Decadent No-Bake Butterfinger Pie: Your New Favorite Dessert!
Every year, when my older sister’s birthday rolled around, there was one request that always made an appearance on her dessert table: a Butterfinger Pie. It wasn’t just any pie; it was the ultimate, creamy, crunchy, no-bake confection that became the stuff of legend in our family. I remember the first time I whipped one up for her – a last-minute scramble after a busy week, needing a showstopper that didn’t require turning on the oven. It was an instant hit, quickly becoming a cherished tradition and a go-to easy dessert for all our gatherings.
Since then, this recipe has been perfected, tested countless times, and shared with everyone who’s ever taken a single bite. It’s the kind of crowd-pleaser that gets rave reviews and disappears faster than you can say ‘Butterfinger!’ If you’re looking for a simple yet incredibly satisfying dessert that requires minimal effort but delivers maximum flavor, then you’ve found your new obsession right here. Get ready to impress everyone with this fantastic, family-favorite Butterfinger Pie!

Why You’ll Love This Recipe
❤️ This Butterfinger Pie isn’t just a dessert; it’s an experience! Here’s why you’ll fall head over heels for it:
- No-Bake Wonder: Absolutely no oven required! This makes it perfect for hot summer days, busy holidays, or when you just don’t feel like baking. You’ll save time and energy, but still get a dessert that tastes like it took hours of effort to prepare.
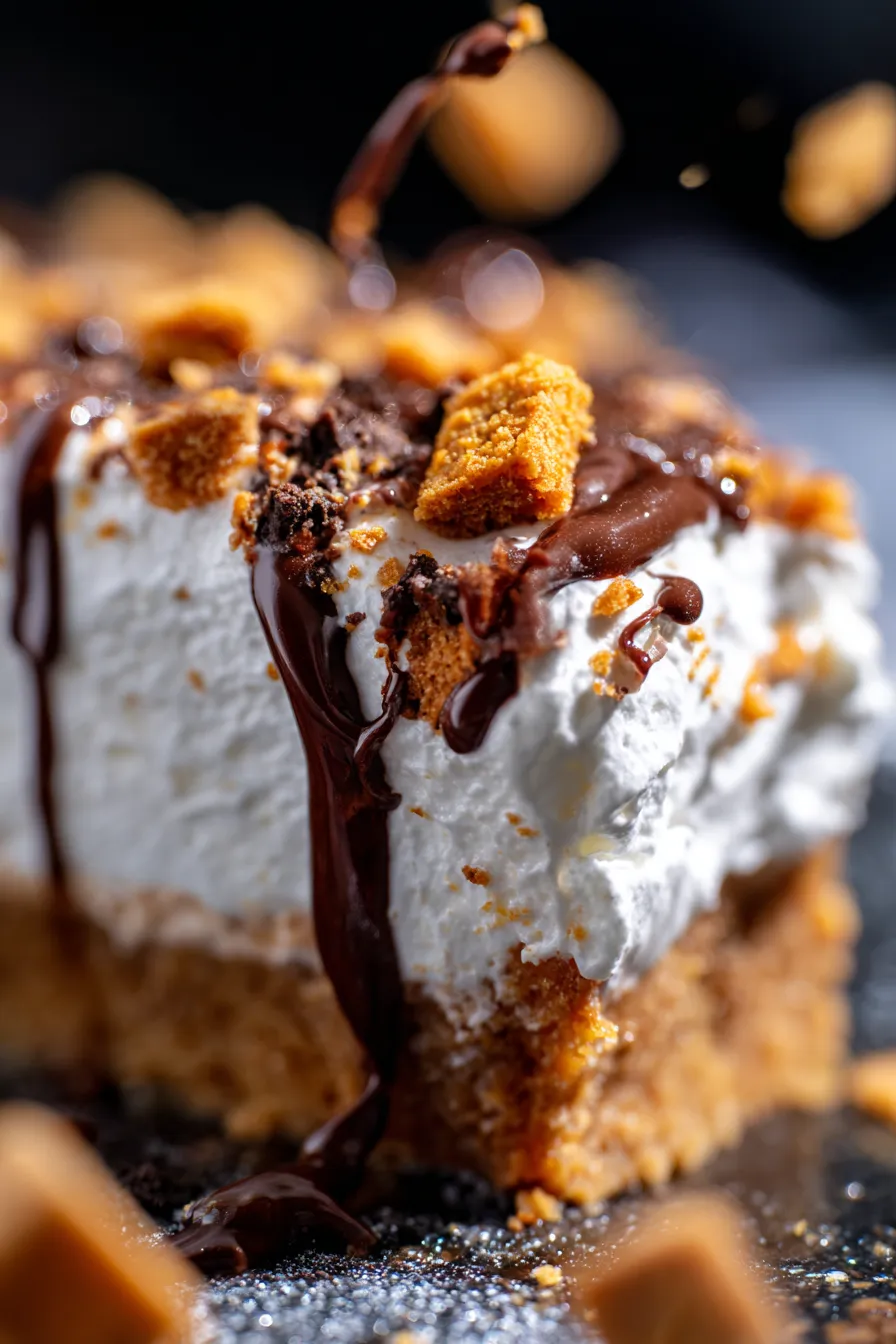
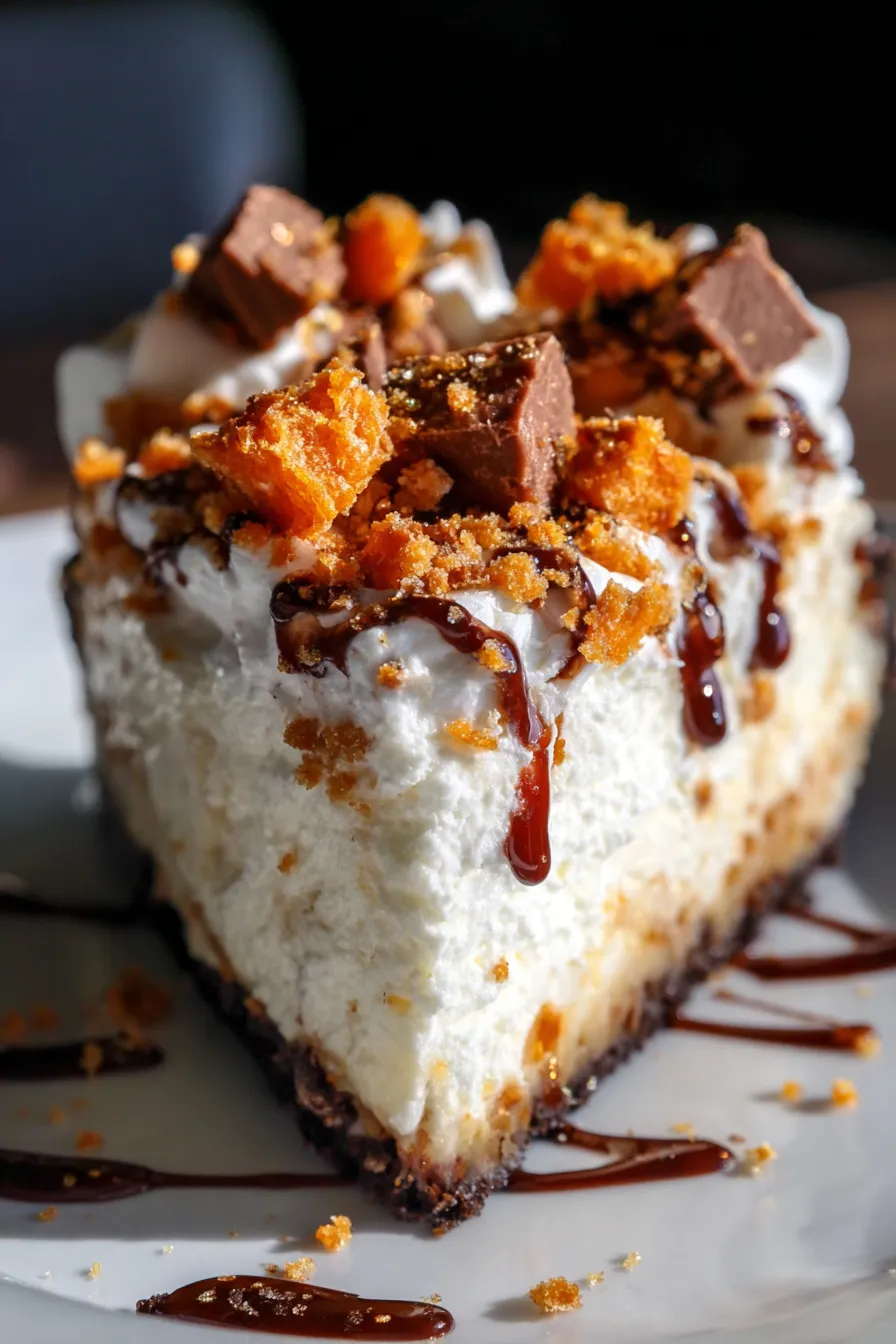
- Irresistible Flavor & Texture: It’s a symphony of creamy, sweet, and crunchy! The smooth, luscious filling perfectly complements the distinct, buttery crunch of the Butterfinger candy bars. Every bite offers that iconic peanut butter and chocolate flavor combination you crave, elevated to a whole new level in a dreamy pie form.
- Crowd-Pleaser Guaranteed: This pie always gets rave reviews! It’s universally loved by kids and adults alike, making it the perfect dessert for potlucks, family dinners, birthdays, or any special occasion. Be prepared to share the recipe, because everyone will ask for it!
- Simple Ingredients, Big Impact: You only need a handful of readily available ingredients, most of which you probably already have in your pantry or can easily find at any grocery store. Despite its simplicity, the end result is a decadent dessert that looks and tastes incredibly impressive, making you look like a pastry chef without the effort.
- Customizable Fun: While classic Butterfinger is amazing, this recipe is super flexible! You can easily swap out the candy bar for your other favorites, or even add extra mix-ins like chocolate chips or nuts. Make it your own every time you prepare it.
- Make-Ahead Friendly: This pie needs time to chill, making it an ideal dessert to prepare in advance. Whip it up the day before your event, and let it set perfectly in the fridge. This frees up your valuable time on the day of serving, allowing you to relax and enjoy your guests. It also ensures the flavors meld beautifully for an even richer taste.
What You Need
You only need a few simple pantry staples for this recipe! From the crunchy Oreo crust to the creamy, candy-packed filling, each ingredient plays a vital role in creating this irresistible Butterfinger Pie. Check the full printable recipe card below for detailed measurements and a complete list.
Expert Tips
💡 Want to make your Butterfinger Pie absolutely perfect every single time? Here are my tried-and-true expert tips to ensure success and elevate your dessert game:
- Crush Your Oreos Finely: For the best crust, use a food processor to crush your Oreo cookies into very fine crumbs. If you don’t have one, place them in a zip-top bag and crush them with a rolling pin. Fine crumbs ensure a firm, even crust that won’t fall apart when sliced.
- Chill the Crust: Don’t skip chilling the crust! Pressing it firmly into the pie plate and chilling it for at least 30 minutes (or even freezing for 15 minutes) helps it set and become sturdy. This prevents a soggy crust and makes for cleaner slices.
- Soften Cream Cheese: Ensure your cream cheese is at room temperature. This is crucial for achieving a smooth, lump-free filling. Cold cream cheese will result in a clumpy mixture, no matter how much you beat it. Take it out of the fridge at least an hour before you plan to start mixing.
- Whip Cream Cheese Until Fluffy: When combining the cream cheese and powdered sugar, beat them thoroughly until light and fluffy. This incorporates air, making the filling wonderfully smooth and airy. Don’t under-mix this step.
- Fold in Whipped Topping Gently: Once you’ve beaten your cream cheese mixture, gently fold in the whipped topping. Over-mixing here can deflate the whipped topping, leading to a denser, less airy pie. Use a spatula and a gentle, upward motion until just combined.
- Properly Crush Butterfingers: You want a good mix of textures from your Butterfinger candy bars. Crush some very finely for even distribution throughout the filling, and leave some larger pieces for delightful crunch and visual appeal on top. A rolling pin works wonders here.
- Chill Thoroughly: This is perhaps the most important tip! Your pie needs a minimum of 4-6 hours in the refrigerator to set completely. Overnight is even better. This allows the filling to firm up, making it easy to slice and preventing it from becoming a gooey mess. Patience is key for the perfect slice!
- Garnish Right Before Serving: For the freshest look, add your final garnish of extra crushed Butterfingers and perhaps a drizzle of chocolate syrup or extra whipped cream just before serving. This keeps the candy crunchy and the whipped topping looking pristine.
- Clean Slices: For perfectly neat slices, run your knife under hot water, wipe it clean, and then slice. Repeat for each slice. This technique helps glide through the creamy filling and crust without sticking.
Variations & Substitutions
One of the best things about this Butterfinger Pie is how adaptable it is! Feel free to get creative and make it your own:
- Different Candy Bars: Not a Butterfinger fan? No problem! This recipe works wonderfully with other crunchy candy bars like Heath bars, Snickers, or even Reese’s Peanut Butter Cups. Simply crush your favorite and mix it in!
- Gluten-Free Option: Easily make this pie gluten-free by using gluten-free sandwich cookies (like gluten-free Oreos) for the crust. The rest of the ingredients are typically gluten-free, but always double-check labels.
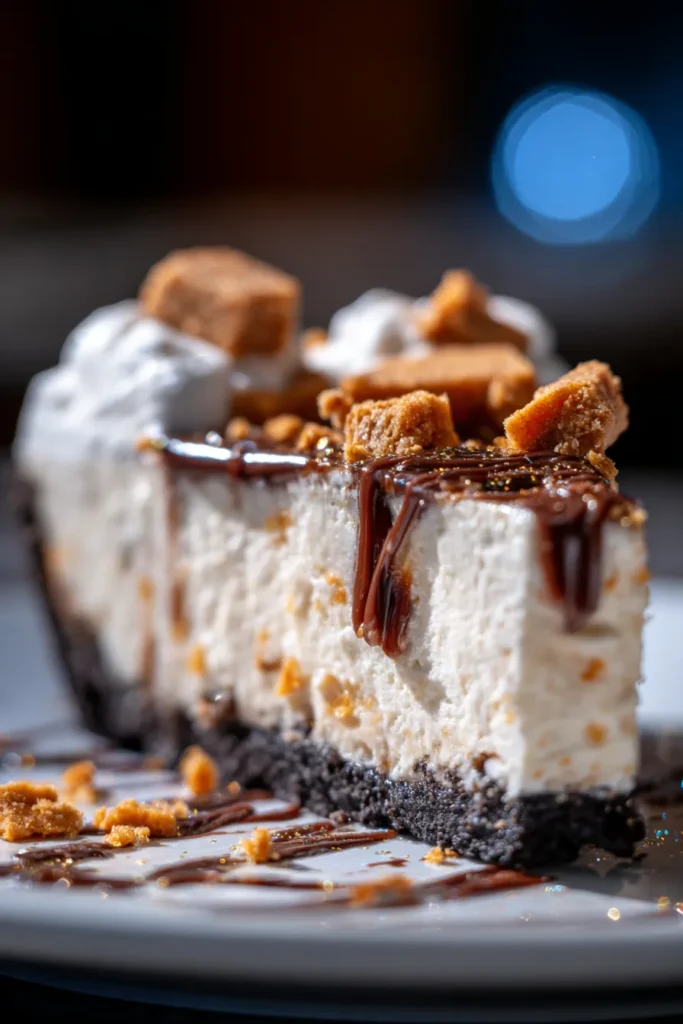
- Chocolate Crust: For an even more intense chocolate flavor, use chocolate sandwich cookies for your crust instead of the traditional Oreos. You can also add a tablespoon of cocoa powder to the crust mixture.
- Peanut Butter Boost: If you’re a true peanut butter lover, add a couple of tablespoons of creamy peanut butter to the cream cheese filling mixture. This will amplify the peanut-y goodness even further!
- Coffee Infusion: For a subtle depth, try adding a teaspoon of instant espresso powder to the cream cheese mixture. It won’t make it taste like coffee, but it will enhance the chocolate flavors beautifully.
- Keto/Low-Carb Friendly (with modifications): While a full keto version is tricky due to the candy, you could potentially adapt this by using a nut-based crust (almond flour + butter, baked until crisp), sugar-free whipped topping, and a sugar-free, low-carb candy bar alternative or simply chopped peanuts/chocolate if you omit the Butterfinger. This would be a significant modification.
- Vegan Version (requires substitutes): To make this vegan, you would need to use vegan cream cheese, dairy-free whipped topping (like coconut whipped cream or a store-bought vegan version), vegan butter, and vegan-friendly chocolate sandwich cookies for the crust. Ensure your chosen candy bar (if using) is also vegan.
- Add Chocolate Chips: Stir in a handful of mini chocolate chips into the filling for an extra textural and flavor dimension.
- Different Toppings: Beyond crushed candy, consider a chocolate ganache drizzle, a sprinkle of sea salt, or even a dusting of cocoa powder for a gourmet touch.
Storage & Freezing
Good news! This Butterfinger Pie is fantastic for making ahead and stores beautifully. Here’s how to keep it fresh:
- Refrigerator: Store any leftover slices (or the entire pie) tightly covered with plastic wrap or in an airtight container in the refrigerator for up to 3-4 days. The crust will soften slightly over time, but the flavor remains delicious.
- Freezing (Whole Pie): For longer storage, you can freeze the entire pie! Once completely set, wrap the pie tightly in several layers of plastic wrap, then an additional layer of aluminum foil. Freeze for up to 1 month.
- Freezing (Slices): For individual portions, slice the pie, then wrap each slice individually in plastic wrap before placing them in an airtight freezer-safe container or bag. This makes it easy to grab a single serving whenever a craving strikes.
- Thawing: To thaw, transfer the frozen pie (or slices) to the refrigerator and let it thaw slowly for several hours or overnight. Do not thaw at room temperature.
FAQ
Q: Can I make Butterfinger Pie ahead of time?
A: Absolutely! This pie is perfect for making ahead. In fact, it needs at least 4-6 hours to chill and set properly, making it an ideal make-ahead dessert for parties or holidays. You can prepare it a day or even two days in advance.
Q: What if I can’t find Butterfinger candy bars?
A: No worries! While Butterfinger adds that unique crunch and flavor, you can easily substitute it with other crunchy candy bars like Heath bars, Snickers, or even crushed chocolate-covered pretzels. The core creamy pie will still be delicious.
Q: My pie isn’t setting. What went wrong?
A: The most common reason for a pie not setting is insufficient chilling time. Make sure it gets at least 4-6 hours in the refrigerator, or even overnight. Also, ensure your whipped topping was stiff enough and not deflated during mixing, as it provides much of the structure.
There you have it – the ultimate recipe for a creamy, crunchy, and utterly irresistible Butterfinger Pie! This no-bake wonder is truly a dessert dream come true, perfect for impressing guests or simply treating yourself to something spectacularly delicious.
I hope this recipe brings as much joy to your table as it has to mine. Don’t forget to Pin this recipe for later so you can easily whip it up whenever that Butterfinger craving hits. Happy baking (or rather, no-baking)!
Decadent No-Bake Butterfinger Pie: Your New Favorite Dessert!
Ingredients
- 1 ½ cups Oreo cookie crumbs (about 18-20 cookies)
- ¼ cup unsalted butter, melted
- 1 (8-ounce) package cream cheese, softened
- ½ cup powdered sugar
- ¼ cup milk
- 1 teaspoon vanilla extract
- 1 (8-ounce) container frozen whipped topping, thawed (like Cool Whip)
- 6 (1.9-ounce) Butterfinger candy bars, crushed (about 2 cups)
- Optional: Chocolate syrup for drizzling, extra whipped cream for garnish
Instructions
- Step 1 1. Prepare the crust: In a medium bowl, combine the Oreo cookie crumbs and melted butter until well mixed. Press the mixture firmly into the bottom and up the sides of a 9-inch pie plate. Chill in the refrigerator for at least 30 minutes while you prepare the filling.
- Step 2 2. Make the filling: In a large mixing bowl, beat the softened cream cheese and powdered sugar with an electric mixer until smooth and fluffy, about 2-3 minutes. Add the milk and vanilla extract, continuing to beat until fully incorporated and creamy.
- Step 3 3. Fold in whipped topping: Gently fold in the thawed whipped topping into the cream cheese mixture using a spatula until no streaks remain. Be careful not to overmix, as this can deflate the filling.
- Step 4 4. Add Butterfingers: Fold in 1 ½ cups of the crushed Butterfinger candy bars into the pie filling. Reserve the remaining ½ cup for garnish.
- Step 5 5. Assemble the pie: Pour the filling into the chilled Oreo crust, spreading evenly with a spatula. Sprinkle the reserved crushed Butterfinger candy bars over the top of the pie.
- Step 6 6. Chill and serve: Cover the pie loosely with plastic wrap and refrigerate for at least 6 hours, or preferably overnight, until thoroughly set. Once firm, slice, and serve. Garnish with an optional chocolate drizzle or extra whipped cream if desired.