Zesty Raspberry Lemonade Bars: Your New Favorite Summer Treat!
My grandma always said, “The best desserts taste like sunshine!” And she wasn’t wrong. I remember one sweltering summer afternoon, we were all wilting on the porch. Grandma, with a twinkle in her eye, emerged from the kitchen with a plate of the most vibrant, glistening bars I had ever seen. The first bite was pure magic – a burst of tart lemon and sweet raspberry, perfectly balanced. That day, these Raspberry Lemonade Bars Recipe became a legend in our family.
Fast forward to today, and this tested Raspberry Lemonade Bars Recipe is still a beloved classic, especially when I need an easy dessert that truly wows. It’s perfect for potlucks, picnics, or just a sweet pick-me-up on a lazy Sunday. Every time I bake a batch, I feel that same warmth and joy, and now you can too!
Get ready to create some sunshine in your own kitchen with these incredibly simple yet sensationally flavorful bars. This recipe is a guaranteed crowd-pleaser and will bring a vibrant, comforting dessert to any occasion. You’ll love sharing this delightful summer treat.
Why You’ll Love This Recipe
- ❤️ Bursting with Flavor: Experience a delightful symphony of tart lemon and sweet, juicy raspberries. Each bite is a refreshing taste of summer, perfectly balanced and incredibly satisfying.
- ❤️ Incredibly Easy to Make: This recipe is surprisingly simple, perfect for all skill levels. With a straightforward shortbread crust and an easy-to-mix filling, these bars come together quickly with minimal fuss.
- ❤️ Perfect for Any Occasion: From backyard BBQs to elegant brunches, these vibrant bars are always a hit. They are visually stunning and adapt beautifully to any gathering, big or small.
- ❤️ Make Ahead Friendly: These bars actually improve overnight as the flavors deepen and meld. Prepare them in advance, making entertaining a breeze and reducing last-minute stress.
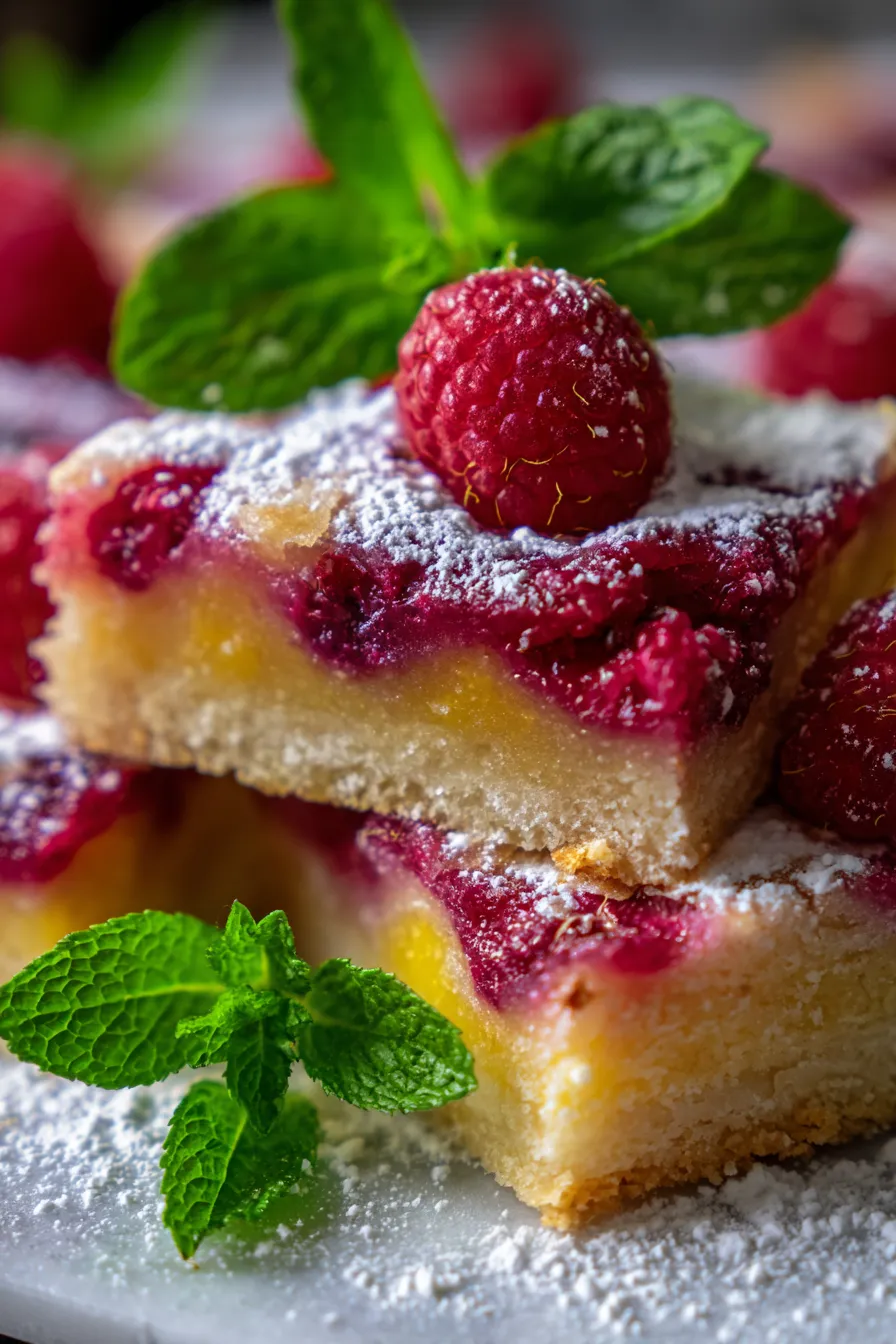
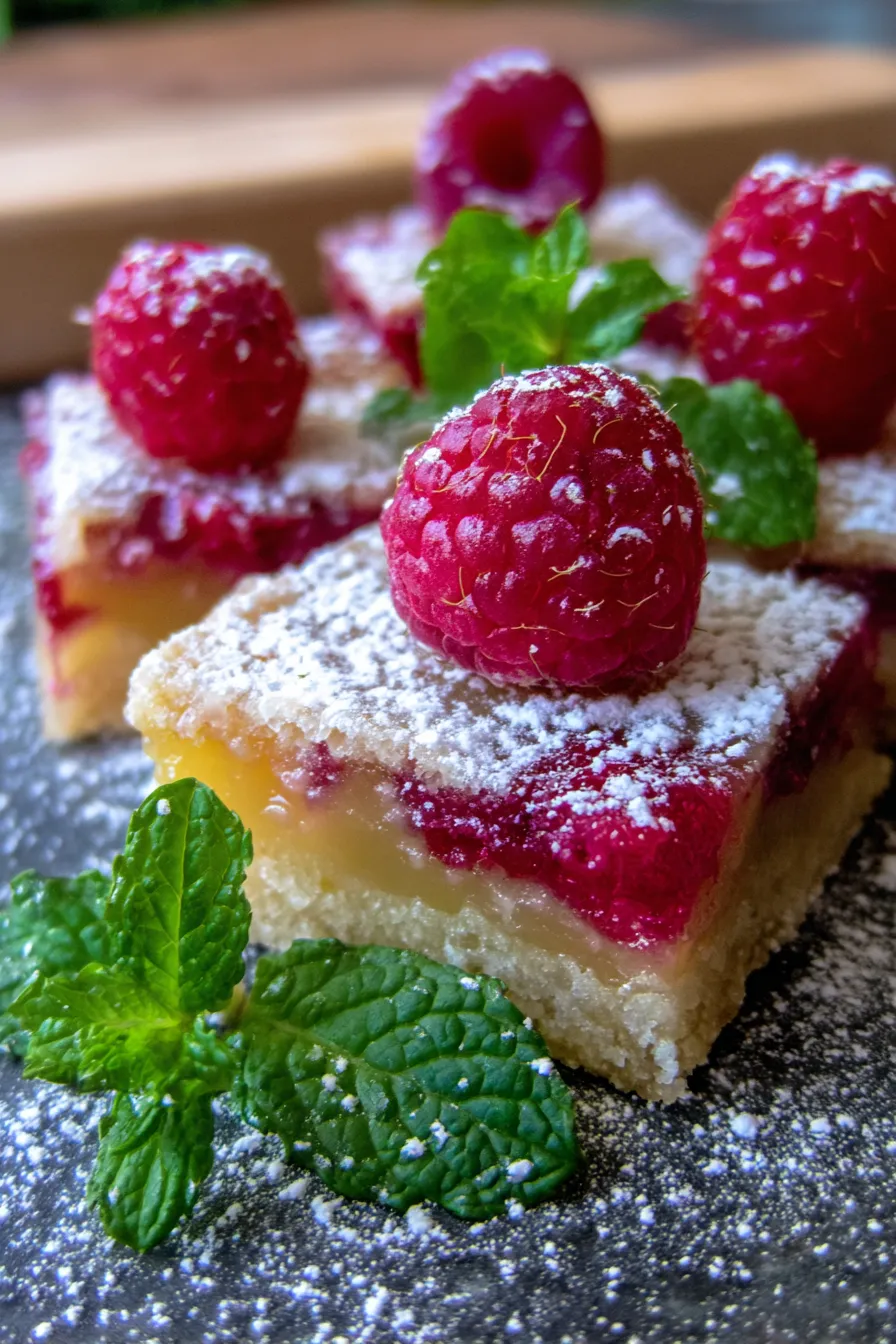
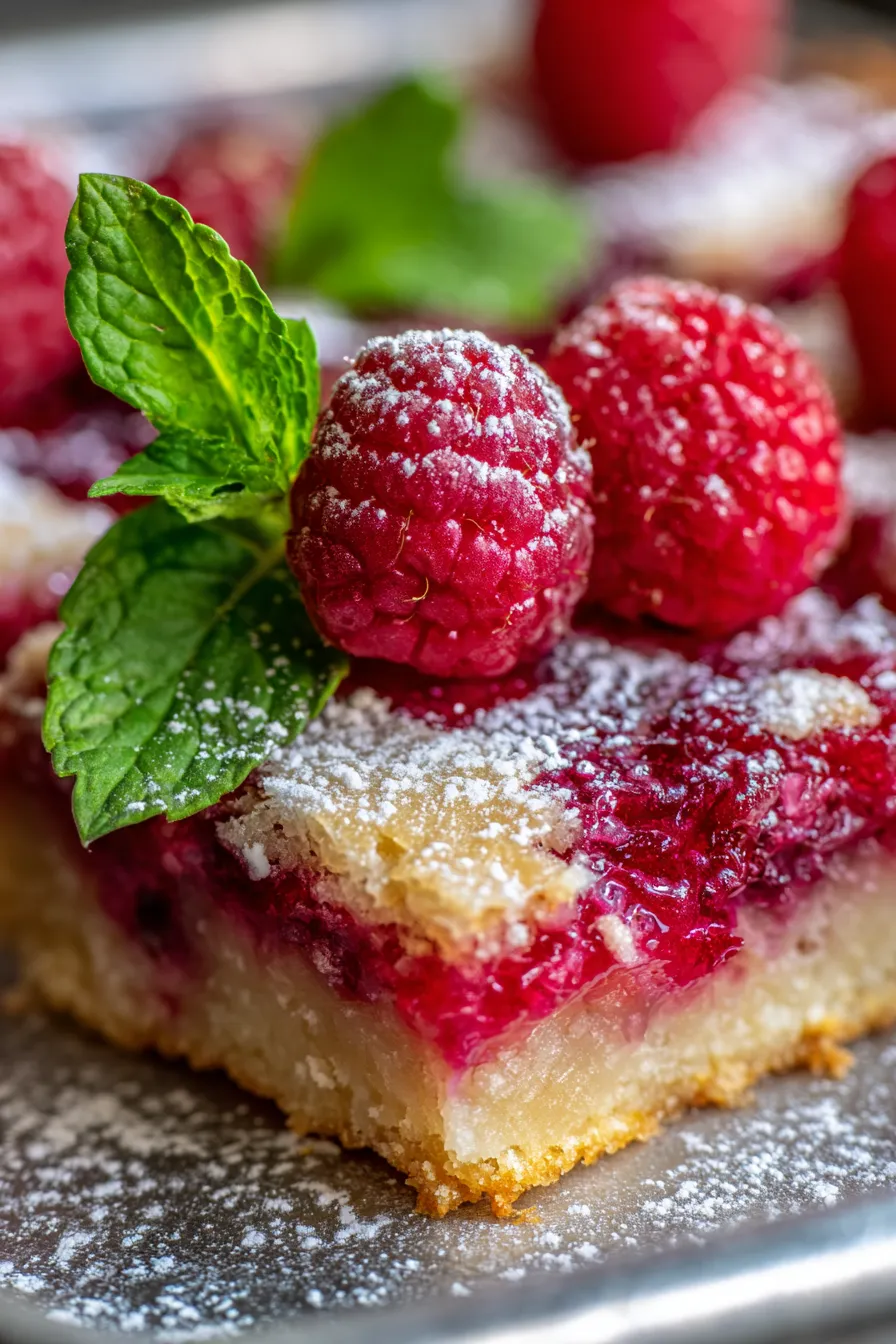
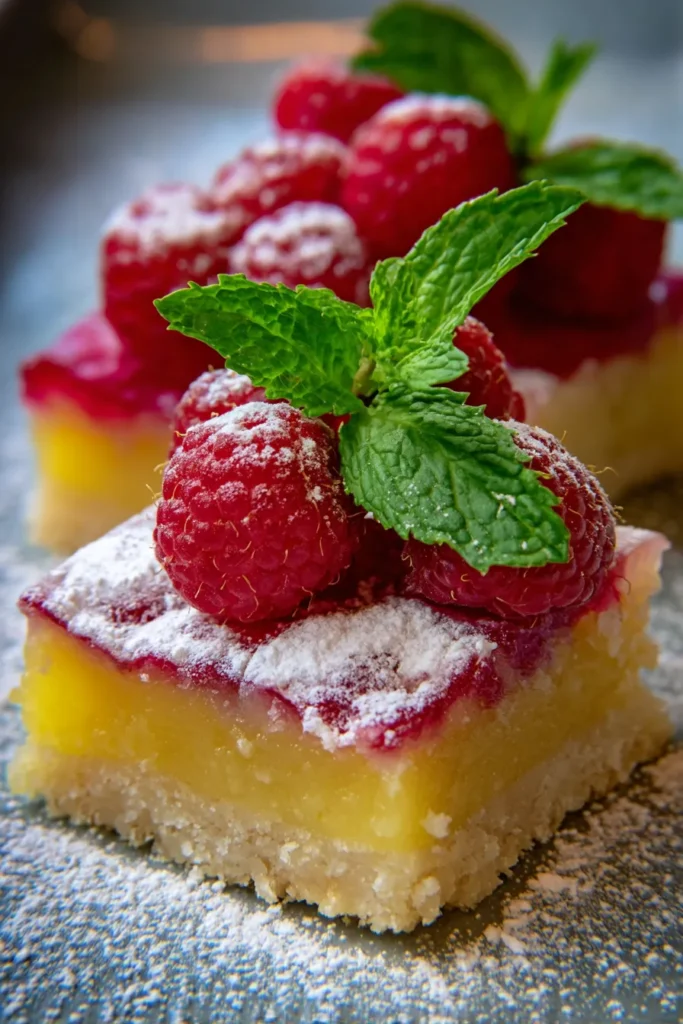
- ❤️ Stunning Presentation: The vivid red raspberries against the sunny lemon filling and golden crust are absolutely gorgeous. A light dusting of powdered sugar adds the perfect, elegant finishing touch.
- ❤️ Customizable & Versatile: Easily swap raspberries for other berries like blueberries or blackberries. You can also experiment with lime or orange for a unique citrus twist, adapting the recipe to your taste.
- ❤️ Crisp & Chewy Texture: Enjoy the delightful contrast of a buttery, tender shortbread crust paired with a smooth, tangy, and wonderfully chewy lemon-raspberry filling. It’s a textural dream.
- ❤️ Kid-Friendly Favorite: The bright colors and appealing sweet-tart taste make these bars a huge hit with everyone. They disappear quickly at family gatherings and bake sales alike.
- ❤️ Uses Simple Ingredients: You likely have most of the necessary ingredients in your pantry already. No obscure items, just wholesome goodness transformed into something extraordinary.
- ❤️ A Taste of Nostalgia: The classic combination of lemon and berries evokes cherished memories of warm weather and joyful moments. These bars deliver a comforting, familiar taste that brings a smile to every face.
What You Need
You only need a few simple pantry staples for this recipe! From fresh lemons to sweet raspberries and basic baking essentials, you’ll find everything required to create these incredible bars. Check the full printable recipe card below for detailed measurements and a complete list.
Expert Tips
- 💡 Chill Your Crust: For a perfectly tender and flaky shortbread, chill the crust dough for at least 15-20 minutes before baking. This prevents the butter from melting too quickly, ensuring a superior texture.
- 💡 Don’t Overmix the Crust: Mix the shortbread dough just until combined. Overmixing develops gluten, which can lead to a tough, dense crust instead of a delicate, crumbly one.
- 💡 Fresh Lemon is a Must: Always use freshly squeezed lemon juice and zest. Bottled juice lacks the vibrant, aromatic punch that makes these bars truly special. The zest holds most of the intense lemon flavor.
- 💡 Raspberry Prep: Gently wash and pat fresh raspberries dry. If using frozen, add them directly to the filling without thawing. A tiny sprinkle of flour with frozen berries can help absorb extra moisture if desired.
- 💡 Perfectly Baked Filling: The lemon filling is done when the edges are set and lightly golden, but the center still has a slight jiggle. It will continue to firm up upon cooling, so avoid overbaking.
- 💡 Cool Completely: This is crucial for clean, neat slices. Allow the bars to cool fully at room temperature, then chill in the refrigerator for at least 2-3 hours (or overnight) before cutting.
- 💡 Sharp Knife for Slicing: Use a sharp, clean knife for the best results. For extra clean cuts, wipe the knife with a damp cloth or run it under hot water and dry between each slice.
- 💡 Dust with Powdered Sugar: A final dusting of powdered sugar before serving adds an elegant touch and balances the tartness. It brightens the presentation and enhances the overall sweetness.
- 💡 Line Your Pan: Line your baking pan with parchment paper, leaving an overhang on the sides. This creates “sling handles” for easy removal and prevents sticking, making slicing much simpler.
- 💡 Adjust Sweetness to Taste: Depending on your lemons and preference, you might want to add a tablespoon or two more sugar to the filling for a sweeter bar, or reduce it for more tartness. Taste before baking!
Variations & Substitutions
- Berry Bonanza: Substitute raspberries with blueberries, blackberries, or a mix of your favorite berries. Keep the total berry quantity similar for best results.
- Citrus Swirl: Try lime for a zestier twist, or orange for a sweeter, sunnier profile. Adjust sugar slightly to balance the tartness of your chosen citrus.
- Gluten-Free Option: Use a 1:1 gluten-free baking flour blend (with xanthan gum) for the crust. This ensures a tender and crumbly texture without gluten.
- Vegan Twist: Replace butter with a quality vegan butter alternative. For the filling, use plant-based egg substitutes and dairy-free milk/cream, potentially adding extra cornstarch for setting.
- Nutty Crust: Incorporate 1/4 cup of finely ground almonds or pecans into your shortbread crust for added depth and a subtle, delicious nutty flavor.
- Cream Cheese Layer: For indulgence, spread a thin layer of sweetened cream cheese (softened cream cheese, powdered sugar, vanilla) over the cooled crust before adding the lemon-raspberry filling.
Storage & Freezing
- Storage: Once completely cooled, store your Raspberry Lemonade Bars in an airtight container in the refrigerator for up to 4-5 days. They actually taste wonderful chilled, making them a perfect make-ahead dessert!
- Freezing: Yes, you can freeze these delicious bars! First, ensure they are completely cooled. Cut them into individual squares. Place them on a parchment-lined baking sheet and freeze until firm (about 1-2 hours). Once frozen, transfer the bars to an airtight freezer-safe container or a freezer bag, separating layers with parchment paper to prevent sticking. They will keep well in the freezer for up to 2-3 months.
- To Thaw: Simply remove the desired number of bars from the freezer and let them thaw in the refrigerator for a few hours, or at room temperature for about 30-60 minutes, before serving.
FAQ
Q: Can I use frozen raspberries?
A: Absolutely! You can use frozen raspberries directly from the freezer. There’s no need to thaw them first, though they might release a little more liquid than fresh ones.
Q: How do I know when the lemon filling is cooked through?
A: The filling is done when the edges are set and lightly golden, but the center still has a slight jiggle when you gently shake the pan. It will continue to set as it cools, so don’t wait for it to be completely firm in the oven.
Q: Why did my crust turn out tough?
A: A tough crust is usually a sign of overmixing. When making the shortbread, mix the ingredients just until they come together. Overworking the dough develops the gluten, leading to a less tender, more chewy crust.
Q: Can I make these ahead of time for a party?
A: Yes, these bars are perfect for making ahead! In fact, their flavors often deepen and meld beautifully overnight. Prepare them a day in advance, store them in an airtight container in the refrigerator, and then simply dust with powdered sugar just before serving.
There you have it – your new favorite dessert, the vibrant and utterly delicious Raspberry Lemonade Bars! This recipe is a true testament to how simple ingredients can create something so extraordinary and memorable. I hope you enjoy baking and sharing these sunny treats as much as I do. Don’t forget to pin this recipe for later so you can revisit this burst of sunshine whenever you need it! Happy baking!
Zesty Raspberry Lemonade Bars: Your New Favorite Summer Treat!
Ingredients
- For the Crust:
- 1 ½ cups (180g) all-purpose flour
- ½ cup (113g) unsalted butter, cold and cubed
- ¼ cup (50g) granulated sugar
- ¼ teaspoon salt
- For the Lemon-Raspberry Filling:
- 1 cup (200g) granulated sugar
- ¼ cup (30g) all-purpose flour
- ½ teaspoon baking powder
- ¼ teaspoon salt
- 2 large eggs
- 2 large egg yolks
- u2154 cup (160ml) fresh lemon juice (from 3-4 lemons)
- 1 tablespoon lemon zest
- 1 cup (125g) fresh or frozen raspberries
- For Garnish (Optional):
- Powdered sugar for dusting
Instructions
- Step 1 Preheat Oven & Prep Pan: Preheat your oven to 350°F (175°C). Line an 8x8 inch (20x20 cm) baking pan with parchment paper, leaving an overhang on two sides for easy lifting.
- Step 2 Make the Crust: In a medium bowl, whisk together the flour, sugar, and salt. Cut in the cold, cubed butter using a pastry blender, two knives, or your fingertips until the mixture resembles coarse crumbs. Press the mixture evenly into the prepared baking pan. Bake for 18-20 minutes, or until lightly golden. While the crust bakes, prepare the filling.
- Step 3 Prepare the Filling: In a large bowl, whisk together the granulated sugar, flour, baking powder, and salt. Add the eggs, egg yolks, lemon juice, and lemon zest. Whisk until smooth and well combined.
- Step 4 Add Raspberries: Gently fold in the raspberries into the lemon mixture. Pour the filling over the hot, pre-baked crust.
- Step 5 Bake the Bars: Return the pan to the oven and bake for another 25-30 minutes, or until the edges are set and lightly golden, and the center has a slight jiggle when gently shaken.
- Step 6 Cool & Chill: Let the bars cool completely at room temperature, then transfer them to the refrigerator and chill for at least 2-3 hours (preferably overnight) before slicing. Chilling is crucial for clean cuts and a firm set.
- Step 7 Slice & Serve: Once thoroughly chilled, use the parchment paper overhang to lift the entire slab of bars out of the pan. Place on a cutting board and slice into 9 or 16 squares. Dust with powdered sugar, if desired, just before serving.