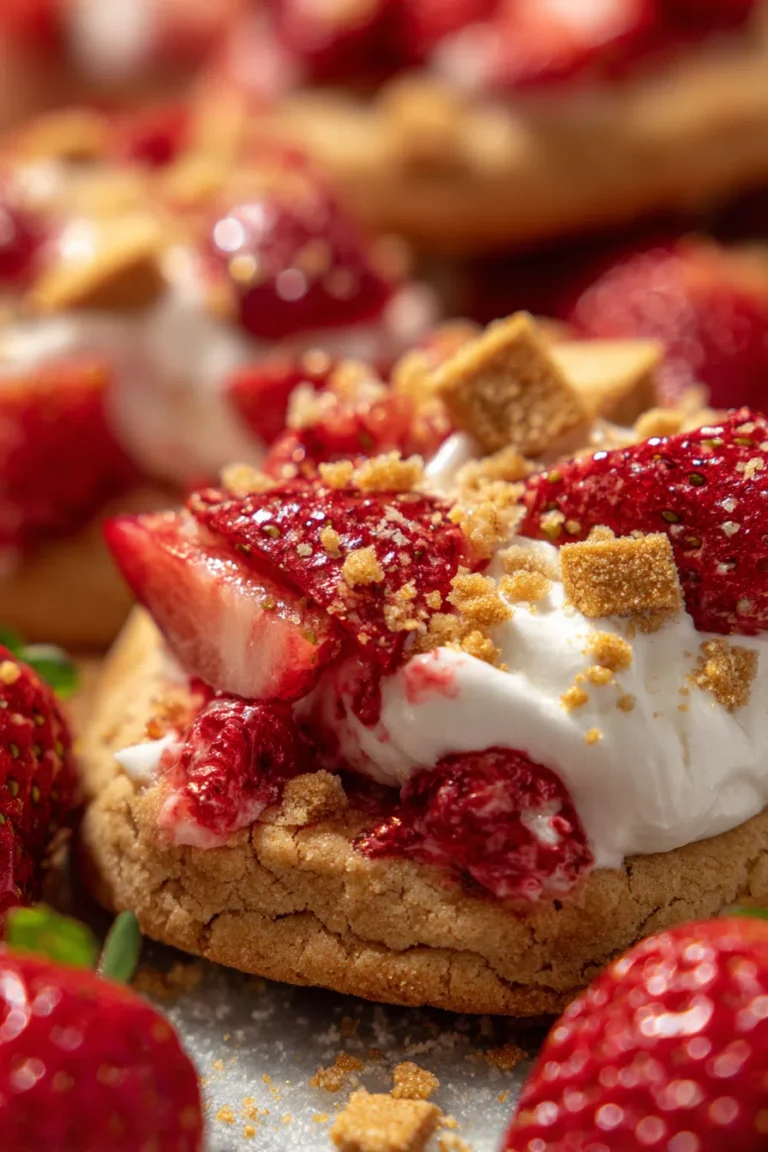
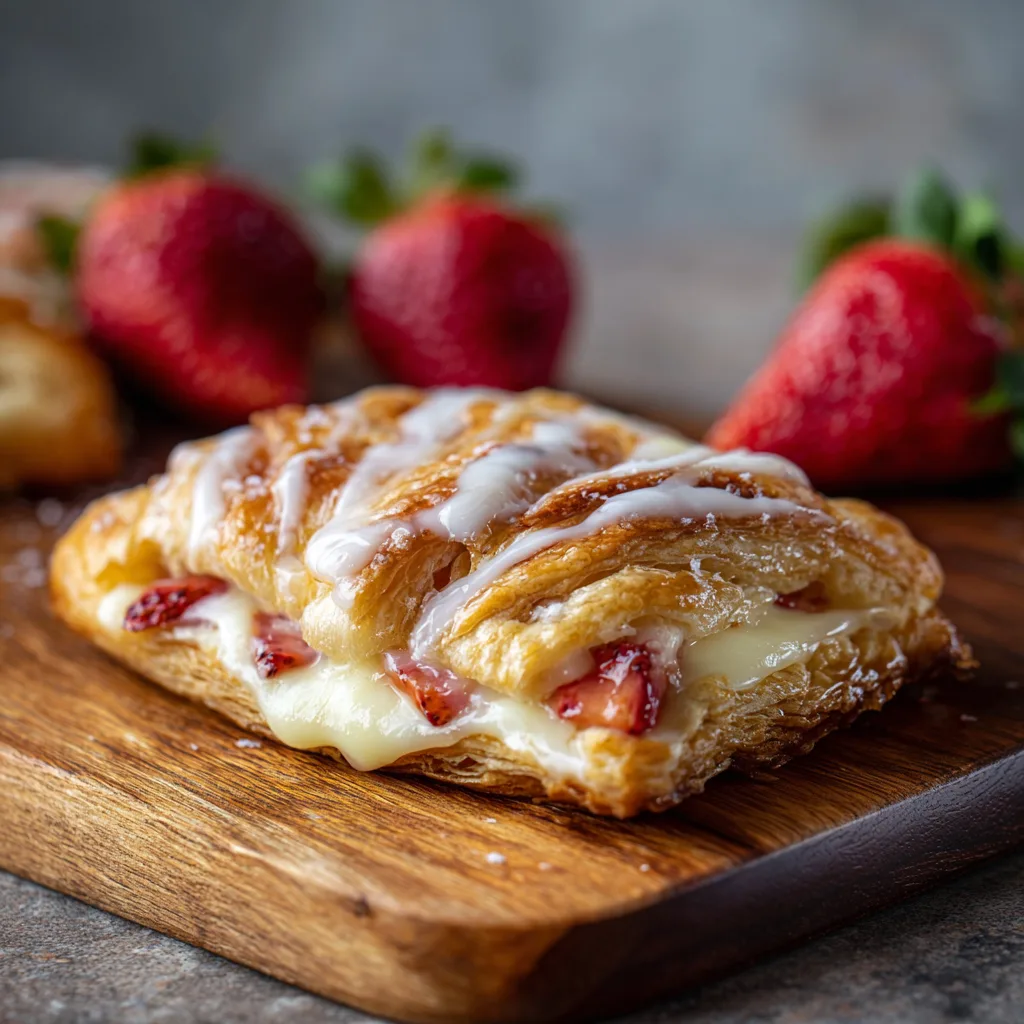
The Strawberry Cream Cheese Danish is a beloved pastry that perfectly marries the light, ethereal flakiness of laminated dough with the rich, slightly tangy sweetness of a cheesecake-inspired filling. Known in its homeland as Wienerbrød (Viennese bread), the modern Danish pastry evolved in Denmark after Austrian bakers introduced laminated dough techniques during an 1850 strike. The cream cheese and fresh fruit rendition, however, is a distinctly American adaptation, celebrated for its simple elegance and comforting flavors. With just a few high-quality ingredients and key professional techniques, anyone can recreate this luxurious morning treat or satisfying dessert in their own kitchen, achieving that signature golden crust and creamy center.
Ingredients
The following recipe is optimized for efficiency and flavor, yielding 8 individual pastries using readily available frozen puff pastry.
For the Pastry Base:
-
1 sheet (about 9×14 inches) frozen puff pastry, thawed according to package directions
-
1 large egg
-
1 tablespoon water
-
1 teaspoon Turbinado or Demerara sugar (optional, for sprinkling)
For the Cream Cheese Filling:
-
4 ounces (half a standard brick) full-fat cream cheese, fully softened to room temperature
-
3 tablespoons granulated sugar or powdered sugar
-
1 teaspoon vanilla extract
-
½ teaspoon fresh lemon zest (optional, for brightness)
-
1 large egg yolk (optional, for richer texture)
For the Strawberry Topping:
-
½ cup good quality strawberry jam or preserves
-
1 cup fresh strawberries, sliced or quartered
-
½ tablespoon granulated sugar
-
½ teaspoon cornstarch (optional, to thicken fresh fruit juices)
For the Glaze:
-
½ cup powdered sugar, sifted
-
1 ½ tablespoons milk or heavy cream
-
¼ teaspoon vanilla or almond extract
-
A pinch of salt
Step-by-Step Instructions
1. Prepare the Filling and Fruit: In a medium bowl, combine the softened cream cheese, 3 tablespoons of sugar, vanilla extract, lemon zest, and egg yolk (if using). Beat with an electric mixer or whisk vigorously until the mixture is completely smooth and lump-free. Set aside. In a separate small bowl, gently toss the sliced strawberries with the ½ tablespoon of sugar and the cornstarch (if using). Set aside to macerate while preparing the pastry.
2. Preheat and Prepare the Pastry: Preheat the oven to 400°F (200°C). Line a large baking sheet with parchment paper. Unfold the thawed puff pastry sheet onto a lightly floured surface. Roll it out slightly to smooth any creases, forming a rectangle. Cut the sheet into 8 equal rectangles (typically 4 cuts lengthwise and 1 cut crosswise). Transfer the squares to the prepared baking sheet, spacing them 2 inches apart.
3. Shape the Pastries and Apply Egg Wash: Using a sharp knife, lightly score a border about ½ to ¾ inch inside the edges of each pastry rectangle, being careful not to cut all the way through the dough. This scoring encourages the edges to puff up while keeping the center relatively flat to hold the filling. Prick the center of the scored area several times with a fork (docking) to prevent the middle from rising too much. Whisk together the egg and water to make the egg wash. Brush the egg wash liberally over the exposed pastry edges. If using, sprinkle the borders with Turbinado sugar.
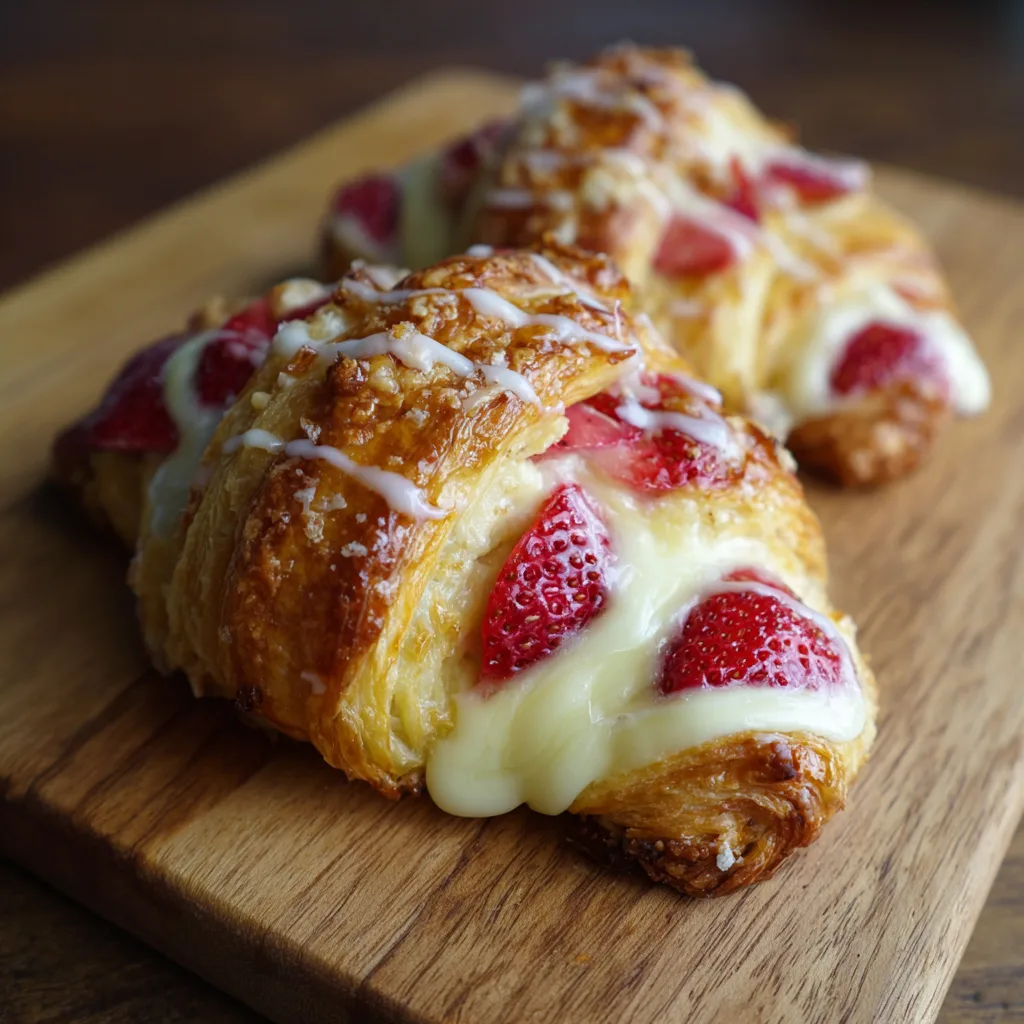
4. Assemble the Danish: Place a generous teaspoon of strawberry jam into the center well of each pastry square and gently spread it to the scored border. Next, spoon 1 to 2 tablespoons of the cream cheese filling on top of the jam, spreading it evenly within the border. Finally, arrange 3–5 slices of the prepared fresh strawberries on top of the cream cheese.
5. Bake and Cool: Bake for 15 to 20 minutes, or until the pastry is deeply golden brown, puffed along the edges, and the filling is set but still slightly soft. Remove from the oven and let cool on the baking sheet for 5 minutes before transferring to a wire rack to cool completely.
6. Glaze and Serve: While the pastries cool, whisk together the powdered sugar, milk/cream, and extract for the glaze until smooth and drizzly. If the glaze is too thick, add a few drops of milk; if too thin, add a teaspoon of powdered sugar. Drizzle the glaze decoratively over the cooled pastries. The danishes are best served fresh and slightly warm.
The Secret to the Flaky Base: Mastering Puff Pastry
The foundation of a great Danish is its pastry base. While traditional Danish dough is a Viennoiserie (yeast-leavened laminated dough requiring a multi-day process), the widely popular and highly successful home version relies on store-bought frozen puff pastry. Achieving bakery-quality results with this shortcut depends entirely on handling the dough correctly.
Handling and Shaping Techniques
The most crucial rule when working with puff pastry is to keep it cold. The signature flakiness comes from the layers of butter steaming rapidly as the dough hits a hot oven. If the butter melts before baking, the layers collapse, resulting in a flat, chewy pastry.
-
Proper Thawing: Thaw the pastry in the refrigerator overnight, or for about 30–45 minutes at room temperature, until pliable but still cold to the touch. Work quickly, keeping the unused sheet refrigerated.
-
The Power of Scoring: Scoring a border around the filling area (without cutting through) is a key technique. This creates a psychological barrier for the rising dough. The outer ring, coated with the egg wash, will puff up dramatically, creating a buttery, golden “fence” that contains the filling in a deep, delectable well.
-
Preventing “Puff”: Docking the center with a fork is essential. This perforates the dough where the filling sits, preventing that section from rising and creating a perfect, flat platform for the cream cheese and strawberries.
-
The Egg Wash Advantage: Do not skip the egg wash. A mixture of beaten egg (often just the white or a whole egg) and a splash of water, brushed only on the exposed pastry edges, delivers two things: the glossy sheen characteristic of high-end bakeries, and a darker, richer golden color that signals a properly baked crust.
Crafting the Perfect Filling Dynamic
The “Cream Cheese Danish” is defined by its filling—a sweet, tangy, and rich counterpoint to the crisp pastry. Success lies in balancing texture and flavor, especially the interplay between the dairy and the fruit.
Whipping the Cream Cheese Mixture
The goal is a light, smooth filling that retains its shape during baking without leaking or becoming grainy.
-
Temperature is Key: Use full-fat cream cheese and ensure it is fully softened to room temperature. Attempting to beat cold cream cheese will inevitably lead to lumps and a heavy, uneven filling.
-
Flavor Boosters: While sugar and vanilla are standard, the professional touch often comes from an acid or an aromatic extract. Lemon zest or a small amount of fresh lemon juice cuts through the richness, balancing the sugar and cream cheese perfectly. Alternatively, a hint of almond extract offers a classic European pastry flavor that complements both strawberries and cream.
-
The Stabilizer: Incorporating a single egg yolk (as featured in the recipe above) adds richness, improves the texture, and acts as a stabilizer, ensuring the filling sets up beautifully and remains creamy without melting or weeping during baking.
The Art of the Strawberry Layer
The choice between fresh strawberries, jam, or both dramatically changes the final pastry.
-
Fresh Strawberries: These provide vibrant flavor and texture, but can release excess liquid during baking, leading to a “soggy bottom.” To combat this, slice the berries and gently toss them with a small amount of sugar (maceration) and, crucially, a tiny bit of cornstarch or flour. The cornstarch absorbs the excess liquid as the fruit heats, thickening it into a stable, sweet sauce.
-
Strawberry Jam/Preserves: Using jam provides a thicker, more intense strawberry flavor and a moisture barrier between the pastry and the cream cheese. Many top-rated recipes use jam as the first layer on the dough, followed by the cream cheese filling, and then topped with fresh berries. This technique adds depth of flavor and improves the structural integrity of the base. For best results, use a high-quality, thick preserve.
Flavor Variations and Professional Finishing Touches
Once the core recipe is mastered, customizing the Danish with nuanced flavors and elegant finishes elevates it from a simple home bake to a show-stopping treat.
Glaze & Aromatic Upgrades
A light drizzle of icing is essential for presentation and textural contrast, offering a cool, sweet finish to the warm pastry.
-
The Lemon Glaze: The most professional variation is the lemon glaze. Substituting lemon juice for the milk or cream not only thins the powdered sugar to a drizzleable consistency but adds a tart counterpoint to the sweetness of the fruit and cream cheese.
-
The Almond Note: For a rich, classic European profile, swap vanilla extract for almond extract in both the cream cheese filling and the icing. This pairs exceptionally well with strawberries.
-
Turbinado Crunch: For a textural element often seen in bakeries, brush the exposed puff pastry edges with egg wash and then sprinkle them with coarse sugar, like Turbinado or Demerara sugar, just before baking. This adds a beautiful sparkle and a satisfying caramel crunch.
Creative Fruit and Shape Variations
While the strawberry is a classic, the Danish template works with virtually any fruit.
-
Other Berry Combinations: Try mixing strawberries with raspberries for a more complex tartness, or using blueberries with a hint of orange zest in the cream cheese for a brighter flavor.
-
Seasonal Fruits: A fall-themed Danish might feature sliced apples tossed with cinnamon and brown sugar, while a summer version could utilize diced peaches. For high-moisture fruits like peaches, pre-cooking them slightly or using cornstarch is highly recommended.
-
Beyond the Square: Experiment with shaping. For large parties, create a Braided Danish by filling a long rectangle of puff pastry down the middle and cutting diagonal strips on the sides to be folded over in an alternating pattern. For an authentic look, shape the squares into Spandauer (the classic round Danish) by folding the four corners into the center to meet.
Preparation, Storage, and Troubleshooting
Baking delicate pastries requires attention to detail. Knowing how to handle the dough, troubleshoot common issues, and manage storage ensures perfect results every time.
Troubleshooting Common Danish Issues
-
The Soggy Bottom: This is the most frequent complaint and usually occurs because the pastry base gets saturated with moisture before or during baking. Causes include: the dough being too warm, the filling or fruit being too watery, or not using a moisture barrier.
-
Fix: Keep the puff pastry cold. Use jam as a base layer. If using fresh fruit, toss it with cornstarch. Ensure the oven is fully preheated to 400°F (200°C) to allow the bottom layers to cook quickly.
-
-
Flat Pastry: If the edges do not rise, it’s typically because the dough was worked too much (over-rolled) or became too warm, causing the butter layers to melt and blend into the flour.
-
Fix: Work quickly. Chill the assembled pastries for 10 minutes before baking. Ensure the oven temperature is accurate and high enough.
-
-
Filling That Cracks or Sinks: This can happen if the filling is over-baked or lacks enough stabilizer (like an egg yolk).
-
Fix: Do not overbake. The filling should still have a slight jiggle when removed from the oven, as it will continue to set on the cooling rack.
-
Making Ahead and Storage
Danish pastries are best enjoyed on the day they are baked, but preparation steps can be done in advance.
-
Make-Ahead Filling: The cream cheese filling can be made up to two days in advance and stored in an airtight container in the refrigerator. Allow it to come to room temperature for 15 minutes before assembly.
-
Unbaked Danish (Assembly): You can assemble the danishes completely, up to the point of applying the egg wash and fruit. Place them on a baking sheet, cover loosely with plastic wrap, and refrigerate for up to 24 hours. Bake from chilled, which can actually improve the flakiness.
-
Storage of Baked Danish: Once baked, the pastries will remain fresh at room temperature for about one day, or stored in an airtight container in the refrigerator for up to three days. Reheat briefly in a 350°F (175°C) oven for about five minutes to crisp up the pastry before serving. Do not store with the glaze already applied if refrigerating, as the glaze can weep and become sticky; apply the glaze just before serving.