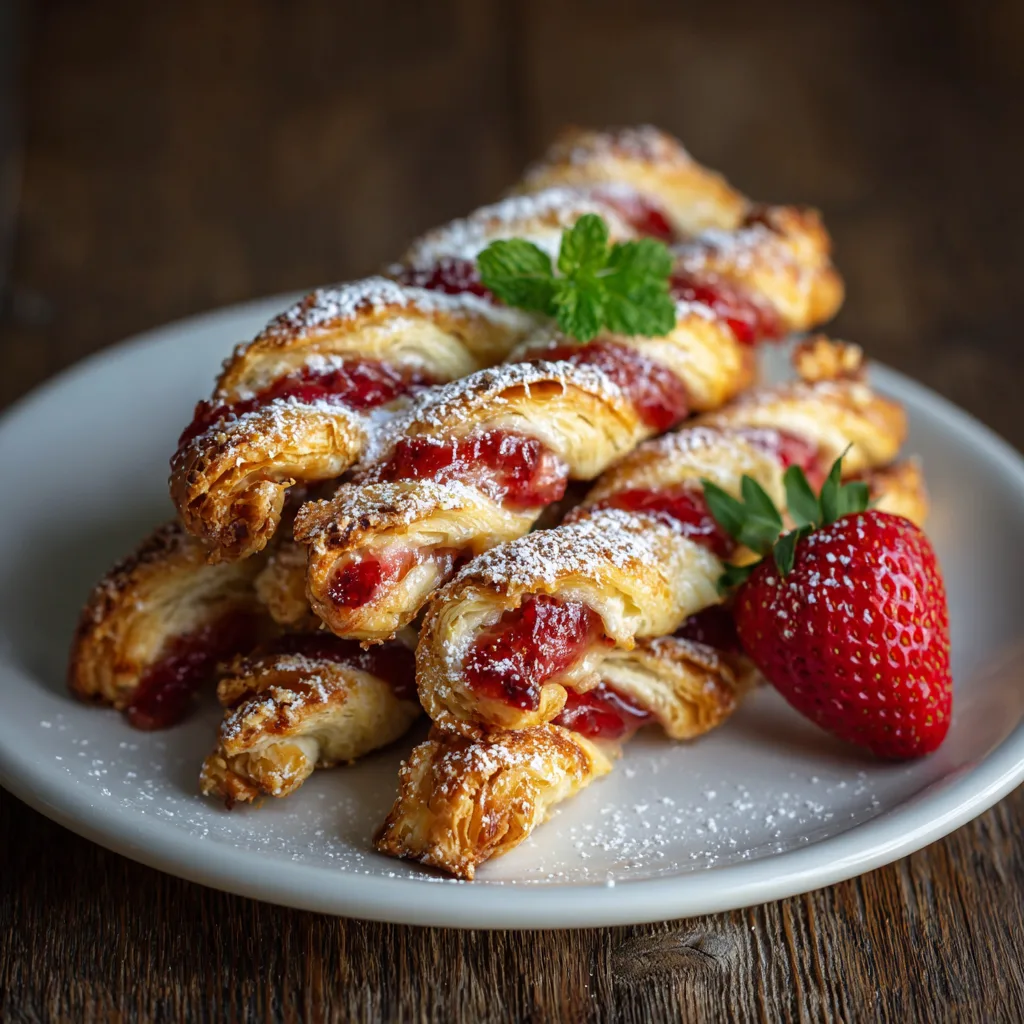
The Ultimate Strawberry Cheesecake Puff Pastry Twists
There is something inherently magical about the combination of buttery, shatteringly crisp puff pastry and the velvety richness of a cream cheese filling. When you add the bright, summery sweetness of strawberries to the mix, you create a dessert that is as elegant to look at as it is effortless to prepare. These Strawberry Cheesecake Puff Pastry Twists are the perfect solution for a last-minute brunch, a sophisticated tea-time snack, or a crowd-pleasing party appetizer. By using a few high-quality shortcuts like store-bought puff pastry, you can achieve a professional-bakery result in your own kitchen with minimal stress.
Ingredients
-
1 package (17.25 oz) frozen puff pastry, thawed but cold
-
8 oz cream cheese, softened to room temperature
-
1/4 cup granulated sugar
-
1 tsp vanilla extract
-
1/2 cup strawberry preserves or finely diced fresh strawberries
-
1 large egg (for egg wash)
-
1 tbsp water
-
Optional: Coarse sanding sugar or powdered sugar for dusting
Step-by-Step Instructions
-
Prepare the Oven and Baking Sheets: Preheat your oven to 400°F (200°C). Line two large baking sheets with parchment paper or silicone baking mats to prevent sticking and ensure even browning.
-
Make the Cheesecake Filling: In a medium mixing bowl, beat the softened cream cheese, granulated sugar, and vanilla extract until the mixture is smooth and creamy. If using fresh strawberries instead of preserves, fold them in gently at this stage, or set them aside to layer later.
-
Prepare the Pastry: On a lightly floured surface, unfold one sheet of puff pastry. Roll it out slightly with a rolling pin to smooth the seams. Spread the cream cheese mixture evenly across the entire surface of the pastry sheet.
-
Add the Strawberry Layer: Carefully spread the strawberry preserves over the cream cheese layer. If using diced fresh berries, sprinkle them evenly over the cream cheese.
-
Seal and Cut: Place the second sheet of puff pastry directly on top of the first, creating a “sandwich” with the filling in the middle. Gently press down to seal the layers. Use a pizza cutter or a sharp knife to cut the pastry into 1-inch wide strips.
-
Twist the Pastry: Pick up each strip and gently twist it in opposite directions 3 to 4 times to create a spiral effect. Place the twists on the prepared baking sheets, leaving about 2 inches of space between each one.
-
Apply Egg Wash: In a small bowl, whisk the egg and water together. Lightly brush the top of each twist with the egg wash. This provides that signature golden-brown sheen. Sprinkle with coarse sanding sugar if desired.
-
Bake: Place the sheets in the oven and bake for 15–18 minutes, or until the pastry is puffed and deeply golden.
-
Cool and Serve: Allow the twists to cool on the baking sheet for at least 5 minutes before transferring them to a wire rack. Dust with powdered sugar just before serving if you prefer a sweeter finish.
Mastering the Art of Puff Pastry
The secret to the perfect puff pastry twist lies in temperature management. Puff pastry is composed of hundreds of thin layers of dough separated by butter. When the cold butter hits the hot oven, it creates steam, which forces the layers apart and creates that iconic flaky texture. If the pastry becomes too warm while you are working with it, the butter will melt into the dough, resulting in a heavy, greasy bread rather than a light pastry.
To ensure success, always keep your pastry in the refrigerator until the moment you are ready to roll it out. If you find the dough is getting too soft or sticky while you are twisting the strips, don’t hesitate to pop the entire baking sheet into the fridge for 10 minutes before putting it in the oven. This “chill set” ensures the twists maintain their shape and achieve maximum height during the bake.
Customizing Your Flavor Profile
While strawberry and cream cheese is a classic pairing, the beauty of this recipe is its incredible versatility. Once you have mastered the basic technique, you can experiment with a wide variety of fillings to suit the season or your personal preferences. For a different fruity twist, try substituting the strawberry preserves with raspberry jam, lemon curd, or even apricot preserves.
If you want to lean into a more decadent dessert profile, consider adding a layer of mini chocolate chips or a drizzle of Nutella over the cream cheese. For a fall-inspired version, swap the strawberries for apple butter and add a dash of cinnamon to the cream cheese mixture. The structural integrity of the puff pastry allows for a range of textures, from smooth purees to chunky fruit compotes, making it a blank canvas for your culinary creativity.
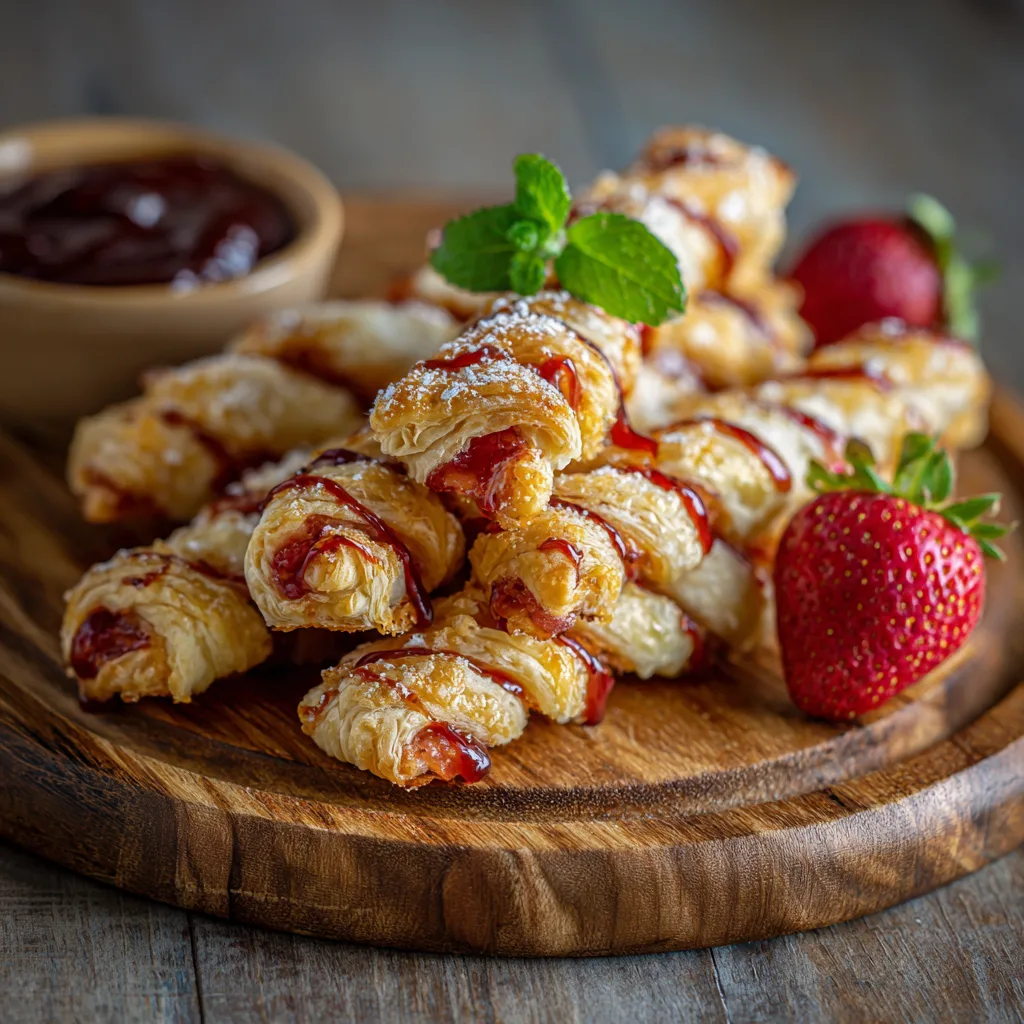
Presentation and Serving Suggestions
These twists are visually stunning on their own, but a few simple touches can elevate them for a formal gathering. For a professional finish, you can create a simple glaze by mixing half a cup of powdered sugar with a teaspoon of milk and a drop of vanilla. Drizzle this over the warm twists in a zig-zag pattern to mimic the look of a high-end danish.
If you are serving these as part of a brunch spread, they pair beautifully with a bowl of fresh berries and a side of Greek yogurt. For a dessert application, serve them warm with a scoop of vanilla bean ice cream. Because they are easy to hold and eat without utensils, they also make excellent additions to dessert charcuterie boards, nestled alongside macarons, dark chocolate squares, and clusters of grapes.
Storage and Reheating for Best Quality
Like most puff pastry treats, these twists are at their absolute best the day they are baked. However, if you have leftovers, they can be stored in an airtight container at room temperature for up to two days. To maintain the crispness of the pastry, avoid storing them in the refrigerator, as the moisture can make the dough soggy.
When you are ready to enjoy a leftover twist, avoid the microwave, which will turn the pastry soft and rubbery. Instead, reheat them in a 350°F (175°C) oven or a toaster oven for 3 to 5 minutes. This brief stint in the heat will re-crisp the outer layers and soften the cream cheese filling, bringing that fresh-baked flavor back to life. If you want to prep these in advance, you can assemble and twist them, then freeze them unbaked on a tray. Once frozen solid, transfer them to a freezer bag. You can bake them straight from the freezer—just add an extra 2 to 3 minutes to the total baking time.