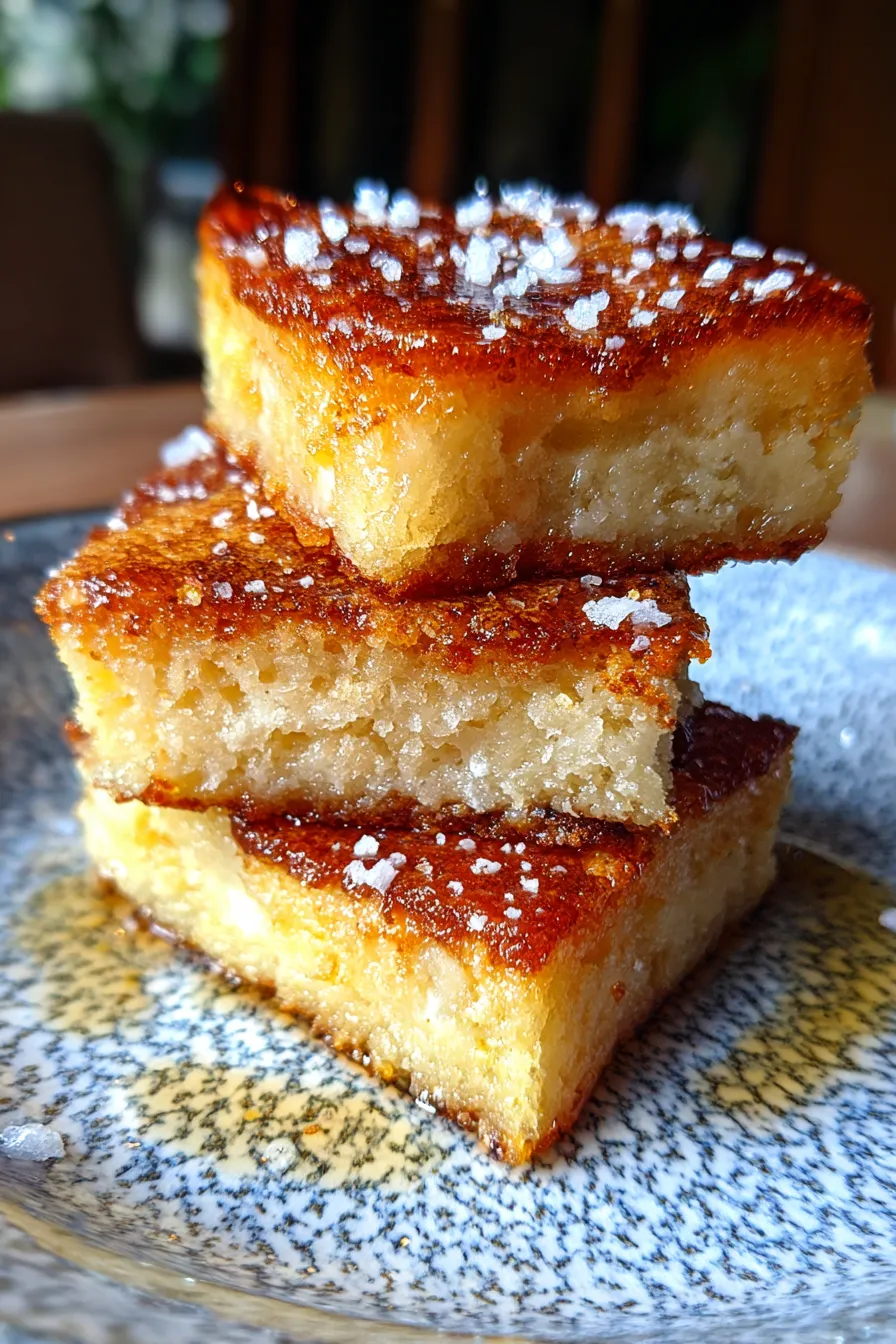
The Best French Butter Cake (Rich & Moist) You’ll Ever Make!
There’s something truly magical about the aroma of a cake baking in the oven. For me, it instantly transports me back to my grandmother’s kitchen on a crisp autumn afternoon. She always had a freshly baked treat ready, and her simple butter cake was legendary. It was the ultimate comfort food, a slice of pure joy that felt like a warm hug.
That cherished memory is what inspired me to perfect this incredible French Butter Cake (Rich & Moist) recipe. I wanted to capture that same tender crumb, that melt-in-your-mouth texture, and that subtle, buttery sweetness that makes you close your eyes in pure bliss. After countless tests and tweaks, I’m thrilled to share this tried-and-true family favorite with you. It’s an easy dessert that truly elevates any moment.
This isn’t just any butter cake; it’s a testament to simple ingredients coming together to create something extraordinary. Imagine a cake so rich it feels decadent, yet so moist it practically dissolves on your tongue. It’s truly the perfect recipe for a cozy evening treat or an impressive centerpiece for your next gathering. Get ready to fall in love with your new go-to cake recipe!
Why You’ll Love This Recipe
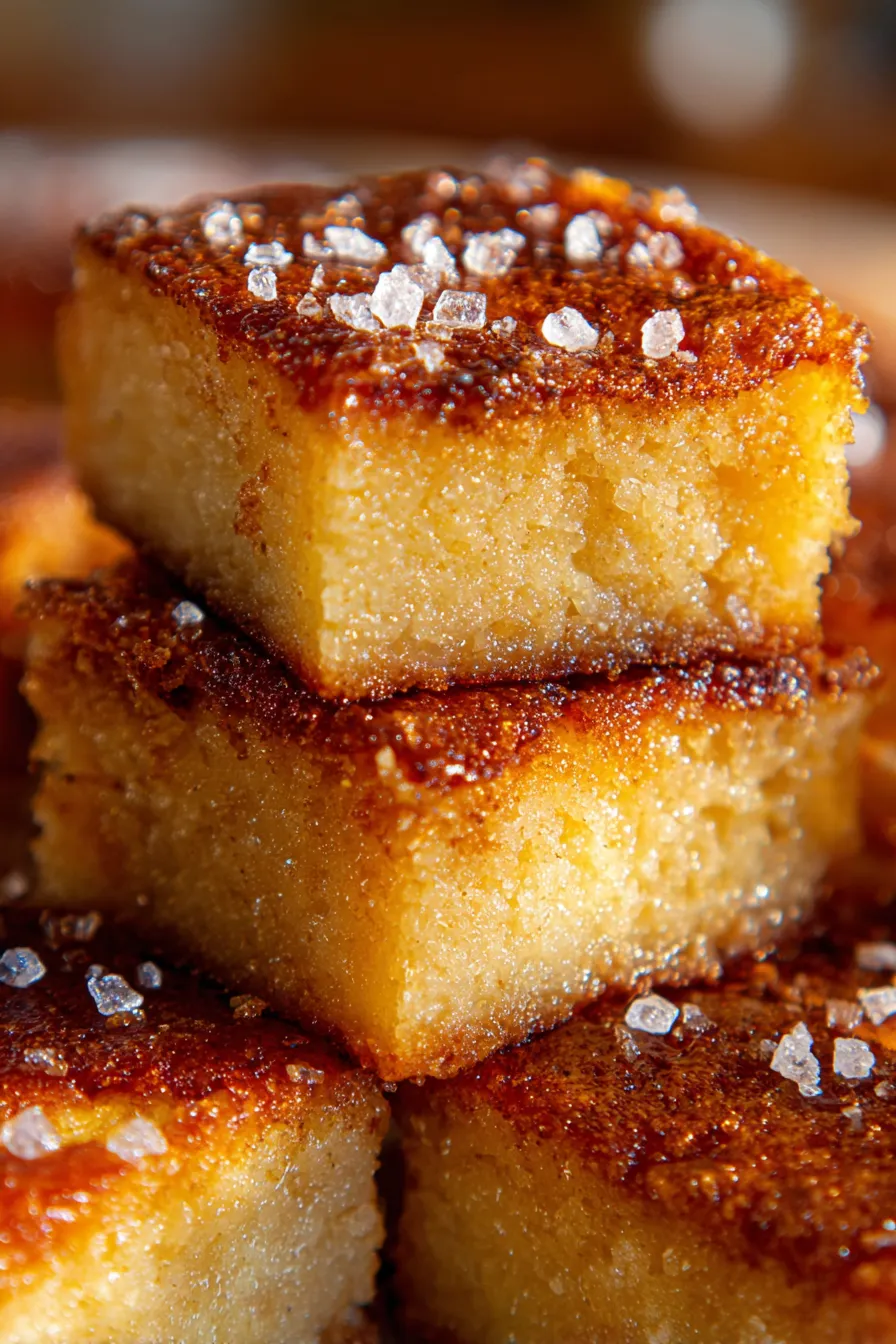
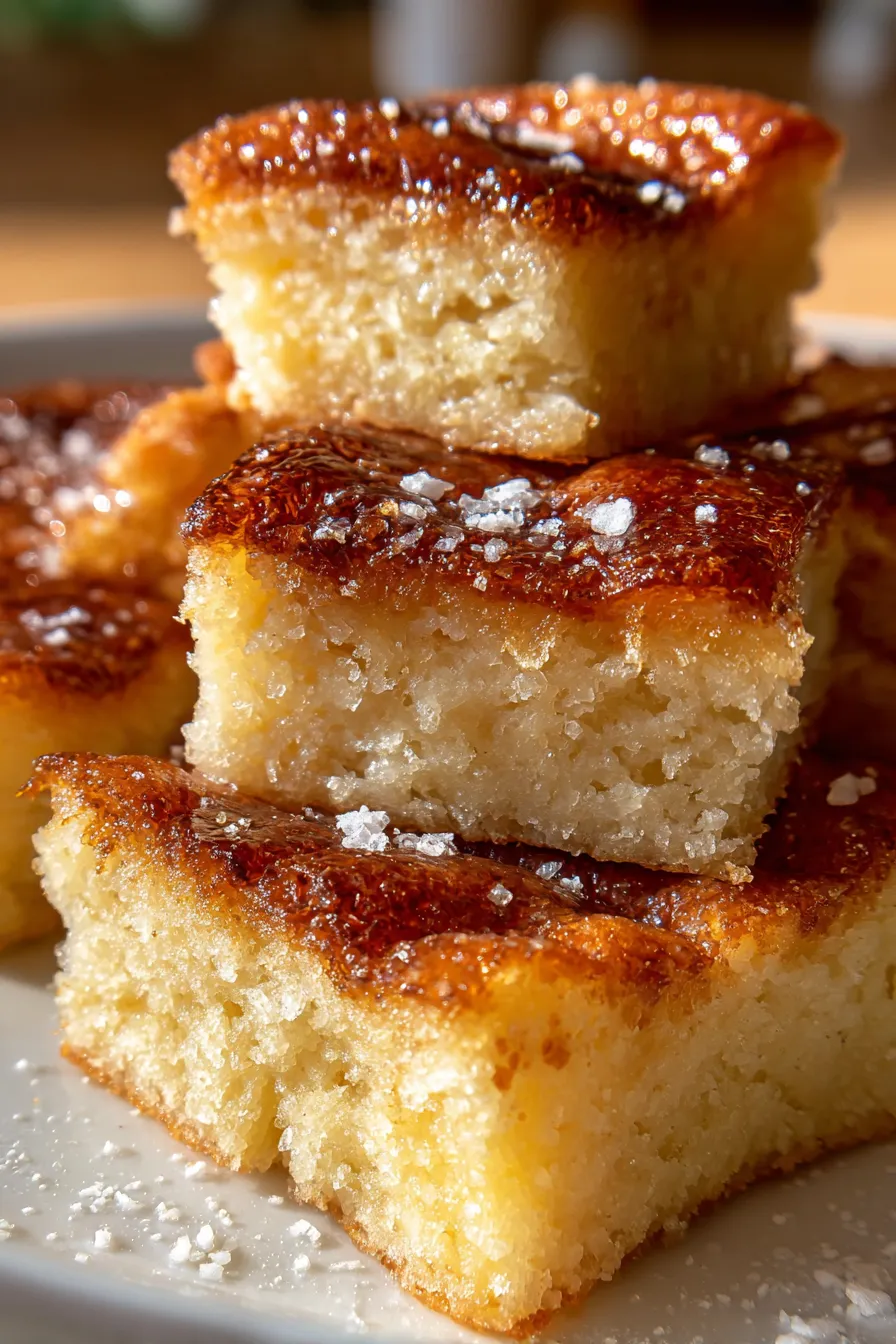
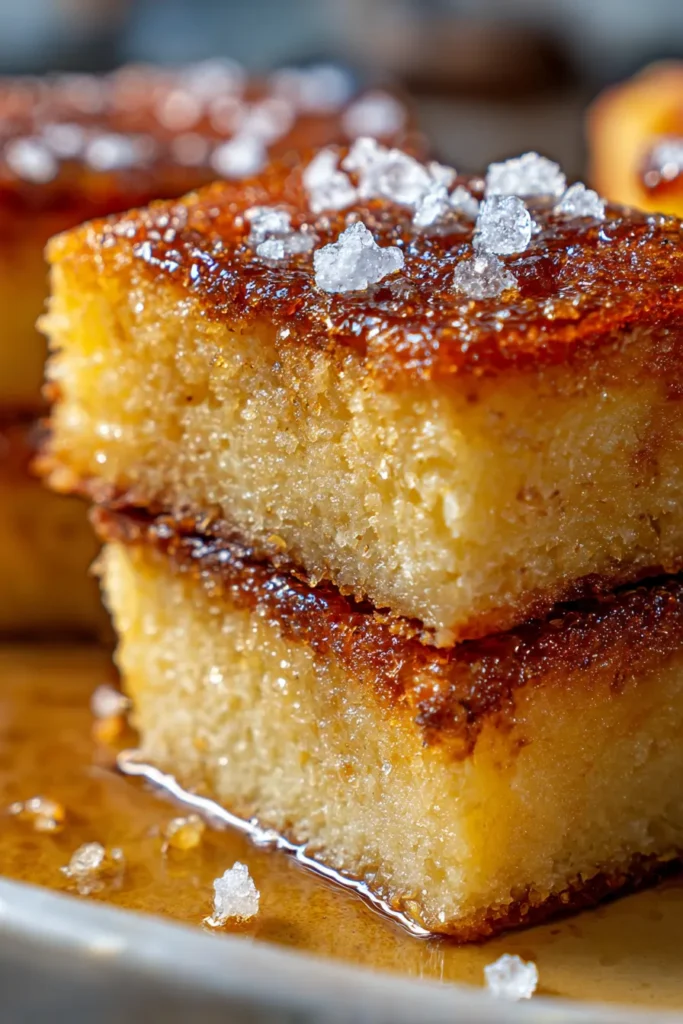
- ❤️ Unbelievably Rich Flavor: This cake celebrates the pure, luxurious taste of butter. Every bite is a decadent experience, a harmonious blend of sweetness and a deep, comforting buttery note that lingers beautifully.
- ❤️ Perfectly Moist Texture: Forget dry, crumbly cakes! This recipe guarantees an incredibly moist, tender crumb that practically melts in your mouth. It’s soft, delicate, and utterly irresistible.
- ❤️ Simple Yet Elegant: Despite its sophisticated taste, this cake uses basic pantry staples and straightforward techniques. You don’t need fancy equipment or advanced skills to achieve a stunning result that looks and tastes gourmet.
- ❤️ Versatile for Any Occasion: Whether it’s a casual weeknight dessert, a special holiday celebration, or a simple afternoon tea, this French Butter Cake fits perfectly. It’s a crowd-pleaser that everyone will adore.
- ❤️ A Beautiful Canvas: Enjoy it plain with a dusting of powdered sugar, or dress it up with fresh berries, a dollop of whipped cream, or a simple glaze. It’s wonderfully adaptable to your preferences.
- ❤️ Makes Your Home Smell Amazing: The aroma of this cake baking is pure bliss. The warm, sweet, buttery scent will fill your kitchen, making it feel cozy and inviting long before you even take the first bite.
- ❤️ Freezer-Friendly: Make a double batch and freeze half for a future craving! This cake freezes beautifully, meaning you can always have a slice of heaven on hand.
- ❤️ Tested & Approved: This isn’t just a recipe; it’s a tried and true method perfected over many baking sessions. You can trust that the steps and proportions are just right for a flawless cake every time.
- ❤️ Nostalgic Comfort: For many, the taste of a classic butter cake evokes cherished childhood memories and a sense of warmth and security. This recipe brings that comforting nostalgia straight to your kitchen.
- ❤️ The Ultimate Base: Want to get creative? This cake serves as an excellent base for various flavor additions. Think almond extract, lemon zest, or even a hint of cardamom to customize your creation.
What You Need
You only need a few simple pantry staples for this recipe! Most likely, you already have everything on hand to whip up this incredible cake. The magic truly happens with quality ingredients, especially good butter. Check the full printable recipe card below for detailed measurements and a complete list of what you’ll need.
Expert Tips
- 💡 Use Room Temperature Ingredients: This is perhaps the most crucial tip! Ensure your butter, eggs, and milk are all at room temperature. This allows them to emulsify properly, creating a smooth batter and a perfectly uniform, tender crumb. Cold ingredients can lead to a lumpy batter and a denser cake.
- 💡 Cream Butter and Sugar Properly: Take your time with this step. Beat the butter and sugar together until the mixture is light, fluffy, and pale in color (about 3-5 minutes with an electric mixer). This incorporates air, which is essential for a light and tender cake texture. Don’t rush it!
- 💡 Don’t Overmix the Batter: Once you add the dry ingredients and milk, mix only until *just* combined. Overmixing develops the gluten in the flour, leading to a tough, dry cake. A few lumps are perfectly fine and often preferred.
- 💡 Measure Flour Correctly: For accurate results, spoon your flour into the measuring cup and then level it off with a straight edge. Scooping directly from the bag can compact the flour, leading to too much flour and a dry cake.
- 💡 Prepare Your Pan: Grease and flour your baking pan thoroughly, or line it with parchment paper, especially for the bottom. This prevents sticking and ensures your beautiful cake releases easily.
- 💡 Bake Until Golden: Bake until a wooden skewer or toothpick inserted into the center of the cake comes out clean, or with only a few moist crumbs attached. The top should be golden brown and spring back lightly when touched.
- 💡 Cool Completely: While it’s tempting to dive in, allow the cake to cool in the pan for about 10-15 minutes before inverting it onto a wire rack. This allows the cake to set and prevents it from breaking. Let it cool completely on the rack before slicing for the cleanest cuts and best texture.
- 💡 Quality Butter Matters: Since butter is the star of this cake, use the best quality unsalted butter you can find. European-style butter, with its higher fat content, can make a noticeable difference in flavor and richness.
- 💡 Gentle Folding: When alternating between dry ingredients and milk, start and end with the dry. Fold gently until just incorporated, never vigorously mix. This maintains the airiness created in the initial creaming step.
- 💡 Don’t Forget the Salt: A pinch of salt doesn’t make the cake salty; it actually enhances and balances the sweetness, bringing out the rich buttery flavors even more.
Variations & Substitutions
This French Butter Cake is wonderfully versatile! Here are some ideas to customize it to your liking:
- Citrus Zest: Add 1-2 tablespoons of lemon, orange, or lime zest to the batter for a bright, fragrant twist.
- Almond Extract: Substitute half of the vanilla extract with almond extract for a delicate, nutty flavor.
- Nutty Crunch: Fold in 1/2 cup of chopped toasted pecans or walnuts for added texture and flavor.
- Chocolate Chips: Gently fold in 1 cup of mini chocolate chips or chopped chocolate for a delightful surprise in every bite.
- Spice It Up: Add 1 teaspoon of ground cinnamon or a pinch of nutmeg for a warmer, spicier profile, especially great for fall and winter.
- Glaze Options: Drizzle with a simple powdered sugar glaze (powdered sugar + milk/lemon juice) or a rich vanilla bean glaze.
- Gluten-Free: You can often substitute all-purpose flour with a 1:1 gluten-free baking flour blend (ensure it contains xanthan gum) for a gluten-free version. Results may vary slightly in texture.
- Dairy-Free: Use a high-quality plant-based butter alternative and plant-based milk (like almond or oat milk). Ensure they are at room temperature.
Storage & Freezing
Keeping your French Butter Cake fresh is easy, ensuring you can enjoy its deliciousness for days!
Storage:
- Room Temperature: Store the cake in an airtight container at room temperature for up to 3-4 days. Ensure it’s away from direct sunlight or heat.
- Refrigeration: While not strictly necessary, if your kitchen is very warm or humid, you can store it in an airtight container in the refrigerator for up to 5-6 days. Bring it to room temperature before serving for the best flavor and texture.
Freezing:
- Whole Cake: Once the cake is completely cooled, wrap it tightly in several layers of plastic wrap, then an additional layer of aluminum foil. Freeze for up to 2-3 months.
- Individual Slices: Wrap individual slices tightly in plastic wrap, then place them in a freezer-safe bag or container. This is perfect for portion control and quick thawing.
- Thawing: To thaw, simply unwrap the cake or slices and let them come to room temperature on the counter for several hours, or overnight in the refrigerator.
FAQ
Q: What makes a French Butter Cake different from a regular butter cake?
A: While similar, French butter cakes often emphasize a higher butter content and a finer crumb, sometimes achieved through specific flour types or creaming methods. The focus is on a rich, pure buttery flavor and an exceptionally moist, delicate texture. It’s often baked in a larger, simpler form, allowing the pure flavor to shine.
Q: Can I use salted butter instead of unsalted butter?
A: It’s always best to use unsalted butter in baking to control the amount of salt in the recipe. If you only have salted butter, you can use it, but reduce the added salt in the recipe by about a quarter to half a teaspoon, depending on your preference and the saltiness of the butter.
Q: My cake turned out dry. What went wrong?
A: A dry cake is usually a result of overmixing the batter (which develops gluten and makes the cake tough) or overbaking. Ensure you mix only until the ingredients are just combined and bake only until a toothpick comes out clean. An oven thermometer can also help ensure your oven temperature is accurate.
Q: Can I make this cake in a different pan size?
A: Yes, you can! For a Bundt pan, ensure it’s a 10-12 cup capacity and adjust baking time as needed (often slightly longer). For an 8-inch round pan, you might get two layers, and baking time will be shorter. Always keep an eye on it and test for doneness with a toothpick. You might need to adjust the quantities or make two smaller cakes.
Q: How can I tell if my butter is at room temperature?
A: Room temperature butter should be soft enough to indent easily with your finger but still hold its shape. It should not be greasy or melty. If it’s too cold, it won’t cream properly; if it’s too warm, it can make your cake greasy and dense.
And there you have it – the secret to a truly unforgettable French Butter Cake that’s both rich and moist! I hope this recipe brings as much joy to your kitchen as it does to mine. Don’t forget to save this recipe for later by pinning it to your favorite dessert board on Pinterest. Happy baking!
Rich & Moist French Butter Cake Recipe | Easy & Delicious
Ingredients
- 1 cup (226g) unsalted butter, softened
- 2 cups (400g) granulated sugar
- 4 large eggs, room temperature
- 1 tbsp vanilla extract (or 2 tsp vanilla extract + 1 tsp almond extract for a twist)
- 3 cups (360g) all-purpose flour, spooned and leveled
- 1 tbsp baking powder
- 1/2 tsp salt
- 1 cup (240ml) whole milk, room temperature
Instructions
- Step 1 Preheat your oven to 350°F (175°C). Grease and flour a 9x13 inch baking pan, or a 10-12 cup Bundt pan. Set aside.
- Step 2 In a large bowl, using an electric mixer, cream together the softened butter and granulated sugar until light, fluffy, and pale in color (about 3-5 minutes). Scrape down the sides of the bowl as needed.
- Step 3 Beat in the eggs one at a time, incorporating each egg fully before adding the next. Stir in the vanilla extract.
- Step 4 In a separate medium bowl, whisk together the all-purpose flour, baking powder, and salt.
- Step 5 Gradually add the dry ingredients to the wet ingredients, alternating with the whole milk, beginning and ending with the dry ingredients (e.g., 1/3 dry, 1/2 milk, 1/3 dry, 1/2 milk, 1/3 dry). Mix on low speed until *just* combined. Be careful not to overmix; a few small lumps are okay.
- Step 6 Pour the batter evenly into your prepared baking pan and smooth the top with a spatula.
- Step 7 Bake for 40-50 minutes, or until a wooden skewer or toothpick inserted into the center of the cake comes out clean or with only a few moist crumbs attached. (Baking time may vary depending on your oven and pan type).
- Step 8 Let the cake cool in the pan for 10-15 minutes before carefully inverting it onto a wire rack to cool completely. Slice and serve plain, with a dusting of powdered sugar, or your favorite topping.