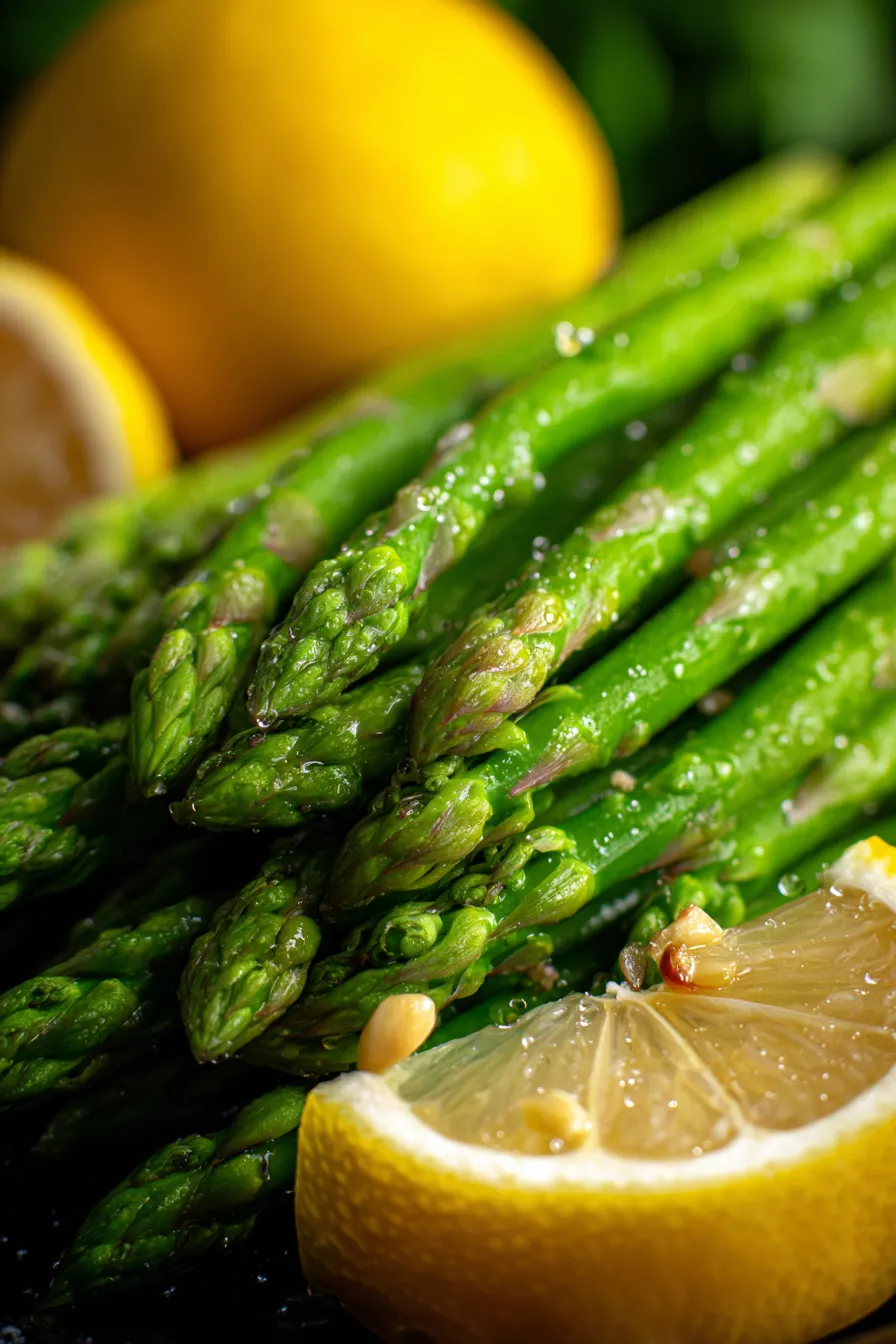
Best Ever Quick and Easy Stovetop Asparagus
I remember my first apartment, tiny kitchen, limited tools. After a long day at my first job, cooking felt like a chore. One evening, staring at a lonely bunch of asparagus, I decided to simplify. No fancy roasting, no steaming — just a pan, a little olive oil, and a dash of garlic. That night, the Quick and Easy Stovetop Asparagus I made was surprisingly delicious, a revelation of simple flavors that transformed a plain vegetable into a star side dish. It became my go-to easy dinner solution, a truly comforting and healthy side.
Fast forward years later, and this recipe is still a cherished family favorite, perfected and tested countless times. It’s the ultimate way to enjoy vibrant green asparagus without fuss, delivering tender-crisp perfection every single time. If you’re looking for a foolproof method to cook asparagus that’s both quick and packed with flavor, you’ve found it!
Why You’ll Love This Recipe
❤️ Speedy & Simple: This recipe lives up to its name! From start to finish, you’re looking at less than 15 minutes. Perfect for busy weeknights when you need a healthy side dish on the table *fast*. No preheating ovens, no complicated steps – just pure stovetop magic.
❤️ Tender-Crisp Perfection: Say goodbye to soggy or stringy asparagus! Our method ensures each spear is cooked just right, retaining a delightful bite and vibrant green color. It’s all about that perfect balance of heat and time.
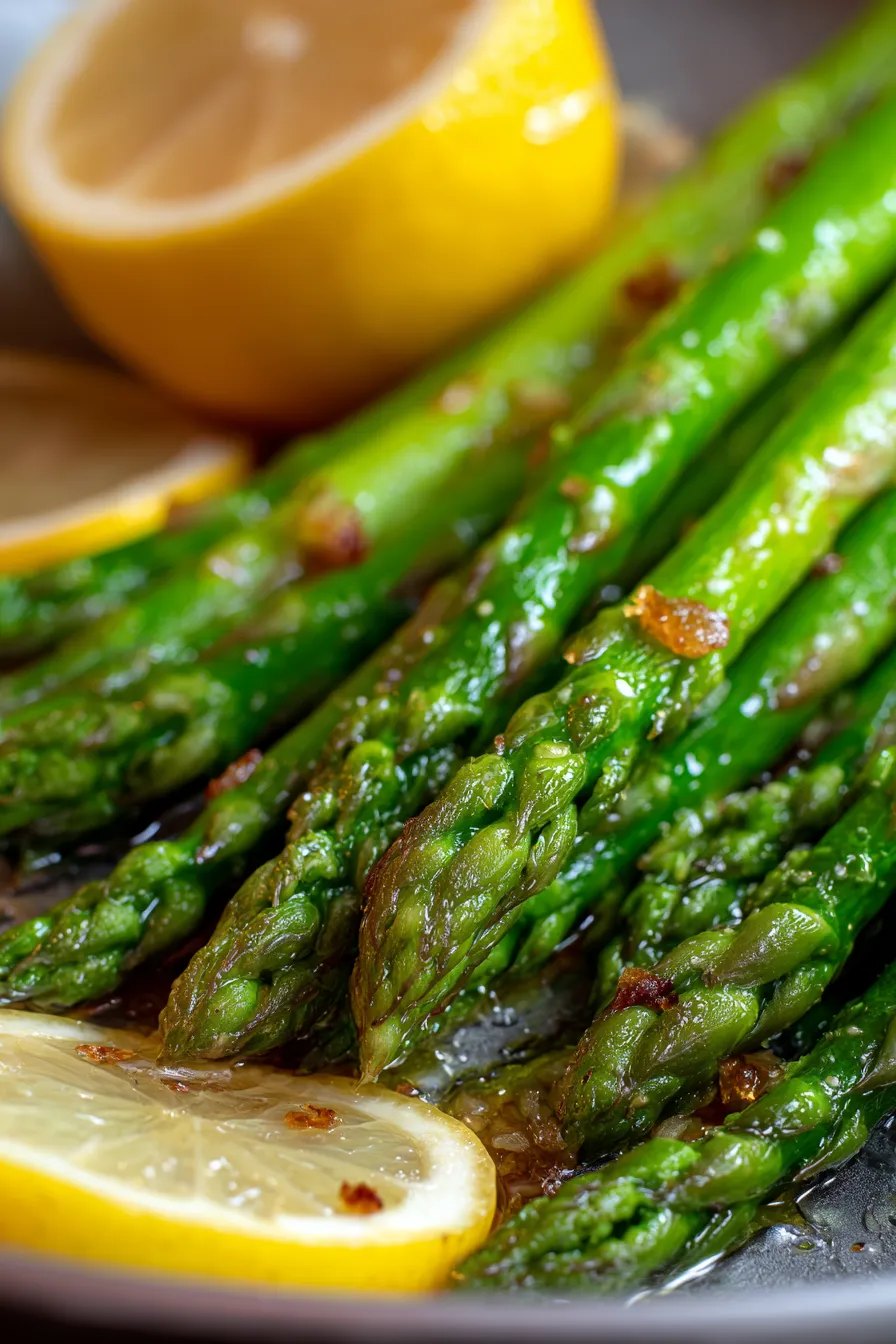
❤️ Minimal Ingredients, Maximum Flavor: You only need a handful of pantry staples to create an incredibly flavorful dish. Fresh asparagus, a good olive oil, garlic, and a squeeze of lemon are the heroes here. These simple ingredients combine to highlight the natural sweetness of the asparagus beautifully.
❤️ Healthy & Nutritious: Asparagus is a nutritional powerhouse, packed with vitamins A, C, E, K, and B6, as well as folate, iron, and fiber. Cooking it lightly on the stovetop helps preserve these valuable nutrients, making it a wonderful addition to any meal. It’s naturally low-carb and gluten-free!
❤️ Versatile Side Dish: This stovetop asparagus pairs wonderfully with almost anything! Serve it alongside grilled chicken, baked salmon, a juicy steak, or even scrambled eggs for a hearty breakfast. It’s endlessly adaptable and always a crowd-pleaser.
❤️ Foolproof Method: Whether you’re a seasoned chef or a kitchen beginner, this recipe is incredibly hard to mess up. We’ll walk you through each step, ensuring you achieve perfect results every time. It’s a fundamental cooking technique everyone should have in their repertoire.
What You Need
You only need a few simple pantry staples for this recipe! Fresh asparagus, olive oil, garlic, salt, pepper, and a touch of lemon are the stars. Check the full printable recipe card below for detailed measurements of these essential ingredients.
Expert Tips
💡 Choose Fresh Asparagus: Look for bright green, firm spears with tight, closed tips. Avoid any that look wilted, dull, or have yellowing spots. Thicker spears tend to be more tender than very thin ones when cooked this way, offering a better bite.
💡 Trim Properly: To trim asparagus, simply snap off the woody ends. They’ll naturally break where the tough part meets the tender part. Alternatively, you can line them up and cut off the bottom inch or two with a sharp knife. This ensures every bite is tender and enjoyable, without any stringy bits.
💡 Don’t Overcrowd the Pan: For even cooking, make sure the asparagus spears are in a single layer in your skillet. If your pan isn’t large enough to accommodate them without overlapping, cook them in two batches. Overcrowding will steam the asparagus rather than sauté it, leading to a less desirable, softer texture and a less vibrant color.
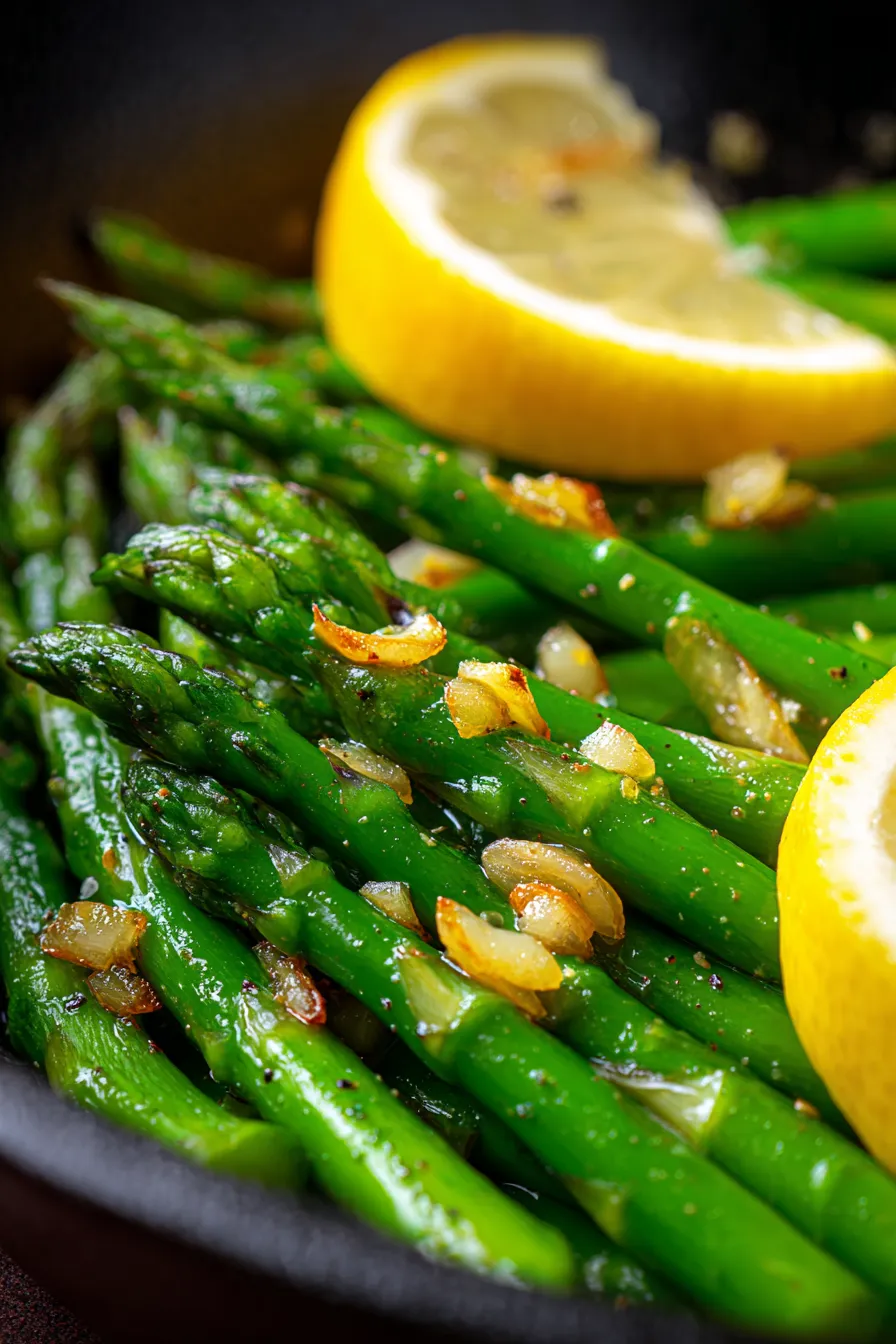
💡 Medium-High Heat is Key: You want the pan hot enough to get a slight char and tenderize the asparagus quickly, but not so hot that it burns the garlic or olive oil. A good medium-high heat allows for rapid cooking, a beautiful vibrant green color, and a delicious slightly caramelized exterior.
💡 Garlic Timing Matters: Add minced garlic in the last minute or two of cooking, after the asparagus has mostly cooked through. This prevents it from burning and turning bitter, ensuring you get that lovely aromatic, sweet garlic flavor without any harshness.
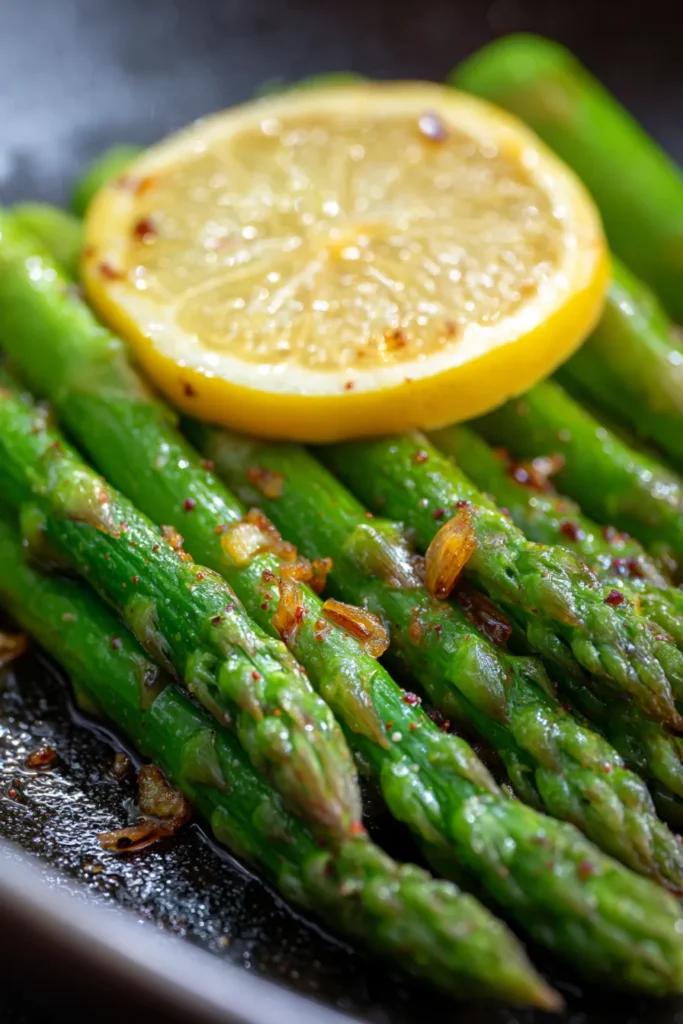
💡 Finish with a Flourish: A squeeze of fresh lemon juice at the very end brightens all the flavors beautifully, adding a zesty zing that perfectly complements the asparagus. A sprinkle of grated Parmesan cheese or a pinch of red pepper flakes can also add an extra layer of deliciousness, transforming it from good to absolutely outstanding.
💡 Test for Doneness: Asparagus is done when it’s vibrant green, slightly tender when pierced with a fork, but still retains a slight snap or crispness when bitten. Taste a spear from the thickest part to confirm it’s cooked perfectly to your liking – everyone has a different preference for tenderness!
Variations & Substitutions
- Spicy Kick: Add a pinch of red pepper flakes along with the garlic for a delightful hint of heat that awakens the palate.
- Cheesy Goodness: Sprinkle freshly grated Parmesan cheese over the asparagus immediately after cooking, while it’s still hot, so it melts slightly into a savory coating. Crumbled feta or creamy goat cheese would also be delicious additions.
- Herbal Infusion: Fresh herbs like finely chopped parsley, chives, dill, or even a hint of mint can be stirred in at the very end for an extra burst of fresh, aromatic flavor.
- Balsamic Glaze: For a sweet and tangy finish, drizzle a store-bought or homemade balsamic glaze over the cooked asparagus just before serving.
- Lemon-Garlic Butter: Instead of solely olive oil, use a combination of unsalted butter and olive oil for a richer, more luxurious flavor profile that melts in your mouth.
- Keto/Low-Carb: This recipe is naturally keto-friendly! Ensure you’re using high-quality olive oil and avoiding any sugary glazes to keep it perfectly aligned with your dietary goals.
- Vegan/Dairy-Free: This recipe is also naturally vegan. Simply stick to olive oil and omit any cheese additions, or use a plant-based Parmesan alternative.
- Gluten-Free: Another naturally gluten-free dish, making it perfect for those with celiac disease or gluten sensitivities without any modifications needed.
Storage & Freezing
Storage: Leftover stovetop asparagus can be stored in an airtight container in the refrigerator for up to 3-4 days. It’s surprisingly delicious reheated gently in a pan or even enjoyed cold, chopped into salads, or added to wraps.
Reheating: To reheat, sauté briefly in a hot pan with a tiny bit of olive oil until just warmed through, or microwave in short bursts, stirring occasionally. Be careful not to overcook, as asparagus can quickly become mushy if reheated too long.
Freezing: While cooked asparagus can be frozen, it tends to lose some of its crispness and firm texture upon thawing, becoming softer. For the absolute best results, it’s generally recommended to enjoy this dish fresh. If you must freeze, consider blanching fresh asparagus first for optimal preservation, then flash freeze the raw blanched spears.
FAQ
Q: Do I need to peel asparagus?
A: For most standard-sized asparagus spears, peeling is generally not necessary. The tough outer layer is typically only present on very thick, older spears. Snapping off the woody ends (which naturally break at the tender point) is usually sufficient for a tender eating experience. If you have exceptionally thick spears, you can lightly peel the bottom third with a vegetable peeler if desired.
Q: What kind of pan is best for stovetop asparagus?
A: A large skillet or frying pan with a wide surface area is ideal for cooking asparagus on the stovetop. Cast iron, stainless steel, or a good quality non-stick pan will all work well. The crucial element is to have enough space to spread the asparagus in a single layer to ensure even cooking and proper sautéing rather than steaming.
Q: Can I use frozen asparagus for this recipe?
A: While fresh asparagus is highly recommended for the best texture and vibrant flavor, you can certainly use frozen asparagus in a pinch. There’s no need to thaw it first; simply add the frozen spears directly to the hot pan with olive oil and cook, stirring occasionally, until they are tender-crisp and heated through. Be aware that the cooking time might be slightly longer, and the texture might be softer than with fresh asparagus.
I hope this Quick and Easy Stovetop Asparagus becomes a staple in your kitchen, just as it has in mine. It’s a simple reminder that wholesome, flavorful food doesn’t have to be complicated or time-consuming. Give it a try tonight, and don’t forget to pin this recipe for later so you can always find your way back to perfect, tender-crisp asparagus!
Quick & Easy Stovetop Asparagus (Perfectly Tender)
Ingredients
- 1 lb fresh asparagus, trimmed
- 2 tbsp olive oil
- 2 cloves garlic, minced
- 1/4 tsp salt
- 1/8 tsp black pepper
- 1 tbsp fresh lemon juice
Instructions
- Step 1 Heat olive oil in a large skillet over medium-high heat until shimmering.
- Step 2 Add the trimmed asparagus to the skillet in a single layer. Cook, stirring occasionally with tongs, for 5-7 minutes, until the asparagus is vibrant green and tender-crisp.
- Step 3 Add the minced garlic, salt, and black pepper to the pan. Cook for another 1-2 minutes, stirring constantly, until the garlic is fragrant and lightly golden. Be careful not to burn the garlic.
- Step 4 Remove the skillet from the heat. Drizzle the asparagus with fresh lemon juice and toss gently to coat.
- Step 5 Serve immediately as a delicious and healthy side dish.