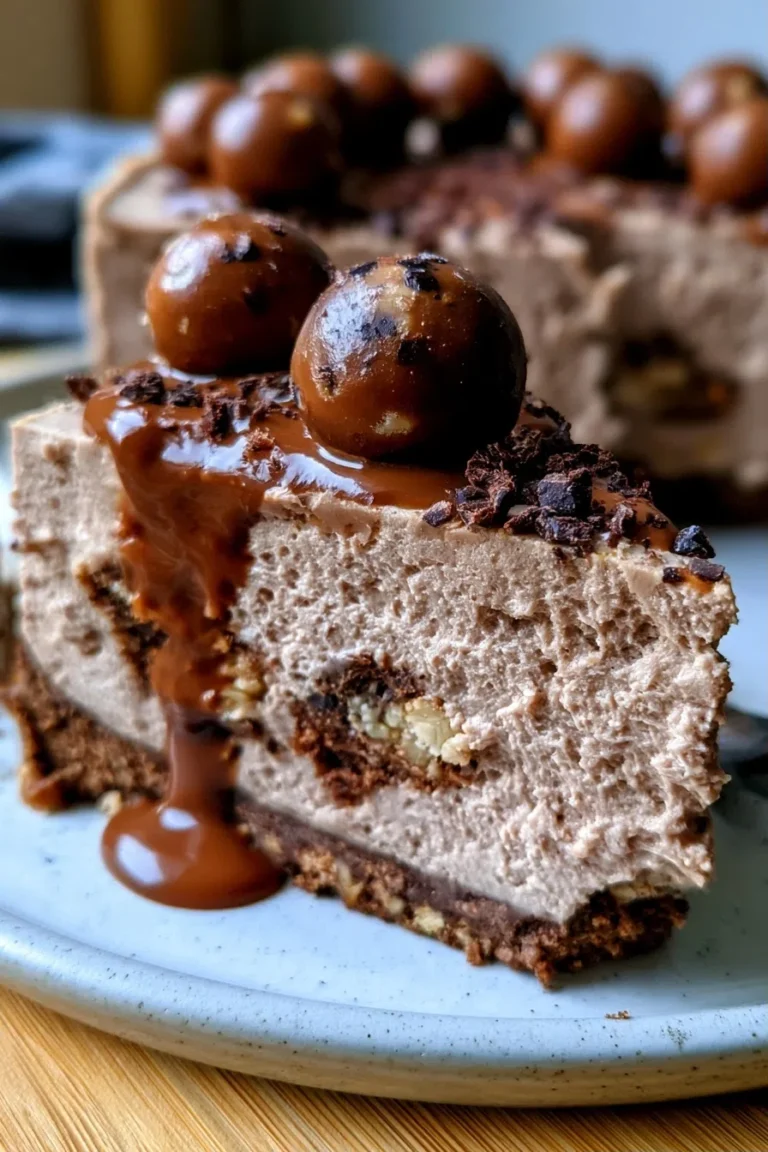
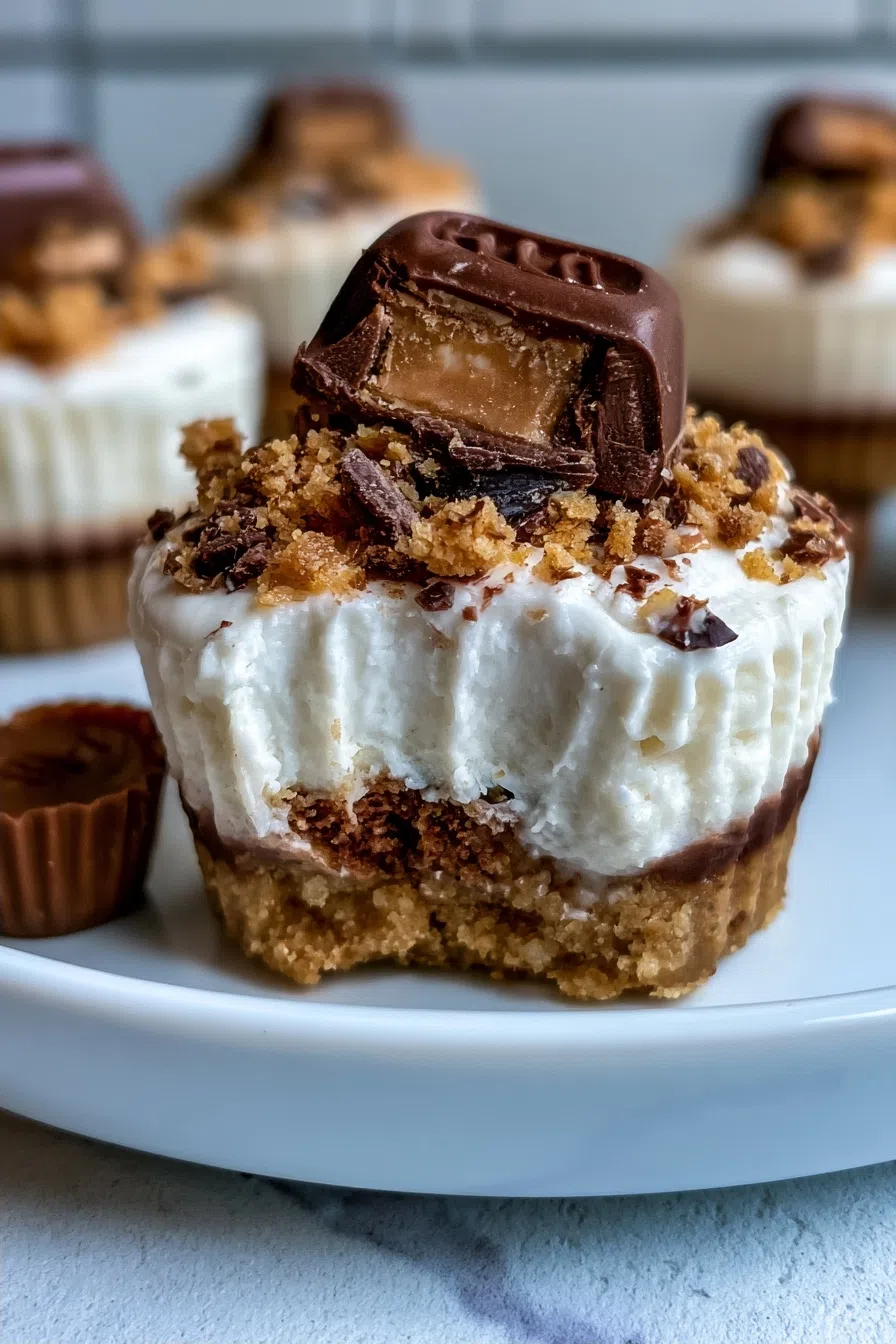
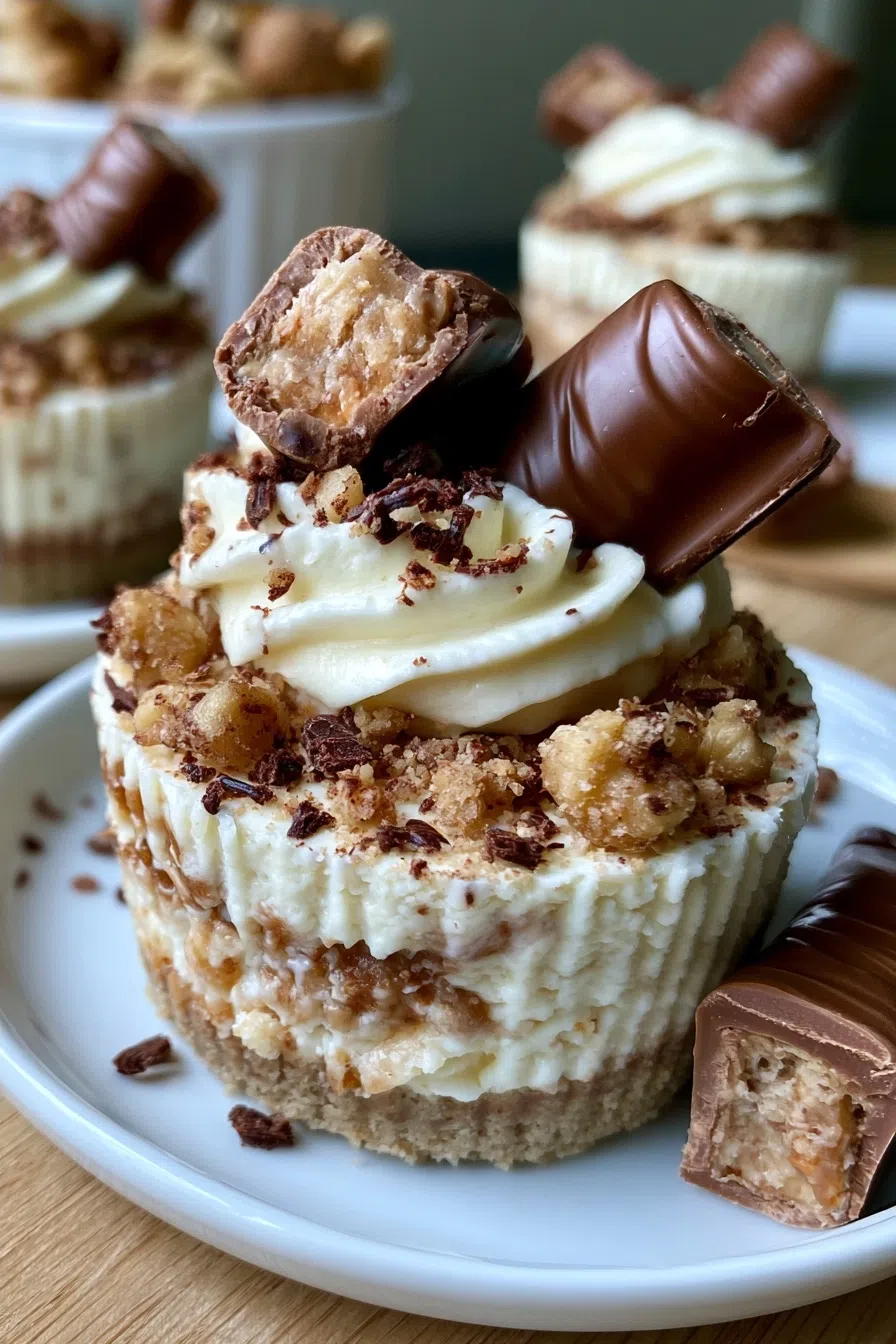
Kinder Bueno Cheesecake Cups
As I took my first bite of these Kinder Bueno Cheesecake Cups, I was instantly transported to a sunny Sunday afternoon in my grandmother’s cozy kitchen, where the aroma of melting chocolate and freshly baked crust filled the air.
I vividly remember the summer I spent at my grandparents’, where my grandmother would lovingly prepare these cheesecake cups for our family gatherings, and the way the crunch of the Kinder Bueno bars would give way to a silky, creamy cheesecake filling.
That was the moment I realized the true magic of these Kinder Bueno Cheesecake Cups, and how they could bring people together with their irresistible combination of textures and flavors. This Kinder Bueno Cheesecake Cups quickly became a cherished family favorite.
Why You’ll Love This Kinder Bueno Cheesecake Cups
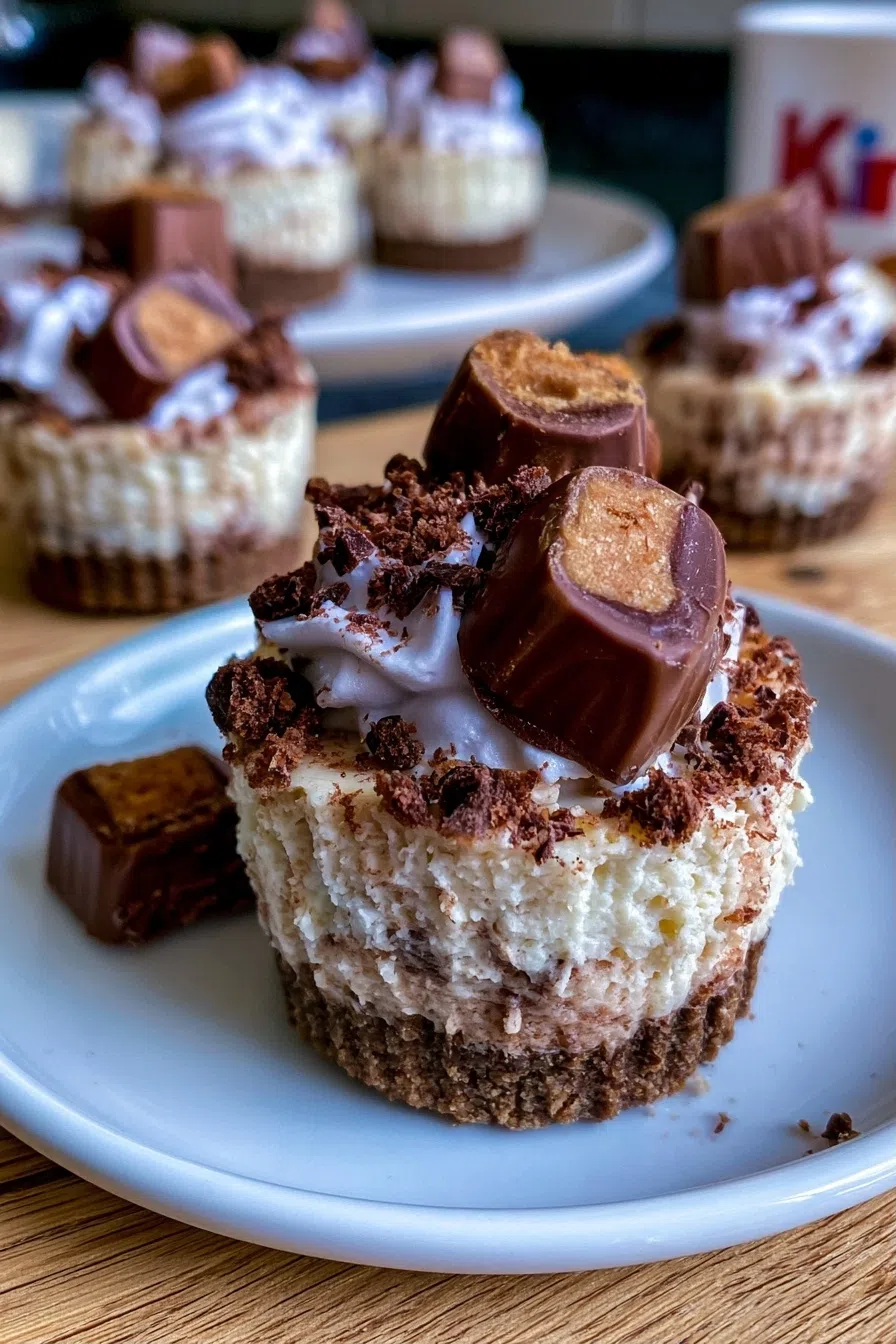
- The crunchy Kinder Bueno bars add a satisfying texture to the creamy cheesecake.
- The combination of the cheesecake and the Kinder Bueno bars creates a rich, chocolate-hazelnut flavor profile.
- These cheesecake cups can be prepared in under 30 minutes, making them perfect for a quick dessert.
- The recipe is foolproof, as it requires minimal ingredients and effort.
- They’re perfect for any occasion, whether it’s a family gathering or a party with friends.
Ingredients You’ll Need
- 1 1/2 cups chocolate biscuit crumbs
- 1/4 cup granulated sugar
- 1/4 cup all-purpose flour
- 1/2 cup unsalted butter, melted
- 16 oz cream cheese, softened
- 1/2 cup granulated sugar
- 4 large eggs, separated
- 1 tsp vanilla extract
- 1 cup heavy cream
- 1 cup milk chocolate chips
- 1 cup chopped Kinder Bueno bars
- 1 cup confectioners’ sugar
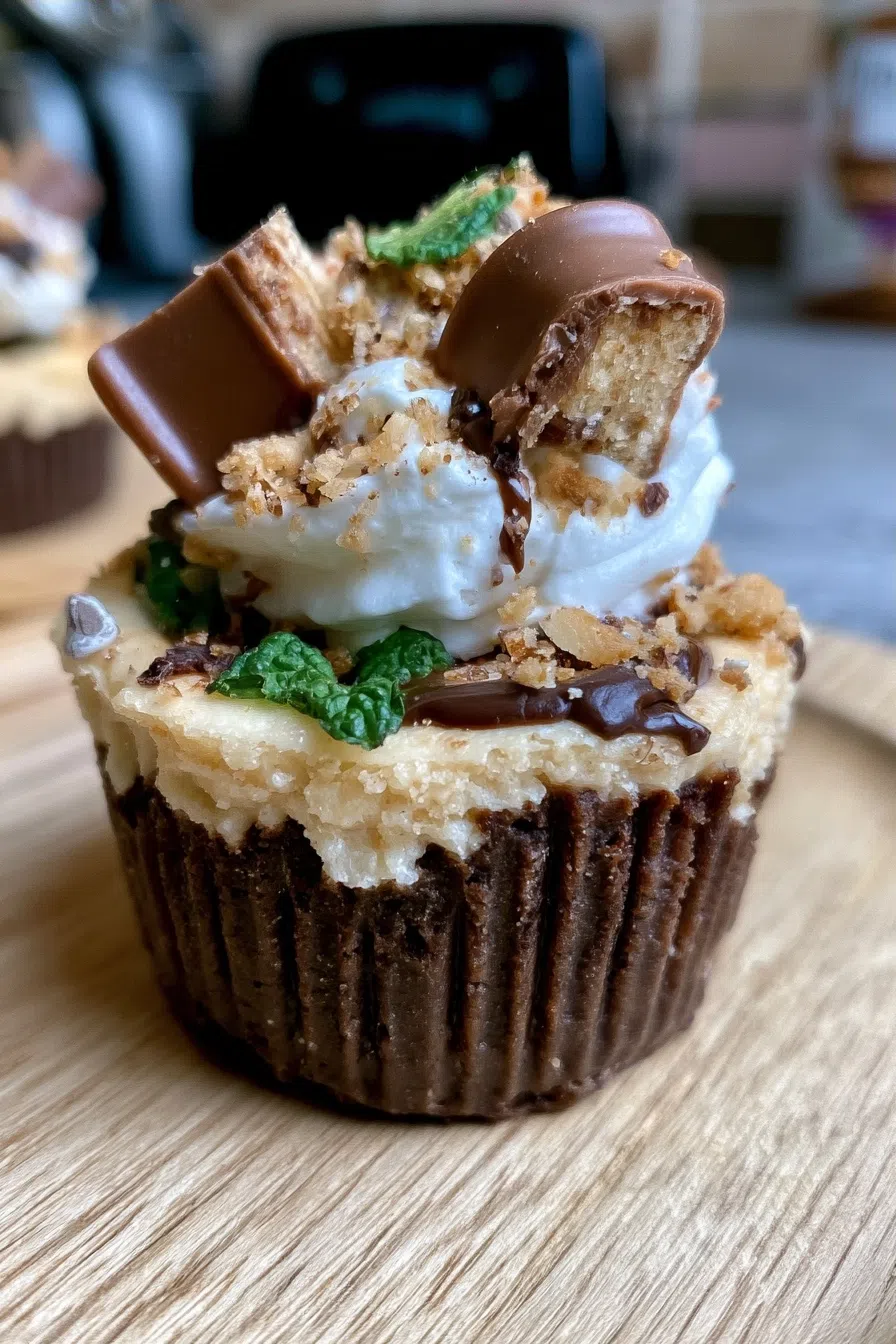
The star ingredients of this recipe are undoubtedly the Kinder Bueno bars and the creamy cheesecake filling, which come together to create a match made in heaven. The crunch of the Kinder Bueno bars provides a beautiful textural contrast to the silky cheesecake.
Expert Tips for the Best Kinder Bueno Cheesecake Cups
- To ensure the cheesecake cups are set, it’s crucial to not overmix the batter, as this can cause them to become tough.
- A common mistake is overbaking the cheesecake cups, which can cause them to dry out – to avoid this, keep an eye on them and remove them from the oven when they’re still slightly jiggly in the center.
- For a pro upgrade, try using high-quality chocolate for the cheesecake filling, as this will give it a deeper, richer flavor.
- The doneness cue for these cheesecake cups is when they’re set and slightly puffed, with a lightly golden-brown crust.
- These cheesecake cups can be made ahead of time and stored in the fridge for up to 3 days, making them perfect for meal prep or planning ahead for a party.
Variations and Substitutions
To make these cheesecake cups gluten-free, simply substitute the graham cracker crust with a gluten-free alternative, such as almond flour or coconut flakes. For a protein swap, try using Greek yogurt instead of sour cream. For a bold flavor twist, add a teaspoon of espresso powder to the cheesecake filling to give it a mocha flavor.
How to Store and Reheat
These cheesecake cups can be stored in the fridge for up to 5 days, and reheated in the microwave or oven when needed. To freeze, simply place the cheesecake cups in a single layer in a freezer-safe container or bag, and store in the freezer for up to 2 months.
Frequently Asked Questions
What is the best way to ensure the cheesecake cups are set?
The best way to ensure the cheesecake cups are set is to not overmix the batter and to not overbake them. Keep an eye on them and remove them from the oven when they’re still slightly jiggly in the center.
Can I make these cheesecake cups ahead of time?
Yes, these cheesecake cups can be made ahead of time and stored in the fridge for up to 3 days, making them perfect for meal prep or planning ahead for a party.
How do I store and reheat the cheesecake cups?
These cheesecake cups can be stored in the fridge for up to 5 days, and reheated in the microwave or oven when needed. To freeze, simply place the cheesecake cups in a single layer in a freezer-safe container or bag, and store in the freezer for up to 2 months.
I hope you enjoy making and devouring these Kinder Bueno Cheesecake Cups as much as I do! They’re the perfect treat to share with loved ones, and I’m sure they’ll become a cherished family favorite in your household too.
Kinder Bueno Cheesecake Cups
🧂 Ingredients
👩🍳 Instructions
-
1Preheat oven to 325°F (160°C).
-
2Prepare a 12-cup muffin tin with cupcake liners.
-
3In a medium bowl, mix together chocolate biscuit crumbs, sugar, and flour.
-
4Add the melted butter and stir until well combined.
-
5Press the mixture into the bottom of each muffin cup.
-
6Bake for 10 minutes.
-
7Meanwhile, beat the cream cheese until smooth.
-
8Add the granulated sugar and beat until combined.
-
9Beat in the egg yolks one at a time.
-
10Beat in the vanilla extract.
-
11In a separate bowl, whip the heavy cream until stiff peaks form.
-
12Add the milk chocolate chips and whip until combined.
-
13Spoon the cheesecake mixture into the muffin cups.
-
14Top each cup with a piece of Kinder Bueno bar.
-
15Bake for an additional 15-20 minutes or until the cheesecakes are set.
-
16Allow the cheesecakes to cool completely in the pan.
-
17Dust with confectioners’ sugar before serving.