The Best Fudgy Chewy Browkies (Brookies) – Savvy Bites
Oh, the sweet nostalgia! I can still remember rainy Saturday afternoons at my grandmother’s house, the scent of chocolate and baking always lingering in the air. She had this magical ability to turn simple ingredients into pure comfort. While she was a master of many classic treats, she always encouraged me to experiment, to blend flavors and textures in new ways. It was during one of those cozy baking sessions, fueled by a mischievous craving for both a rich brownie and a gooey chocolate chip cookie, that the idea for these amazing The Best Fudgy Chewy Browkies (Brookies) – Savvy Bites first sparked.
It started as a whimsical experiment, combining my favorite chewy chocolate chip cookie dough with the most intensely fudgy brownie batter. The result? A dessert so utterly divine, so perfectly balanced in texture and flavor, that it quickly became a family legend. This isn’t just another hybrid dessert; it’s a testament to those cherished baking memories, a truly indulgent comfort treat that brings joy with every single bite. After countless iterations and taste-tests, this tested recipe is finally ready to become your family’s new favorite, promising an easy dessert experience that’s absolutely unforgettable.
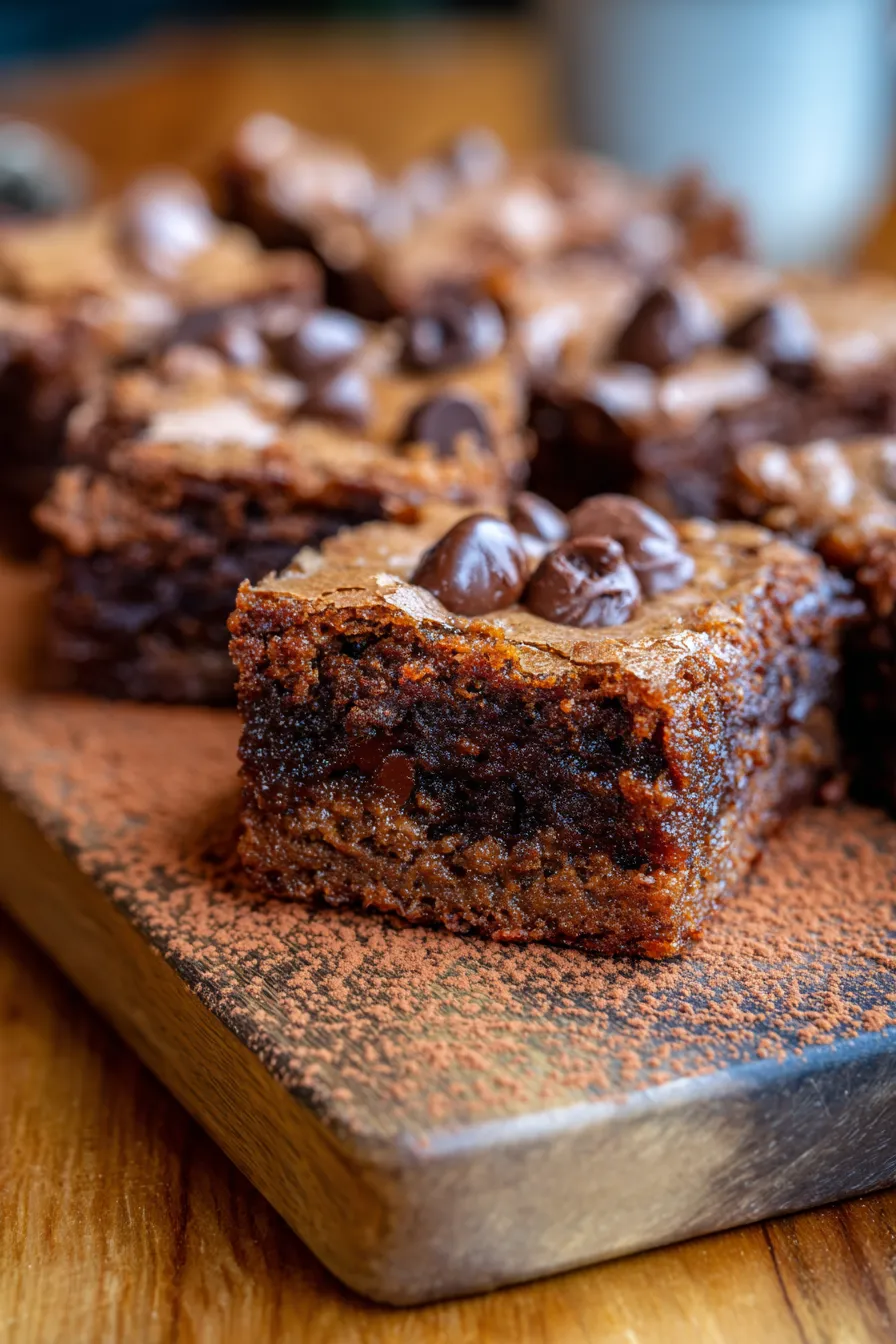
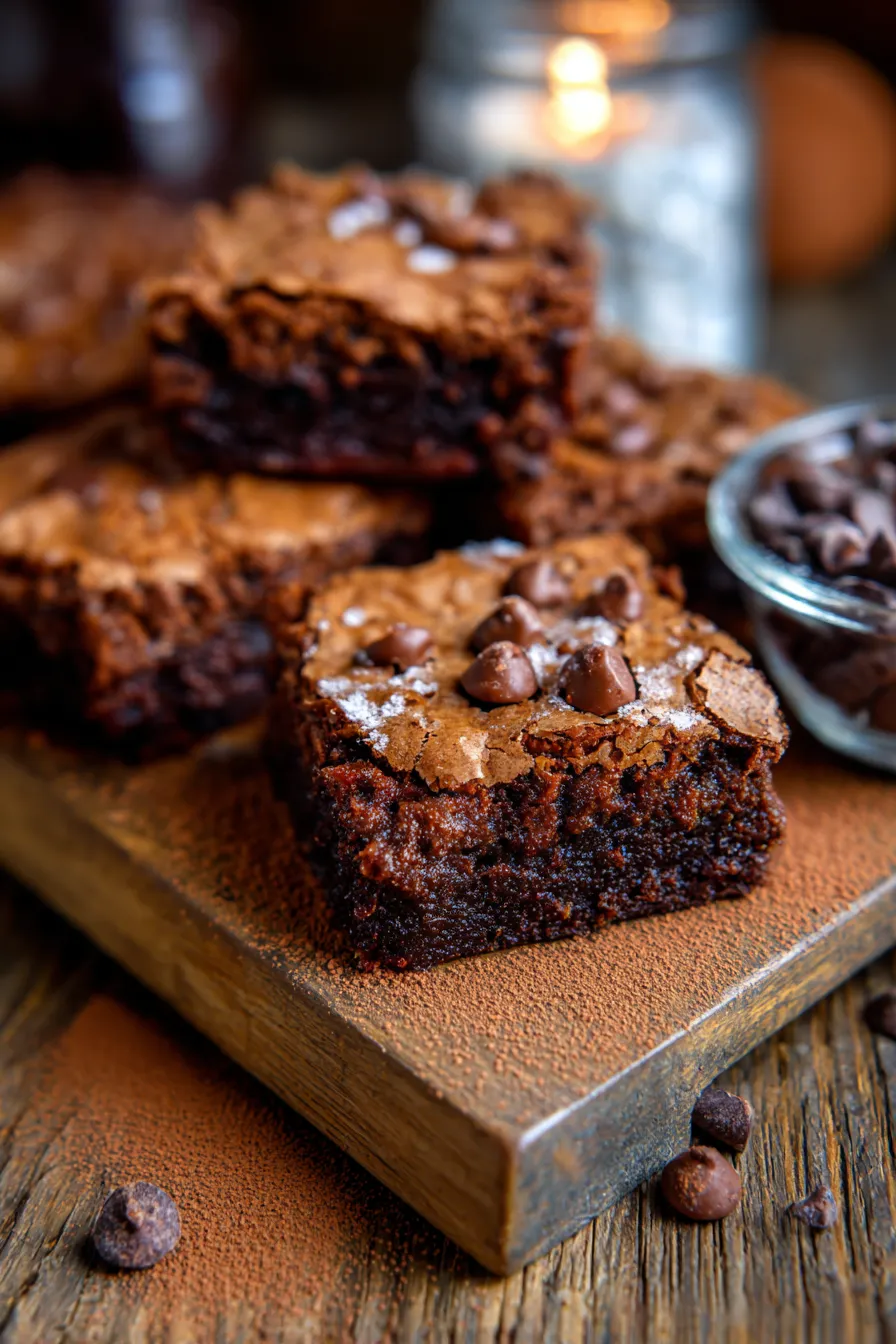
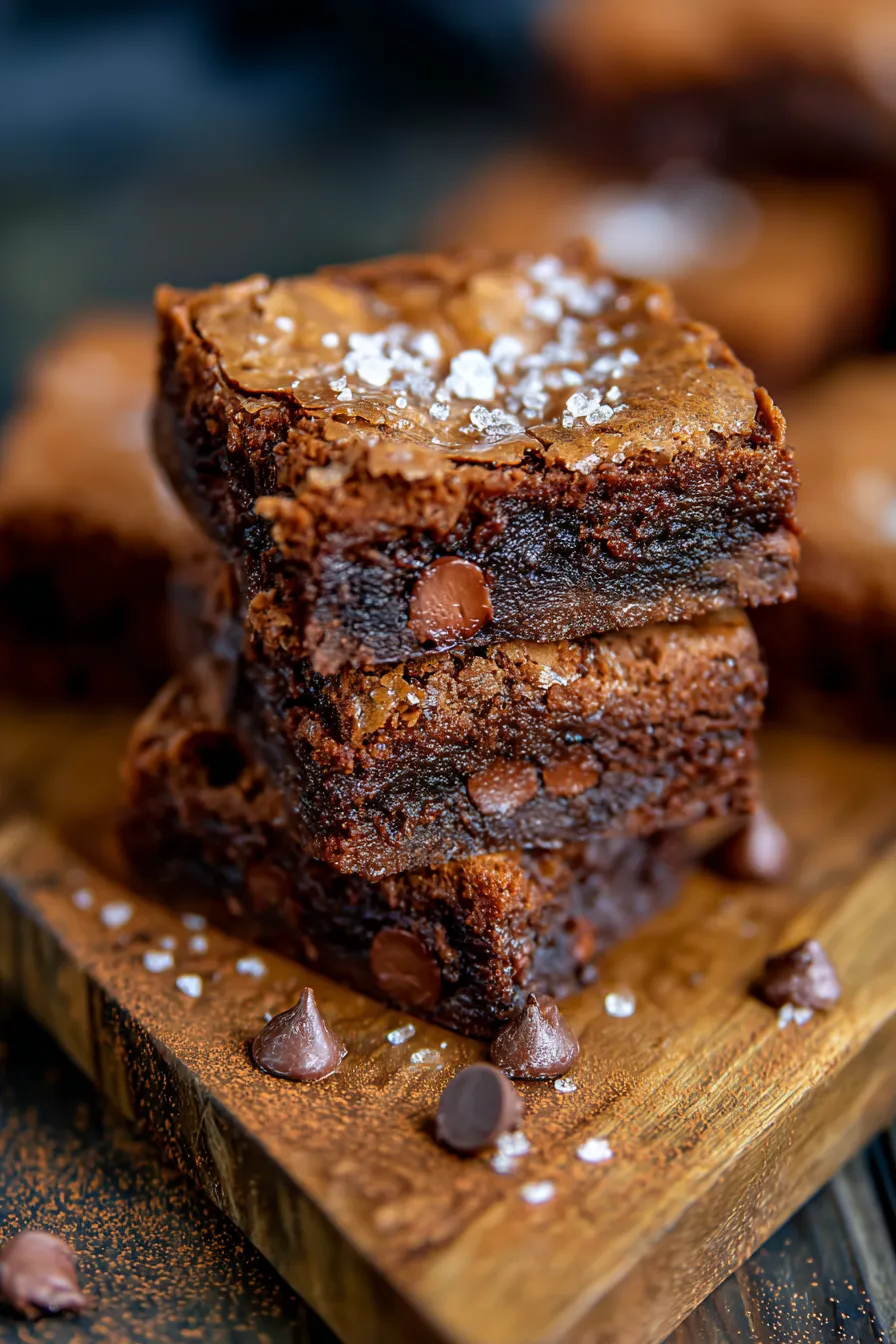
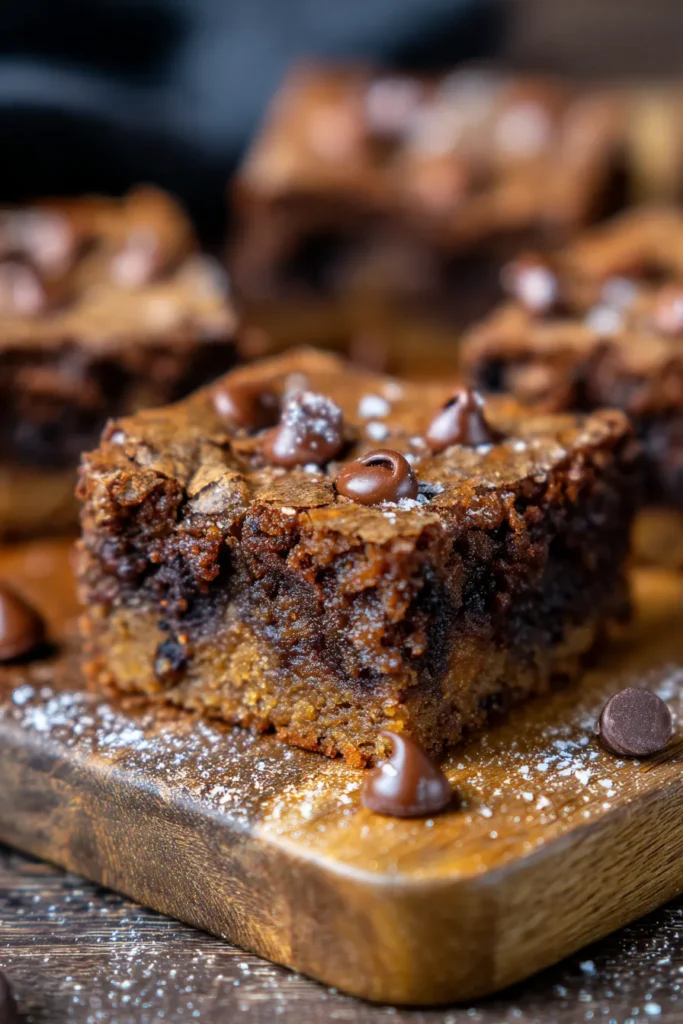
These browkies are the ultimate answer to those dessert dilemmas when you just can’t choose. They offer the best of both worlds: the decadent, rich chewiness of a perfect brownie, layered harmoniously with the familiar, beloved crisp-chewy edge of a chocolate chip cookie. Get ready to bake a batch of pure happiness, because these browkies are seriously that good!
Why You’ll Love This Recipe
- ❤️ Double the Deliciousness: Why choose between a brownie and a cookie when you can have both? These browkies deliver the best of both iconic desserts in one glorious bite. The fudgy, dense brownie layer perfectly complements the chewy, slightly crisp chocolate chip cookie layer, creating a symphony of textures and flavors.
- ❤️ Irresistibly Fudgy & Chewy: We’ve perfected the balance! The brownie portion is incredibly moist and intensely chocolatey, melting in your mouth, while the cookie layer offers that delightful chewiness and golden-brown edges we all crave. Each bite is a textural adventure, from the soft interior to the slightly crisp crust.
- ❤️ Crowd-Pleaser Guaranteed: From potlucks to family gatherings, these browkies are always the first to disappear. They’re universally loved by kids and adults alike, making them the ultimate party dessert or a special treat for movie night. Prepare for rave reviews and requests for the recipe!
- ❤️ Surprisingly Simple to Make: Don’t let the gourmet appearance fool you; this recipe is straightforward and accessible for bakers of all skill levels. With clear instructions and common pantry ingredients, you’ll be whipping up a batch of these beauties in no time. It’s an impressive dessert with minimal fuss.
- ❤️ Customizable Fun: While perfect as is, this recipe is a fantastic canvas for your creativity! Add nuts, different kinds of chocolate, or even a swirl of caramel for an extra special touch. We’ll dive into some exciting variations further down, ensuring you can tailor them to your exact cravings.
- ❤️ Perfect for Any Occasion: Whether it’s a casual weeknight dessert, a celebratory treat, or a thoughtful gift, browkies fit every scenario. They’re comforting on a chilly evening and a delightful indulgence anytime you need a chocolate fix. Their robust flavor and satisfying texture make them truly versatile.
- ❤️ Freezer-Friendly: Bake a big batch and freeze some for later! These browkies hold up beautifully, meaning you can always have a delicious, homemade treat on hand for unexpected guests or sudden cravings. We’ll share our best tips for storage to ensure they taste just as good as freshly baked.
What You Need
You only need a few simple pantry staples for this recipe! We’re talking about ingredients you likely already have on hand, making these browkies an easy decision for your next baking adventure. Check the full printable recipe card below for detailed measurements and a complete list of everything required.
💡 Expert Tips for Perfect Browkies
- Don’t Overmix the Batter: For both the brownie and cookie layers, mix until just combined. Overmixing develops gluten, leading to a tougher texture. We want soft, fudgy brownies and tender, chewy cookies! Gentle folding is key after adding dry ingredients.
- Quality Chocolate Matters: Since chocolate is the star here, use good quality cocoa powder and chocolate chips. Semi-sweet or dark chocolate chips work wonderfully. High-quality chocolate melts more smoothly and provides a richer, more profound flavor, elevating your browkies from good to exceptional.
- Proper Pan Preparation: Line your baking pan with parchment paper, leaving an overhang on the sides. This creates ‘slings’ that make it incredibly easy to lift the entire slab of browkies out of the pan once cooled, allowing for clean, neat cuts. Grease the pan lightly first to help the parchment stick.
- Layering for Success: Spread the cookie dough evenly as the bottom layer, pressing it gently into the corners. Then, carefully spoon and spread the brownie batter over the cookie dough. Take your time to create an even top layer without disturbing the cookie dough too much.
- Don’t Overbake: This is perhaps the most crucial tip for fudgy and chewy perfection! Browkies are best when slightly underbaked. The edges should be set, but the center might still look a little gooey or slightly wet. A toothpick inserted into the center should come out with moist crumbs, not wet batter. Remember, they will continue to set as they cool.
- Cool Completely Before Cutting: Patience is a virtue, especially with baked goods! Allow the browkies to cool completely in the pan before attempting to cut them. Cutting them warm will result in a messy, crumbly experience. For ultra-clean cuts, you can even chill them in the refrigerator for about 30 minutes before slicing.
- Room Temperature Ingredients: Ensure your butter and eggs are at room temperature. This helps them emulsify better with the sugar, creating a smoother, more uniform batter and contributing to the overall texture of your browkies. Cold ingredients can lead to a lumpy batter and a denser bake.
- A Pinch of Salt: Don’t skip the salt in both layers! It’s not just for seasoning; it enhances the chocolate flavor and balances the sweetness, making the browkies taste even more complex and delicious. It brings out the best in the chocolate.
- Get Creative with Toppings: While perfect on their own, a sprinkle of sea salt flakes on top of the warm browkies after baking can elevate the flavors. You could also drizzle with a little melted caramel or white chocolate for an extra touch of indulgence before serving.
Variations & Substitutions
This recipe is wonderfully versatile, allowing you to customize your browkies to suit different tastes or dietary needs. Here are a few ideas:
- Nutty Crunch: Fold in 1/2 cup of chopped walnuts, pecans, or almonds into either the cookie dough or brownie batter for added texture and flavor.
- Different Chocolates: Experiment with white chocolate chips, milk chocolate chunks, or even a mix of different types of chocolate in the cookie layer. You could also swirl in a bit of peanut butter or hazelnut spread into the brownie batter before baking.
- Mint Chocolate Browkies: Add 1/2 teaspoon of mint extract to the brownie batter and use mint chocolate chips for a refreshing twist.
- Spice It Up: A pinch of cayenne pepper in the brownie batter can add a subtle, warming kick, creating a Mexican hot chocolate effect.
- Gluten-Free Option: You can often substitute all-purpose flour with a 1:1 gluten-free baking flour blend for both layers. Ensure your blend contains xanthan gum for best results.
- Dairy-Free Option: Use plant-based butter (like vegan butter sticks) and dairy-free chocolate chips. Ensure your eggs are still regular eggs or explore egg substitutes if aiming for a fully vegan treat (though this recipe hasn’t been tested for a full vegan conversion).
Storage & Freezing
Once cooled, these browkies store beautifully, allowing you to enjoy them for days or save them for a rainy day.
- At Room Temperature: Store cooled browkies in an airtight container at room temperature for up to 3-4 days. For best results and to maintain their fudgy texture, place a piece of parchment paper between layers if stacking.
- In the Refrigerator: If you prefer a firmer, chewier texture or if your kitchen is particularly warm, you can store them in an airtight container in the refrigerator for up to a week. Let them come to room temperature or warm slightly in the microwave before serving for optimal fudginess.
- Freezing: Browkies freeze exceptionally well! Once completely cooled, wrap individual browkies tightly in plastic wrap, then place them in a freezer-safe bag or container. They can be frozen for up to 2-3 months. Thaw at room temperature for a few hours or microwave briefly until warm and gooey.
FAQ
Q: What is a browkie?
A: A browkie is a delicious dessert hybrid combining the best elements of a brownie and a cookie. Typically, it features a fudgy brownie layer topped with a chewy chocolate chip cookie layer, baked together into one irresistible treat.
Q: Can I use a different size baking pan?
A: Yes, but you’ll need to adjust the baking time. A larger pan (e.g., 9×13 inch) will result in thinner browkies that bake faster. A smaller pan (e.g., 8×8 inch) will make thicker browkies requiring a longer baking time. Always keep an eye on the browkies and perform the toothpick test for doneness.
Q: My browkies are dry, what went wrong?
A: The most common culprit for dry browkies is overbaking. Remember, they continue to cook slightly as they cool. Aim for a slightly gooey center when you remove them from the oven. Using room temperature ingredients and measuring flour correctly (spooning into the measuring cup and leveling) also helps prevent dryness.
Q: Can I make the batter ahead of time?
A: You can prepare the cookie dough up to 2-3 days in advance and store it in the refrigerator. The brownie batter is best made right before baking, as cocoa powder can thicken the batter over time, affecting its consistency. Assemble and bake when you’re ready for fresh browkies!
There you have it, folks! The ultimate guide to making The Best Fudgy Chewy Browkies. This recipe is more than just a dessert; it’s a little slice of heaven, a perfect marriage of two beloved classics, destined to become a staple in your baking repertoire. From my kitchen to yours, I hope these browkies bring as much joy and comfort to your home as they do to mine. Don’t forget to tag Savvy Bites if you share your creations on social media – I’d love to see them!
Happy baking, and remember: life’s too short for boring desserts. Pin this recipe for later and get ready to indulge!
Fudgy Chewy Browkies (Brookies) Recipe – Savvy Bites
Ingredients
- For the Cookie Layer:
- 1/2 cup (113g) unsalted butter, softened
- 1/2 cup (100g) granulated sugar
- 1/4 cup (50g) packed light brown sugar
- 1 large egg, room temperature
- 1 teaspoon vanilla extract
- 1 1/4 cups (150g) all-purpose flour
- 1/2 teaspoon baking soda
- 1/4 teaspoon salt
- 1 cup (180g) semi-sweet chocolate chips
- For the Brownie Layer:
- 1/2 cup (113g) unsalted butter
- 4 ounces (113g) unsweetened chocolate, chopped
- 1 1/2 cups (300g) granulated sugar
- 3 large eggs, room temperature
- 1 teaspoon vanilla extract
- 1 cup (120g) all-purpose flour
- 1/2 teaspoon baking powder
- 1/4 teaspoon salt
- 1/2 cup (90g) semi-sweet chocolate chips (optional, for topping)
Instructions
- Step 1 Preheat Oven & Prepare Pan: Preheat your oven to 350°F (175°C). Line a 9x13 inch baking pan with parchment paper, leaving an overhang on the sides. Lightly grease the pan beneath the parchment.
- Step 2 Make the Cookie Layer: In a large bowl, cream together softened butter, granulated sugar, and brown sugar until light and fluffy. Beat in the egg and vanilla extract until well combined. In a separate bowl, whisk together flour, baking soda, and salt. Gradually add the dry ingredients to the wet ingredients, mixing until just combined. Fold in the chocolate chips. Press this cookie dough evenly into the bottom of the prepared pan.
- Step 3 Prepare the Brownie Layer: In a medium microwave-safe bowl, melt the butter and chopped unsweetened chocolate together in 30-second intervals, stirring until smooth. Let cool slightly. In a large bowl, whisk together the granulated sugar, eggs, and vanilla extract until light. Pour in the cooled chocolate mixture and stir until combined. In a separate bowl, whisk together flour, baking powder, and salt. Gradually add the dry ingredients to the wet ingredients, mixing until just combined and no streaks of flour remain. Be careful not to overmix.
- Step 4 Assemble & Bake: Carefully spoon the brownie batter over the cookie dough layer, spreading it gently and evenly to cover the entire surface. If desired, sprinkle the optional extra chocolate chips over the top of the brownie layer. Bake for 28-32 minutes, or until the edges are set and a toothpick inserted into the center comes out with moist crumbs (not wet batter). The center may still look slightly gooey.
- Step 5 Cool & Cut: Remove the pan from the oven and let the browkies cool completely in the pan on a wire rack. This is crucial for fudginess and clean cuts. Once fully cooled (this can take 2-3 hours or more), use the parchment paper overhang to lift the browkies out of the pan. Cut into squares and serve. Enjoy your fudgy, chewy browkies!