The Best Easy Rhubarb Crisp Recipe [Video Tutorial!]
There’s something incredibly nostalgic about the arrival of spring, isn’t there? For me, it’s always been synonymous with the first ruby-red stalks of rhubarb emerging from the garden. I remember my grandmother, with flour dusted on her apron and a twinkle in her eye, always declared that the first rhubarb harvest signaled the true start of warmer days. Her kitchen would fill with the sweet, tangy aroma of baking, and this Easy Rhubarb Crisp [Recipe with Video] was always the star.
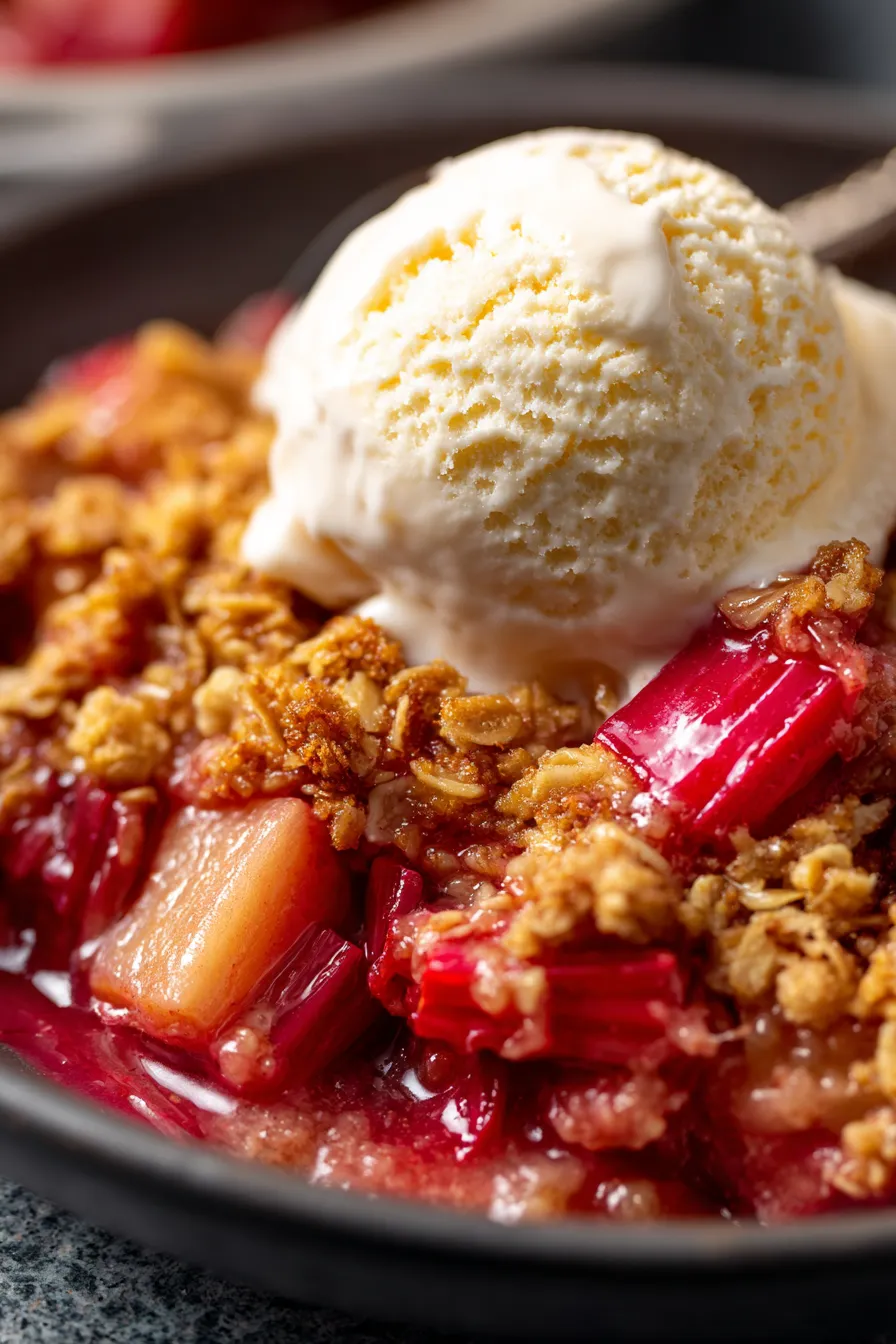
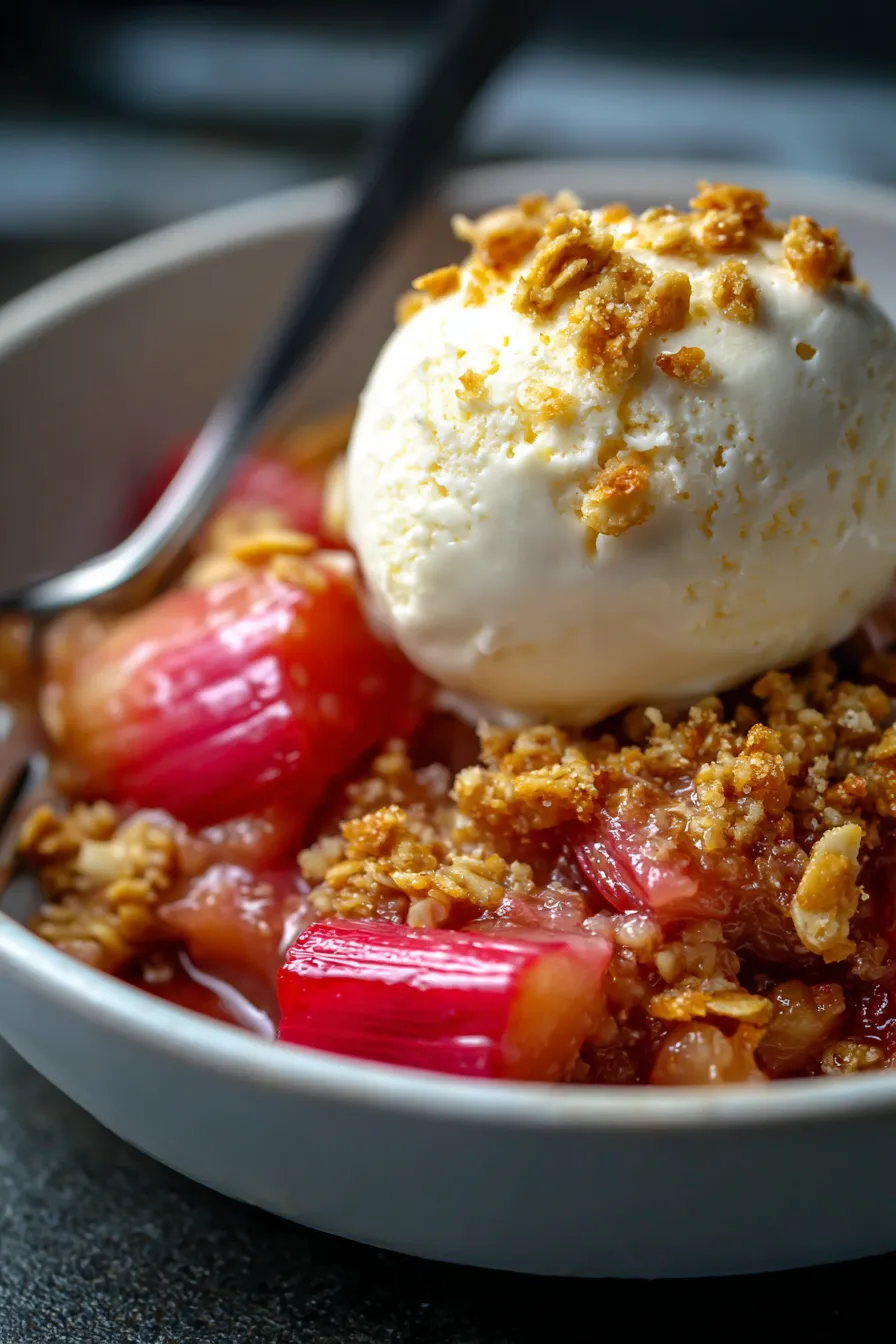
It was her go-to comfort food dessert for rainy Sunday family dinners, served warm with a generous dollop of vanilla ice cream. The combination of the tart, tender rhubarb and the sweet, buttery, crunchy oat topping is simply divine. This recipe is a cherished family favorite, tested countless times, and guaranteed to bring that same warm, fuzzy feeling to your home. It’s truly the perfect spring dessert.
If you’re looking for an effortless yet impressive seasonal treat, you’ve found it. This recipe isn’t just easy; it’s a celebration of simple, wholesome ingredients creating magic. Get ready to fall in love with the classic flavors of spring!
Why You’ll Love This Recipe
❤️ Here are just a few reasons why this Easy Rhubarb Crisp will become your new favorite:
- Effortlessly Simple: This recipe truly lives up to its ‘easy’ name. With straightforward steps and common pantry ingredients, you can whip this up in no time, even if you’re new to baking. It’s perfect for busy weeknights or impromptu gatherings.
- Perfect Balance of Flavors: The natural tartness of fresh rhubarb is beautifully complemented by the sweetness of the sugar and the warm spices in the crisp topping. Each bite offers a delightful dance of sweet and tangy notes that awaken your palate.
- Irresistible Texture Contrast: Imagine digging into a warm bowl where tender, soft rhubarb filling meets a golden-brown, crunchy, buttery oat topping. The textural interplay is pure bliss and incredibly satisfying. The oats add a rustic, wholesome chewiness that you’ll adore.
- Seasonal Delight: Rhubarb is a true sign of spring! This recipe allows you to celebrate and savor the fresh flavors of the season. It’s a wonderful way to utilize a bountiful harvest or simply enjoy a taste of spring’s bounty.
- Incredibly Versatile: While fantastic on its own, this crisp truly shines when paired with a scoop of vanilla ice cream, a dollop of whipped cream, or even a drizzle of custard. It’s also delicious for breakfast the next day, if there’s any left!
- A Crowd-Pleaser: From casual family dinners to more formal potlucks, this rhubarb crisp is always a hit. Its comforting aroma and delectable taste make it universally loved. You’ll be asked for the recipe every time!
- Beginner-Friendly Video: The included video tutorial makes following along even easier. Visual learners will appreciate the step-by-step guidance, ensuring perfect results every time. It’s like having a baking buddy right in your kitchen!
- Warm & Comforting: There’s something inherently comforting about a warm, bubbly fruit crisp straight from the oven. It’s the ultimate dessert for cozy nights in, bringing warmth and joy with every spoonful.
- Make-Ahead Friendly: You can prepare the crisp ahead of time and bake it just before serving, making entertaining a breeze. It also reheats beautifully, so you can enjoy leftovers for days.
- Uses Simple Ingredients: No fancy or hard-to-find ingredients needed here! Just fresh rhubarb, common baking staples like flour, sugar, butter, and oats. You likely have most of them in your pantry already.
What You Need
You only need a few simple pantry staples and fresh, vibrant rhubarb for this recipe! Check the full printable recipe card below for detailed measurements of each ingredient.
Expert Tips
💡 Master your rhubarb crisp with these essential tips:
- Choose Fresh Rhubarb Wisely: Look for firm, bright red, or pink stalks. Avoid any that are limp, bruised, or starting to dry out. The redder the stalks, the more vibrant the color will be in your finished crisp, though green rhubarb is perfectly fine to eat and tastes just as good.
- Don’t Peel the Rhubarb: Unlike some other fruits, rhubarb doesn’t need to be peeled! Its skin becomes tender when cooked. Just give it a good wash and trim off the very ends. This saves time and keeps all the good fiber!
- Cut Rhubarb Uniformly: Aim for pieces that are roughly 1/2 to 3/4-inch thick. This ensures that the rhubarb cooks evenly and becomes wonderfully tender throughout the crisp. Inconsistent sizes can lead to some pieces being too crunchy and others mushy.
- Avoid Overmixing the Topping: When preparing the oat topping, mix just until the butter is incorporated and the mixture forms coarse crumbs. Overmixing can develop the gluten in the flour, leading to a tougher topping rather than a perfectly crisp one.
- Chill Your Butter for Topping: Using cold butter for the crisp topping is crucial. It creates steam as it bakes, which results in those delightful pockets of flakiness and crispiness. You can even grate frozen butter for an extra flaky topping!
- Distribute Topping Evenly: Sprinkle the crisp topping over the rhubarb filling as evenly as possible. This ensures every bite gets a perfect ratio of fruit and crunchy topping, and it prevents any one spot from burning.
- Bake Until Bubbly & Golden: The crisp is done when the topping is golden brown and the rhubarb filling is visibly bubbling around the edges. This bubbling indicates that the fruit is cooked through and the sugars are properly caramelized. Don’t pull it out too early!
- Allow to Cool Slightly: It’s tempting to dive right in, but letting the crisp cool for at least 15-20 minutes after it comes out of the oven allows the filling to set up slightly. This makes it easier to serve and prevents it from being too runny.
- Pair with Vanilla Ice Cream: While delicious on its own, this rhubarb crisp truly shines with a scoop of high-quality vanilla bean ice cream. The cold, creamy sweetness beautifully contrasts with the warm, tart fruit and crunchy topping.
- Adjust Sweetness to Your Liking: Rhubarb’s tartness can vary. Taste a tiny piece of raw rhubarb (it will be very tart!) to gauge its acidity. If you prefer a sweeter dessert, you can add an extra tablespoon or two of sugar to the fruit filling mixture.
- Check for Doneness with a Fork: If you’re unsure if the rhubarb is tender, carefully insert a thin-tined fork into the fruit. It should slide in easily without resistance.
Variations & Substitutions
- Gluten-Free: Substitute the all-purpose flour in the crisp topping with a 1:1 gluten-free baking flour blend. Ensure your oats are certified gluten-free as well.
- Vegan: For a delicious vegan version, use a plant-based butter alternative (like Earth Balance sticks) in both the filling and the topping. Ensure your sugar is vegan-certified if needed.
- Add Other Fruits: Rhubarb pairs wonderfully with other fruits! Try adding 1 cup of sliced strawberries, diced apples, or raspberries to the rhubarb mixture for an added layer of flavor. Adjust sugar slightly if adding sweeter fruits.
- Spice It Up: A pinch of ground ginger, nutmeg, or cardamom can elevate the flavor profile. A teaspoon of lemon zest in the fruit filling can also brighten the taste.
- Nutty Topping: Add 1/2 cup of chopped pecans or walnuts to the oat topping for extra crunch and nutty flavor.
- Lighter Version: Reduce the amount of sugar slightly if your rhubarb is less tart, or if you prefer a less sweet dessert. You can also use half whole wheat flour in the topping for a slightly healthier spin.

Storage & Freezing
To Store: Once cooled, cover leftover rhubarb crisp tightly with plastic wrap or aluminum foil. Store at room temperature for up to 2 days, or in the refrigerator for up to 4-5 days. Reheat individual servings in the microwave or a toaster oven until warmed through.
To Freeze: You can freeze baked rhubarb crisp. Let it cool completely, then cover tightly with plastic wrap and then foil. Freeze for up to 3 months. Thaw overnight in the refrigerator, then reheat in a 350°F (175°C) oven until bubbly and warmed through, covering with foil if the topping starts to brown too much.
FAQ
Q: Do I need to peel the rhubarb?
A: No, you typically do not need to peel rhubarb! The skin softens nicely during baking. Simply wash the stalks thoroughly and trim off any tough ends. This saves time and retains the vibrant color.
Q: Can I use frozen rhubarb?
A: Yes, you can! If using frozen rhubarb, do not thaw it first. Toss the frozen rhubarb directly with the sugar and other filling ingredients. You may need to add an extra tablespoon of flour or cornstarch to the filling to absorb any excess moisture released from the frozen fruit, and bake for an additional 10-15 minutes.
Q: How do I know when the crisp is done?
A: Your rhubarb crisp is perfectly done when the topping is golden brown and the fruit filling around the edges is visibly bubbly. You can also carefully insert a thin knife or fork into the filling to check if the rhubarb is tender. It should offer very little resistance.
This Easy Rhubarb Crisp is more than just a dessert; it’s a celebration of spring, a hug in a bowl, and a memory waiting to be made. I hope you and your loved ones enjoy every single spoonful. Don’t forget to pin this recipe for later so you can make it again and again!

Easy Rhubarb Crisp Recipe | Sweet & Tart Spring Dessert
Ingredients
- 5 cups fresh rhubarb, cut into 3/4-inch pieces
- 1/2 cup granulated sugar (adjust to taste)
- 2 tbsp all-purpose flour or cornstarch (for filling)
- 1 tsp vanilla extract
- 1/4 tsp ground cinnamon
- 1/2 cup all-purpose flour (for topping)
- 1/2 cup packed light brown sugar
- 1/2 cup rolled oats (old-fashioned)
- 1/2 tsp ground cinnamon (for topping)
- 1/4 tsp salt
- 1/2 cup (1 stick) cold unsalted butter, cut into small cubes
Instructions
- Step 1 Preheat oven to 375°F (190°C). Lightly grease an 8x8 or 9x9 inch baking dish.
- Step 2 In a large bowl, combine the chopped rhubarb, granulated sugar, 2 tbsp flour/cornstarch, 1 tsp vanilla extract, and 1/4 tsp cinnamon. Toss to coat evenly. Pour the rhubarb mixture into the prepared baking dish.
- Step 3 In a separate medium bowl, combine 1/2 cup flour, brown sugar, oats, 1/2 tsp cinnamon, and salt. Add the cold butter cubes and, using your fingers or a pastry blender, cut the butter into the dry ingredients until coarse crumbs form.
- Step 4 Evenly sprinkle the oat topping over the rhubarb mixture in the baking dish.
- Step 5 Bake for 35-45 minutes, or until the topping is golden brown and the rhubarb filling is bubbly and tender. If the topping starts to brown too quickly, you can loosely tent the dish with foil.
- Step 6 Remove from oven and let cool for at least 15-20 minutes before serving. This allows the filling to set slightly. Serve warm with vanilla ice cream or whipped cream, if desired.