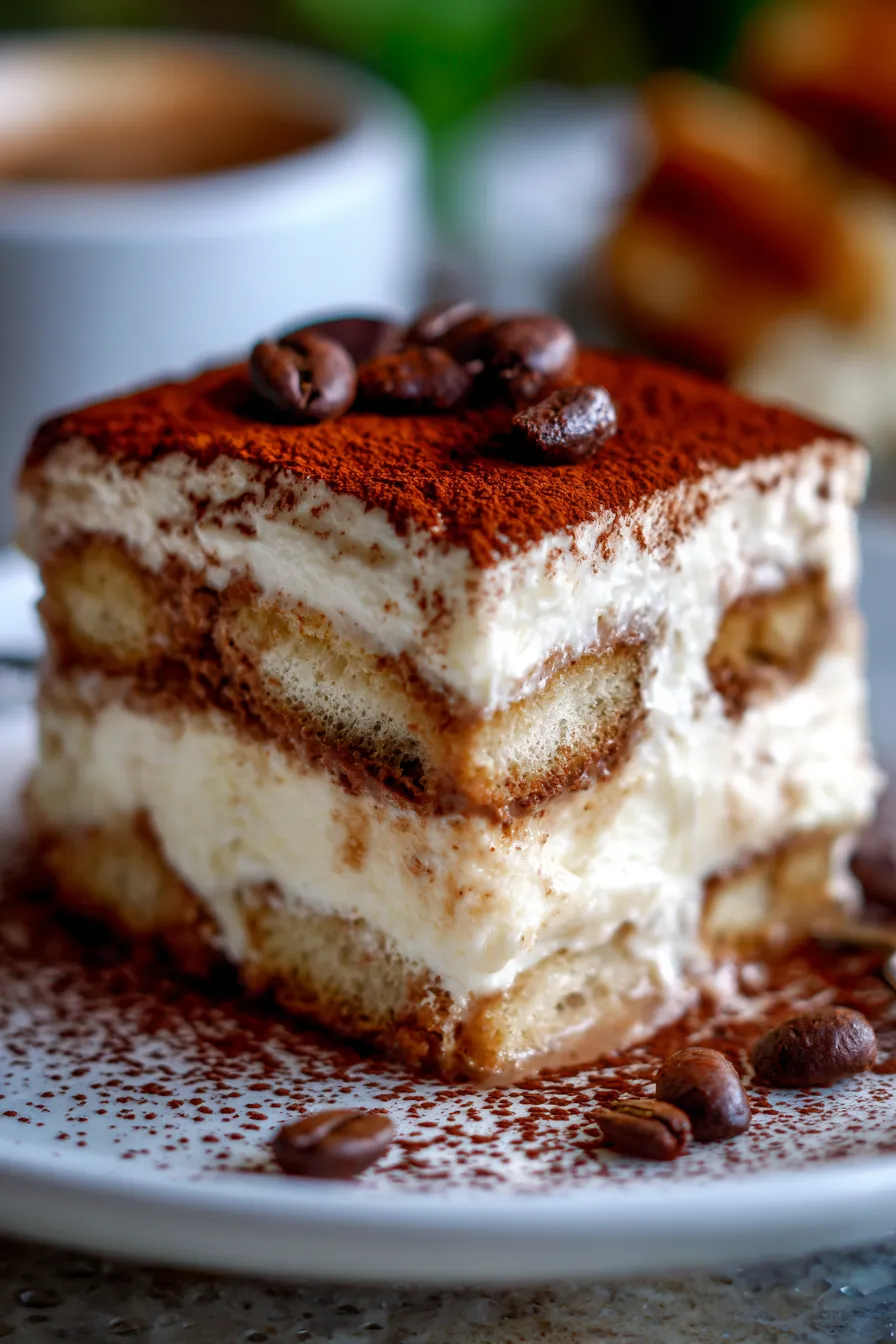
The Ultimate No-Bake Tiramisu Icebox Cake Recipe
There are some desserts that just whisper ‘comfort’ and ‘celebration’ all at once, and for me, a classic Tiramisu has always been one of them. I remember those rainy Sunday afternoons at my grandmother’s house, the smell of strong coffee brewing, and her magically producing an elegant, make-ahead treat without ever turning on the oven. That’s where my love affair with no-bake desserts, and particularly this incredible Tiramisu Icebox Cake, truly began.
This isn’t just any recipe; it’s a cherished family favorite, perfected over many years to bring you all the iconic flavors of Italy’s most beloved dessert with absolutely none of the fuss. It’s an easy dessert, a glorious make-ahead treat, and frankly, a lifesaver when you need something show-stopping without the stress. Every bite is pure, creamy, coffee-infused bliss!
Whether you’re hosting a dinner party, planning a potluck, or simply craving something sweet and satisfying, this tested Tiramisu Icebox Cake recipe promises to deliver. Get ready to impress yourself and everyone lucky enough to grab a slice of this heavenly creation.
Why You’ll Love This Recipe
❤️ Here’s why this Tiramisu Icebox Cake will quickly become a cherished part of your dessert repertoire:
- No-Bake Perfection: Say goodbye to hot ovens and complicated baking steps! This recipe requires absolutely no baking, making it perfect for summer gatherings, busy holidays, or when you simply don’t want to heat up your kitchen. It’s incredibly convenient and simplifies dessert preparation.
- Classic Tiramisu Flavor, Simplified: You get all the authentic, rich flavors of traditional tiramisu – the robust coffee, the creamy mascarpone, and the subtle hint of cocoa – but without the need for eggs or an elaborate custard. It’s the ultimate shortcut to a gourmet dessert experience.
- Make-Ahead Marvel: This cake actually tastes *better* the longer it sits! Preparing it a day or even two in advance allows the flavors to meld beautifully and the ladyfingers to soften perfectly. This makes it an ideal choice for entertaining, freeing you up to enjoy your guests without last-minute stress.
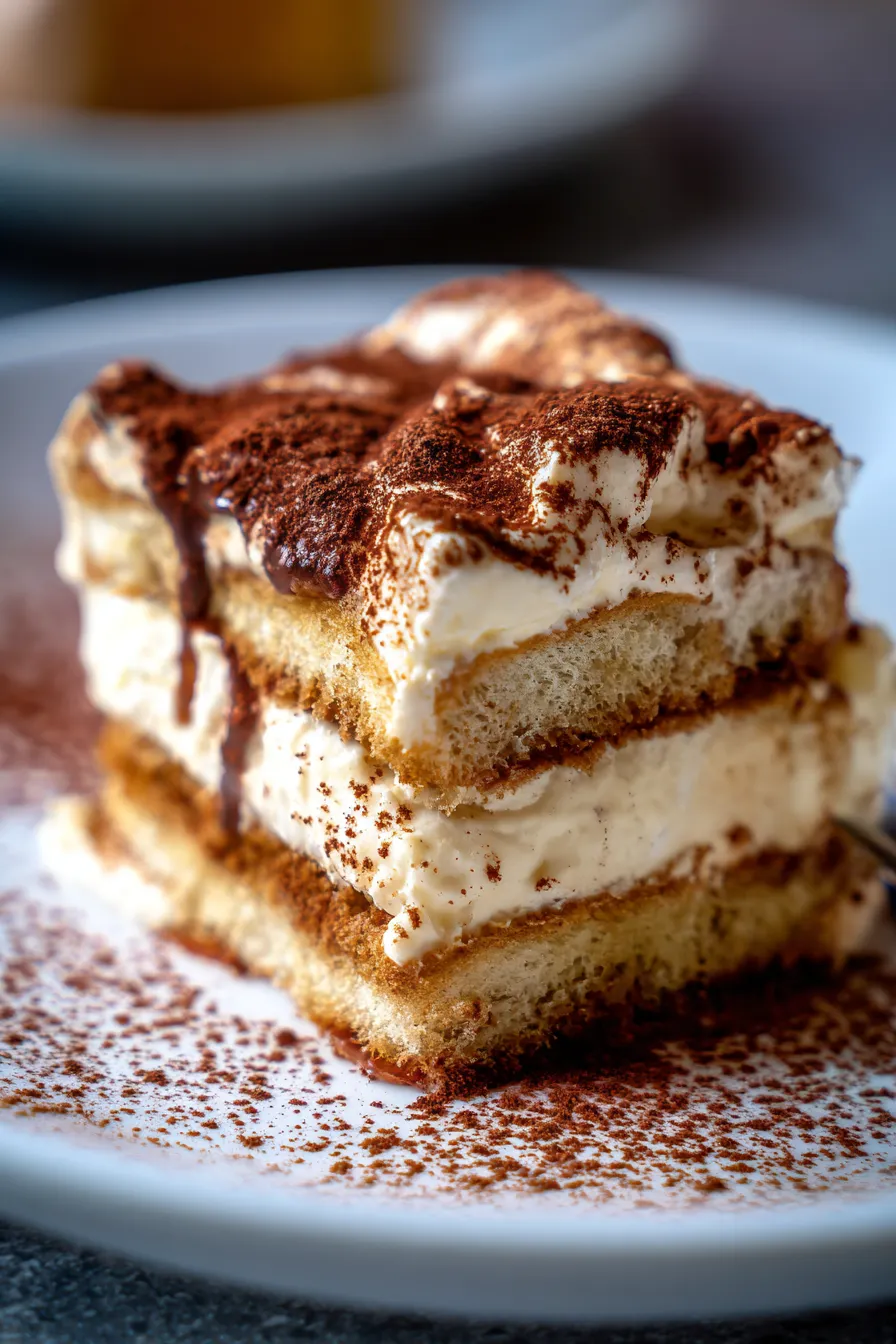
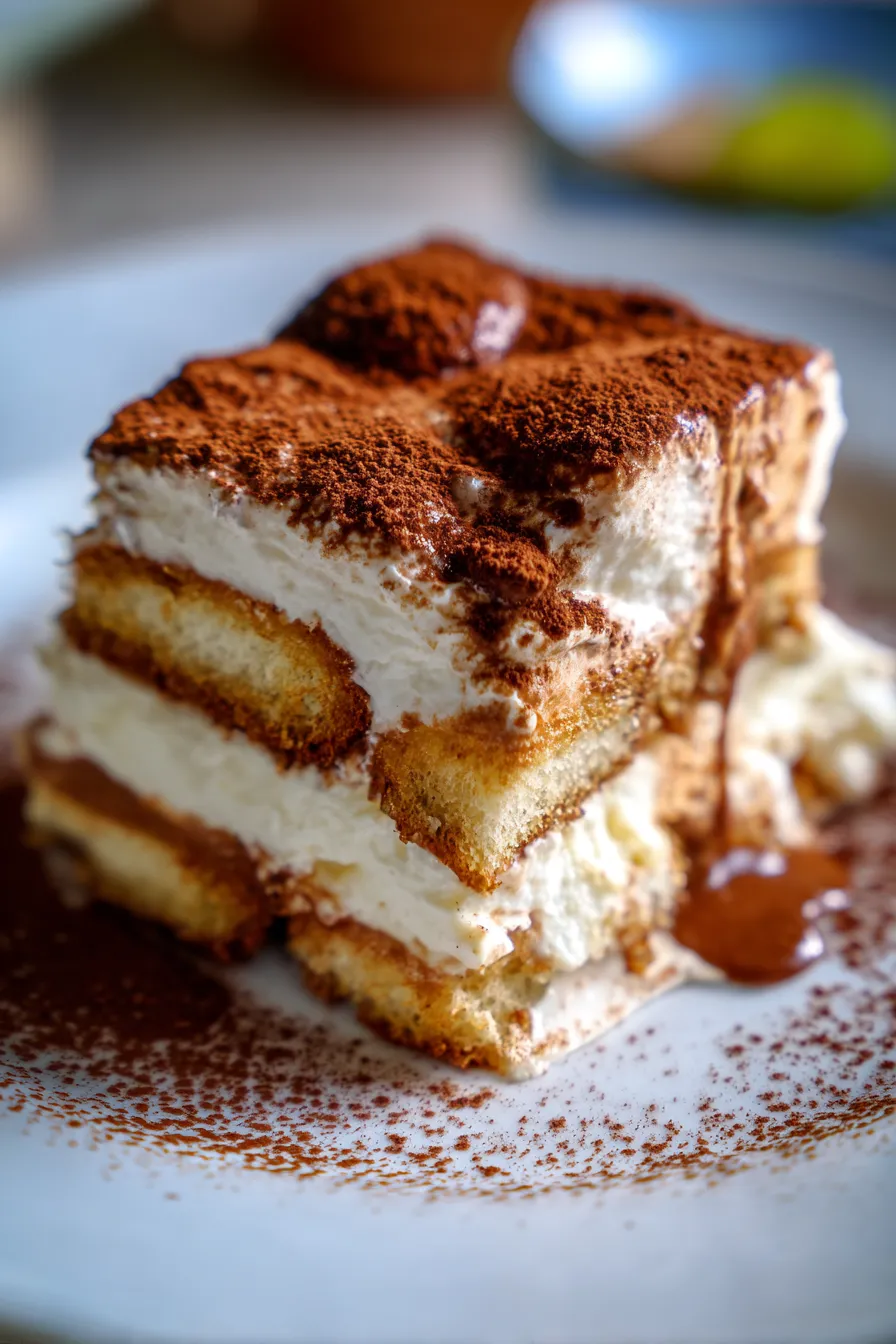
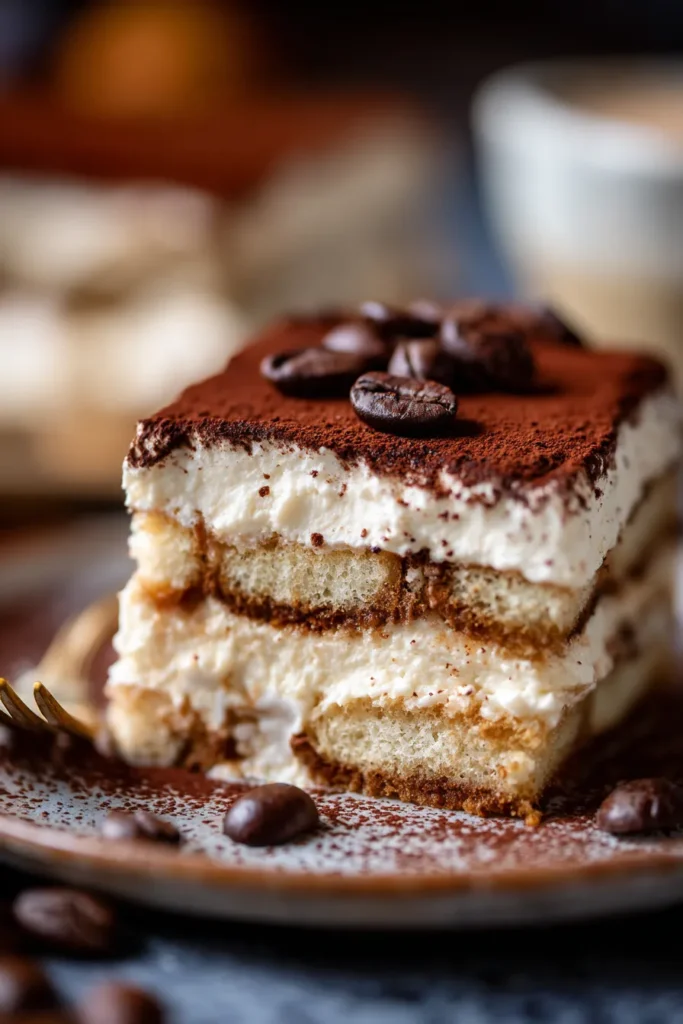
- Effortlessly Elegant Presentation: Despite its ease, this Tiramisu Icebox Cake looks incredibly impressive. Layers of cream and coffee-soaked biscuits, crowned with a dusting of cocoa, create a stunning visual that’s sure to garner compliments. It’s perfect for special occasions or just a fancy weeknight treat.
- Crowd-Pleasing Perfection: Tiramisu is universally loved, and this icebox cake version is no exception. Its delicate balance of sweet, bitter, and creamy textures appeals to almost everyone, guaranteeing happy faces and empty plates. It’s a guaranteed hit at any gathering.
- Foolproof & Fun: Even if you consider yourself a novice in the kitchen, you can master this recipe with ease. The steps are straightforward, and the process is forgiving, making it a truly enjoyable and stress-free dessert to create. It’s a wonderful way to build confidence in your dessert-making skills!
What You Need
You only need a few simple pantry staples for this recipe! You’ll be amazed at how such humble ingredients can come together to create something so utterly decadent. Check the full printable recipe card below for detailed measurements and a complete list.
Expert Tips for Tiramisu Icebox Cake Success
💡 Master this no-bake wonder with these pro tips:
- Use High-Quality Ingredients: The beauty of a simple recipe shines through when you use the best. Opt for a rich, strong-brewed espresso (or good quality instant espresso powder), fresh, full-fat mascarpone cheese, and a robust Dutch-processed cocoa powder. These make a significant difference in the final flavor profile.
- Perfectly Chill Your Cream: For the best whipped cream, ensure your heavy cream, mixing bowl, and even your whisk attachment are very cold. This helps the cream whip up faster and hold its stiff peaks, crucial for the cake’s structure and creamy texture.
- Don’t Over-Soak the Ladyfingers: This is perhaps the most critical tip! Ladyfingers are like sponges. A quick dip – literally 1-2 seconds per side – is all they need. Over-soaking will result in a soggy cake, which is definitely not what we’re aiming for. You want them just moistened enough to absorb flavor.
- Allow Ample Chill Time: Patience is a virtue, especially with icebox cakes. A minimum of 6 hours in the refrigerator is essential for the ladyfingers to soften and the flavors to fully meld. For the absolute best results, I highly recommend chilling it overnight (12-24 hours). This transforms the cake into a unified, luscious dessert.
- Choose Your Coffee Wisely: Strong, cold espresso is ideal. If you don’t have an espresso machine, use a French press or Moka pot for a concentrated brew, or dissolve 2-3 tablespoons of instant espresso powder in 1 cup of hot water and cool completely. The coffee flavor is paramount!
- Gentle Folding is Key: When incorporating the whipped cream into the mascarpone, do so gently using a spatula. Overmixing can deflate the whipped cream and make the mascarpone mixture grainy. You want a light, airy, and smooth cream.
- Dust Just Before Serving: While it’s tempting to dust the cocoa powder right away, for the freshest look and flavor, wait until just before you’re ready to serve. This prevents the cocoa from becoming damp and ensures a beautiful, striking contrast.
Variations & Substitutions
This Tiramisu Icebox Cake is wonderfully adaptable! Feel free to get creative and make it your own.
- Alcohol-Free: Omit the Kahlua or rum entirely, or substitute with 1/2 teaspoon of rum extract or coffee liqueur extract mixed into your espresso.
- Gluten-Free: If you can find gluten-free ladyfingers, they work perfectly! Alternatively, you can use gluten-free vanilla wafers or graham crackers as your base, though the texture will be slightly different.
- Low-Carb/Keto: Replace granulated sugar with your favorite granulated sugar substitute (like erythritol or allulose). Look for low-carb ladyfingers or create your own almond flour-based cookie alternative.
- Chocolate Lovers: Add a layer of finely grated dark chocolate between the cream layers for an extra decadent touch. You could also drizzle a little chocolate syrup on top.
- Citrus Twist: A little orange zest (1 teaspoon) added to the mascarpone cream can brighten the flavors beautifully.
Storage & Freezing
This cake is fantastic for making ahead! Once assembled, store your Tiramisu Icebox Cake tightly covered with plastic wrap in the refrigerator for up to 3-4 days. The flavors will deepen, and the texture will become even more harmonious. While you can freeze individual slices in an airtight container for up to 2 weeks, the texture of the cream can become slightly altered upon thawing, so it’s best enjoyed fresh from the fridge.
FAQ
Can I use instant coffee instead of brewed espresso?
Absolutely! For a strong coffee flavor, dissolve 2-3 tablespoons of good quality instant espresso powder or strong instant coffee in 1 cup of hot water. Make sure it cools completely before dipping the ladyfingers.
How long does Tiramisu Icebox Cake need to chill?
A minimum of 6 hours is essential for the ladyfingers to soften and the flavors to meld together. For the very best results, chilling it overnight (12-24 hours) is highly recommended. The longer it chills, the more amazing the texture and taste become!
What if I can’t find ladyfingers? Are there alternatives?
If traditional ladyfingers are hard to find, you have a few options! You can use thin slices of pound cake, vanilla wafers, or even graham crackers. Keep in mind these alternatives will absorb liquid differently, so adjust your dipping time accordingly to avoid sogginess.
Can I make this cake ahead of time for a party?
Yes, absolutely! This is one of the biggest advantages of an icebox cake. Preparing it 1-2 days in advance actually enhances its flavor and texture, making it perfect for entertaining. Just cover it tightly and keep it refrigerated.
Ready to Make Your Dream Dessert?
This Tiramisu Icebox Cake is more than just a dessert; it’s a sweet escape, a perfect ending to any meal, and a delightful way to gather loved ones. It embodies simplicity without sacrificing sophistication or flavor. Pin this recipe for later, share it with friends, and get ready to fall in love with your new favorite no-bake treat!
Easy No-Bake Tiramisu Icebox Cake – Perfect Dessert!
Ingredients
- 24-30 pieces Savoiardi ladyfingers (approx. 2 x 7oz packages)
- 1 cup strong brewed espresso, cooled
- 2 tbsp Kahlua or dark rum (optional, or use coffee extract)
- 16 oz (2 blocks) mascarpone cheese, softened
- 1.5 cups heavy cream, very cold
- 3/4 cup granulated sugar
- 1 tsp pure vanilla extract
- 2-3 tbsp unsweetened cocoa powder, for dusting
Instructions
- Step 1 Brew espresso and let it cool completely. If using, stir in Kahlua or rum. Pour into a shallow dish.
- Step 2 In a large, chilled bowl, combine very cold heavy cream, granulated sugar, and vanilla extract. Beat with an electric mixer on high speed until stiff peaks form (the cream should hold its shape). Be careful not to over-beat.
- Step 3 In a separate medium bowl, gently whisk the softened mascarpone cheese until smooth. It should be light and airy. Do not overmix.
- Step 4 Carefully fold about one-third of the whipped cream into the mascarpone until just combined. Then, gently fold in the remaining whipped cream until no streaks remain. Be gentle to maintain the airiness.
- Step 5 Quickly dip each ladyfinger into the cooled espresso mixture, one by one. Dip only for 1-2 seconds per side; do not over-soak, or they will become soggy. Arrange a single layer of dipped ladyfingers in the bottom of a 9x13 inch baking dish, breaking some to fit if necessary.
- Step 6 Spread half of the mascarpone cream mixture evenly over the layer of ladyfingers.
- Step 7 Repeat with another layer of dipped ladyfingers, followed by the remaining mascarpone cream mixture. Smooth the top with a spatula.
- Step 8 Cover the dish tightly with plastic wrap and refrigerate for at least 6 hours, or preferably overnight (12-24 hours), to allow the cake to set and flavors to meld.
- Step 9 Just before serving, use a fine-mesh sieve to generously dust the top of the Tiramisu Icebox Cake with unsweetened cocoa powder. Slice and serve chilled. Enjoy!