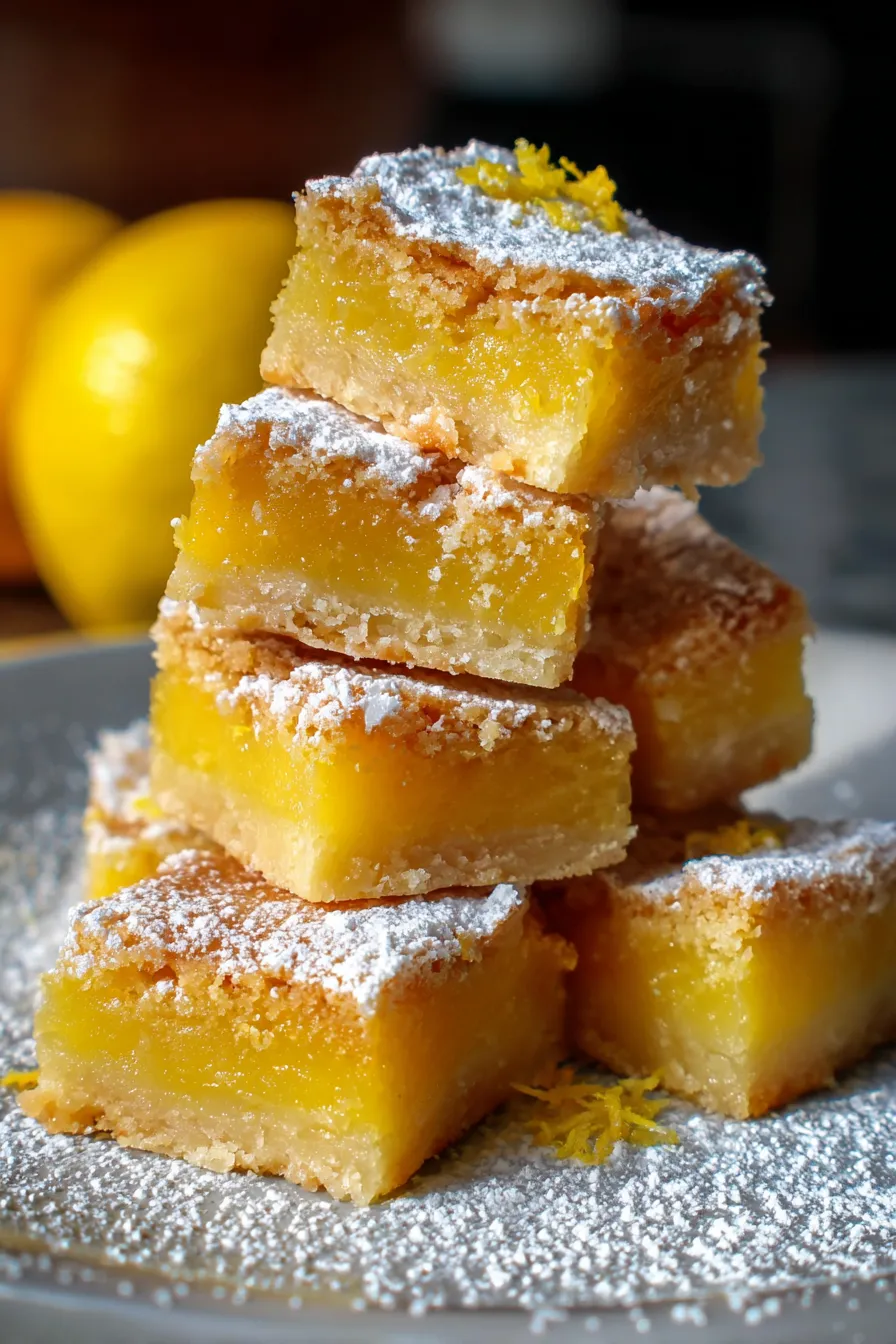
Best Ever Easy Lemonies & Lemon Bars Recipe: Zesty Sunshine in Every Bite!
My earliest memory of sunshine in a pan isn’t from a summer picnic, but a dreary, rain-soaked afternoon when I was about eight. My grandmother, with her hands dusted in flour, was whipping up something magical. The scent of fresh lemons filled her cozy kitchen, instantly chasing away the gloom. That day, she introduced me to the joy of homemade “Lemonies! Lemon bars! EASY! Recipe in details” – a true revelation of a zesty dessert.
It wasn’t just a treat; it was comfort food, a burst of bright flavor that made even the grumpiest clouds seem a little less intimidating. Over the years, that recipe became a cherished family favorite, perfected and passed down. Every time I make them, I’m transported back to that warm kitchen, and the sheer delight of biting into that perfect balance of sweet and tart. This tested recipe is guaranteed to bring that same sunshine to your home.
Now, it’s your turn to experience that same magic. Imagine a fudgy, chewy lemon bar that’s quicker and easier than traditional lemon bars, yet still delivers all that vibrant citrus punch. This recipe is designed for ease, flavor, and pure, unadulterated joy. Get ready to fill your kitchen with the irresistible aroma of fresh lemons and create a dessert that will have everyone asking for more!
Why You’ll Love This Recipe
❤️ Here’s why these easy lemonies and lemon bars will become your new go-to:
- Seriously Easy to Make: Forget complicated techniques! This recipe comes together with minimal fuss, making it perfect for bakers of all skill levels, from beginners to seasoned pros. You’ll be amazed at how quickly you can whip up such an impressive treat.
- Bursting with Lemon Flavor: We’re talking pure, unadulterated lemon bliss! With both lemon zest and fresh lemon juice, every single bite is packed with a vibrant, tangy punch that will awaken your taste buds and leave you craving more.
- Perfectly Chewy Texture: Unlike some overly firm lemon bars, these lemonies boast a delightful, fudgy, and slightly chewy texture that makes them incredibly satisfying. They’re not just tart; they’re melt-in-your-mouth amazing.
- Beautifully Versatile: Whether you call them lemonies or lemon bars, these golden squares are perfect for any occasion. They’re ideal for potlucks, brunches, parties, or simply a sweet afternoon pick-me-up with a cup of tea.
- Uses Simple Pantry Staples: You likely have most of the ingredients on hand already! No fancy or hard-to-find items needed, just everyday basics transformed into something extraordinary. This makes spontaneous baking sessions a breeze.
- Crowd-Pleaser Guaranteed: From kids to adults, everyone adores the bright, refreshing taste of lemon. These bars are always a hit, disappearing quickly from any dessert spread. Prepare for compliments and requests for the recipe!
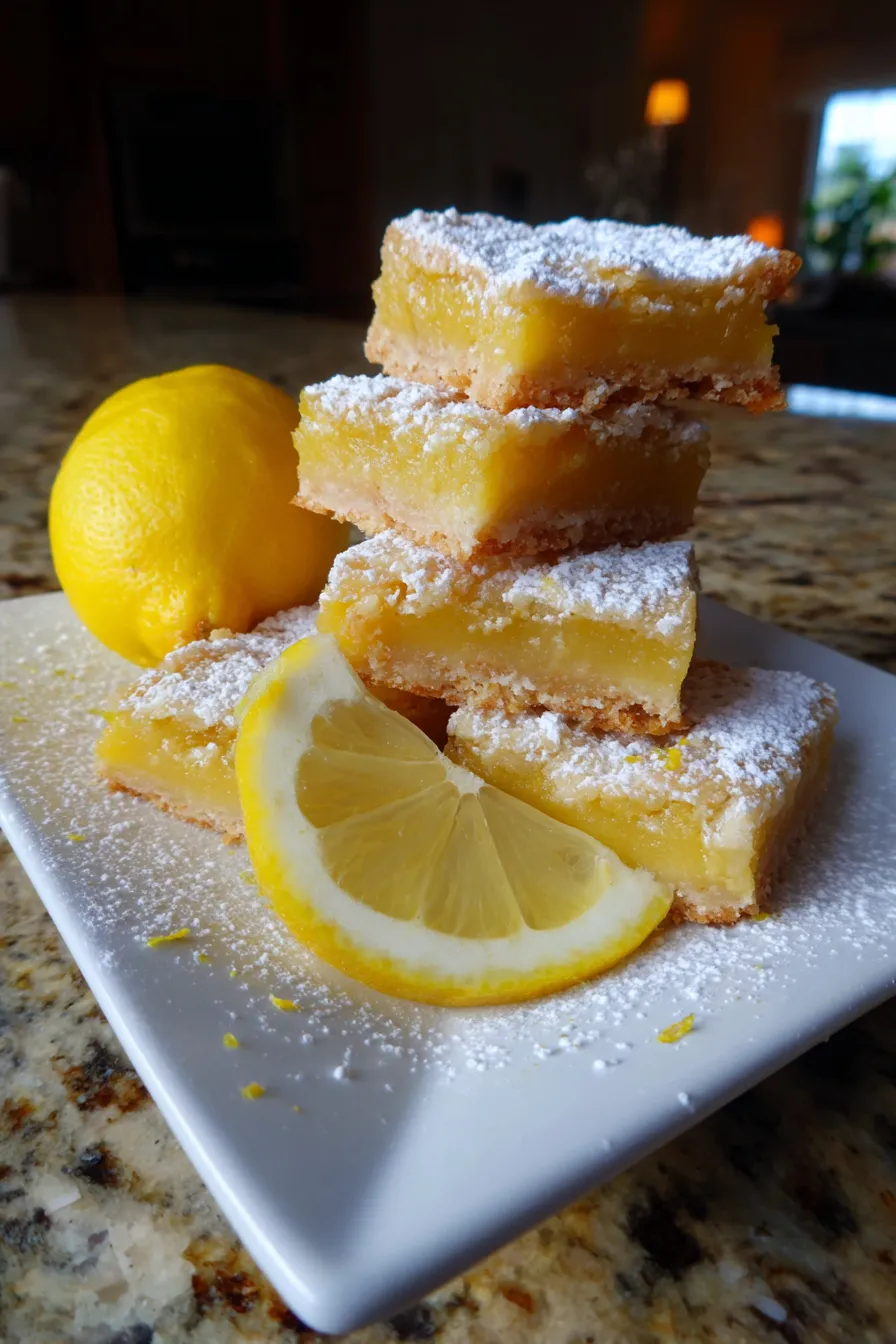
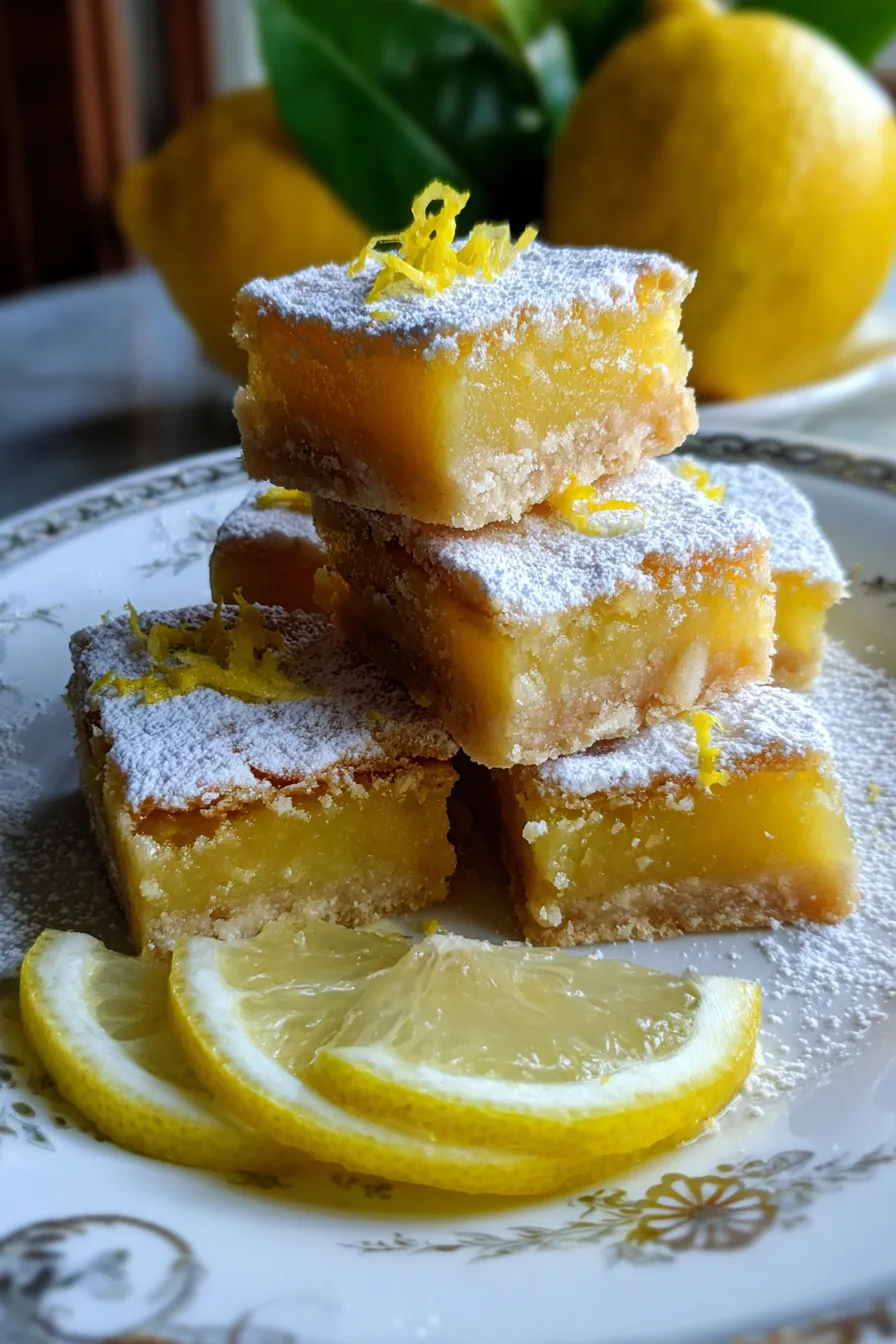
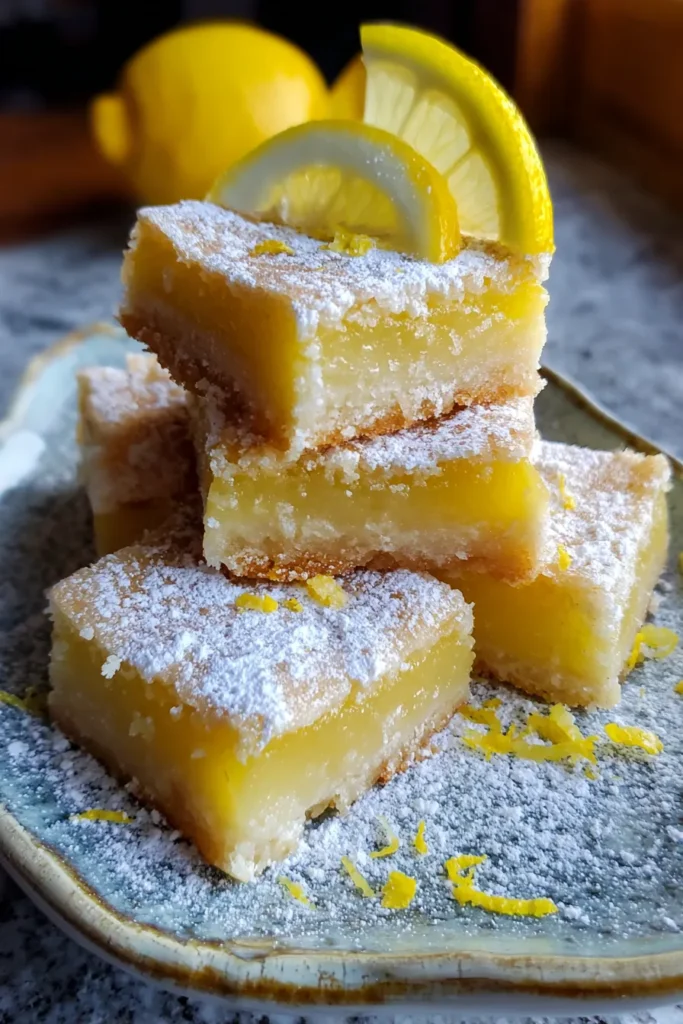
- Visually Appealing: Dusted with a delicate layer of powdered sugar, these lemon bars have a classic, elegant look that makes them irresistible. They look like they came straight from a gourmet bakery, but they’re homemade with love.
- Excellent Make-Ahead Option: These bars taste even better the next day once the flavors have had a chance to meld. This makes them a fantastic dessert to prepare in advance, reducing stress on busy days.
What You Need
You only need a few simple pantry staples for this recipe! We’re talking flour, sugar, eggs, butter, and, of course, plenty of fresh lemons. Check the full printable recipe card below for detailed measurements of these accessible ingredients. You’ll be surprised how something so simple can yield such incredible results!
Expert Tips
💡 Master these lemonies with these insider tips:
- Use Freshly Squeezed Lemon Juice and Zest: This is non-negotiable for the best flavor! Bottled lemon juice just doesn’t compare to the bright, aromatic zest and tangy juice from real lemons. It makes all the difference in achieving that signature vibrant taste.
- Don’t Overbake: Lemon bars should be just set. The edges will be golden, and the center might still have a slight jiggle. They will continue to set as they cool. Overbaking leads to a dry, crumbly texture instead of that desirable fudgy chew.
- Chill Thoroughly Before Slicing: Patience is key! Chilling the bars completely, ideally for at least 2-3 hours or even overnight, makes them much easier to slice into neat squares. This prevents them from crumbling and ensures clean cuts.
- Line Your Pan: Always line your baking pan with parchment paper, leaving an overhang on the sides. This creates “slings” that allow you to easily lift the entire slab of lemonies out of the pan for clean cutting and serving. It’s a lifesaver!
- Powdered Sugar Dusting: Dust the cooled bars generously with powdered sugar just before serving. Not only does it add a beautiful aesthetic, but it also provides a delicate sweetness that perfectly complements the tart lemon.
- Room Temperature Ingredients: Ensure your butter and eggs are at room temperature. This helps them emulsify better with the sugar, creating a smoother, more uniform batter and a lighter, more tender crust and filling.
- Zest Before Juicing: Always zest your lemons before you cut and juice them. It’s much easier to get all that fragrant zest when the lemon is whole and firm. You’ll maximize the lemon flavor this way.
- Adjust Sweetness to Taste: If you prefer a less tart bar, you can slightly increase the amount of granulated sugar in the filling, or add an extra dusting of powdered sugar. Conversely, for an extra pucker, reduce it slightly.
- Press Crust Firmly: When making the shortbread crust, press it firmly and evenly into the bottom of the pan. This ensures a compact, sturdy base that won’t crumble when sliced and provides a lovely contrast to the soft filling.
- Don’t Forget the Salt: A pinch of salt in both the crust and the filling enhances all the other flavors, especially the lemon. It balances the sweetness and makes the overall taste more complex and appealing.
Variations & Substitutions
While this classic lemon bar recipe is perfect as is, it’s also wonderfully adaptable! Feeling adventurous? Here are a few ways to customize them:
- Lime Twist: Swap out half or all of the lemon juice and zest for fresh lime to create vibrant Key Lime Bars.
- Orange Infusion: For a sweeter, milder citrus flavor, use orange juice and zest. A delightful change!
- Gluten-Free: Use your favorite 1:1 gluten-free all-purpose flour blend in place of regular flour for the crust and filling. Ensure it contains xanthan gum for best results.
- Extra Zest: If you’re a true lemon lover, grate in an extra teaspoon of lemon zest into the filling for an even more intense citrus punch.
- Coconut Crust: Add a quarter cup of shredded coconut to your shortbread crust mixture for a tropical twist.
Storage & Freezing
These Lemonies are fantastic for making ahead and storing!
- Countertop: While tempting, it’s best to store them in the refrigerator due to the fresh lemon filling.
- Refrigerator: Store leftover lemon bars in an airtight container in the refrigerator for up to 5-7 days. They taste wonderful chilled!
- Freezer: For longer storage, flash freeze individual bars on a baking sheet until firm, then transfer them to a freezer-safe airtight container or zip-top bag. They will keep for up to 3 months. Thaw in the refrigerator before serving.
FAQ
Q: Why are my lemon bars gooey/not setting?
A: This can happen if they are underbaked or if there wasn’t enough lemon juice/eggs to set properly. Ensure your oven temperature is accurate and bake until the edges are golden and the center has only a slight wobble. Chilling fully is also crucial for final setting.
Q: Can I use bottled lemon juice?
A: While you technically can, we highly recommend using fresh lemon juice and zest for the absolute best flavor. Bottled juice often lacks the vibrancy and natural oils found in fresh lemons, which are key to this recipe’s amazing taste.
Q: How do I prevent the crust from getting soggy?
A: The key is to fully pre-bake the shortbread crust until it’s light golden brown before adding the lemon filling. This creates a barrier and ensures a crisp, buttery base. Don’t skip this step!
Conclusion
And there you have it! Your new favorite recipe for bright, zesty, and perfectly chewy Lemonies! These delightful bars are truly sunshine in dessert form, perfect for brightening any day or occasion. I hope you cherish this easy recipe as much as my family and I do. Don’t forget to share your creations with me on social media, and if you loved this recipe, please leave a comment and rating below!
Pin this for later so you can always bring a little bit of sunshine into your kitchen!
Easy Lemonies & Lemon Bars Recipe: Zesty, Chewy & Simple!
Ingredients
- 1 ½ cups all-purpose flour
- ½ cup granulated sugar
- ½ cup cold unsalted butter, cubed
- 3 large eggs
- 1 cup granulated sugar (for filling)
- ¼ cup all-purpose flour (for filling)
- ½ cup fresh lemon juice
- 1 tbsp lemon zest
- Pinch of salt
- Powdered sugar for dusting
Instructions
- Step 1 Preheat oven to 350°F (175°C). Line a 8x8 or 9x9 inch baking pan with parchment paper, leaving an overhang.
- Step 2 For the crust, combine 1 ½ cups flour, ½ cup sugar, and cold butter in a food processor or with a pastry blender until crumbly. Press evenly into the prepared pan. Bake for 15-20 minutes, or until lightly golden.
- Step 3 While the crust bakes, prepare the filling. In a medium bowl, whisk together eggs, 1 cup sugar, ¼ cup flour, lemon juice, lemon zest, and a pinch of salt until well combined and smooth.
- Step 4 Pour the filling over the hot, pre-baked crust.
- Step 5 Return to the oven and bake for another 20-25 minutes, or until the edges are lightly golden and the center is just set with a slight jiggle. It will continue to set as it cools.
- Step 6 Let cool completely on a wire rack at room temperature. For best results, chill in the refrigerator for at least 2-3 hours (or overnight) before slicing.
- Step 7 Once thoroughly chilled, use the parchment paper overhang to lift the bars out of the pan. Dust generously with powdered sugar before cutting into squares and serving.