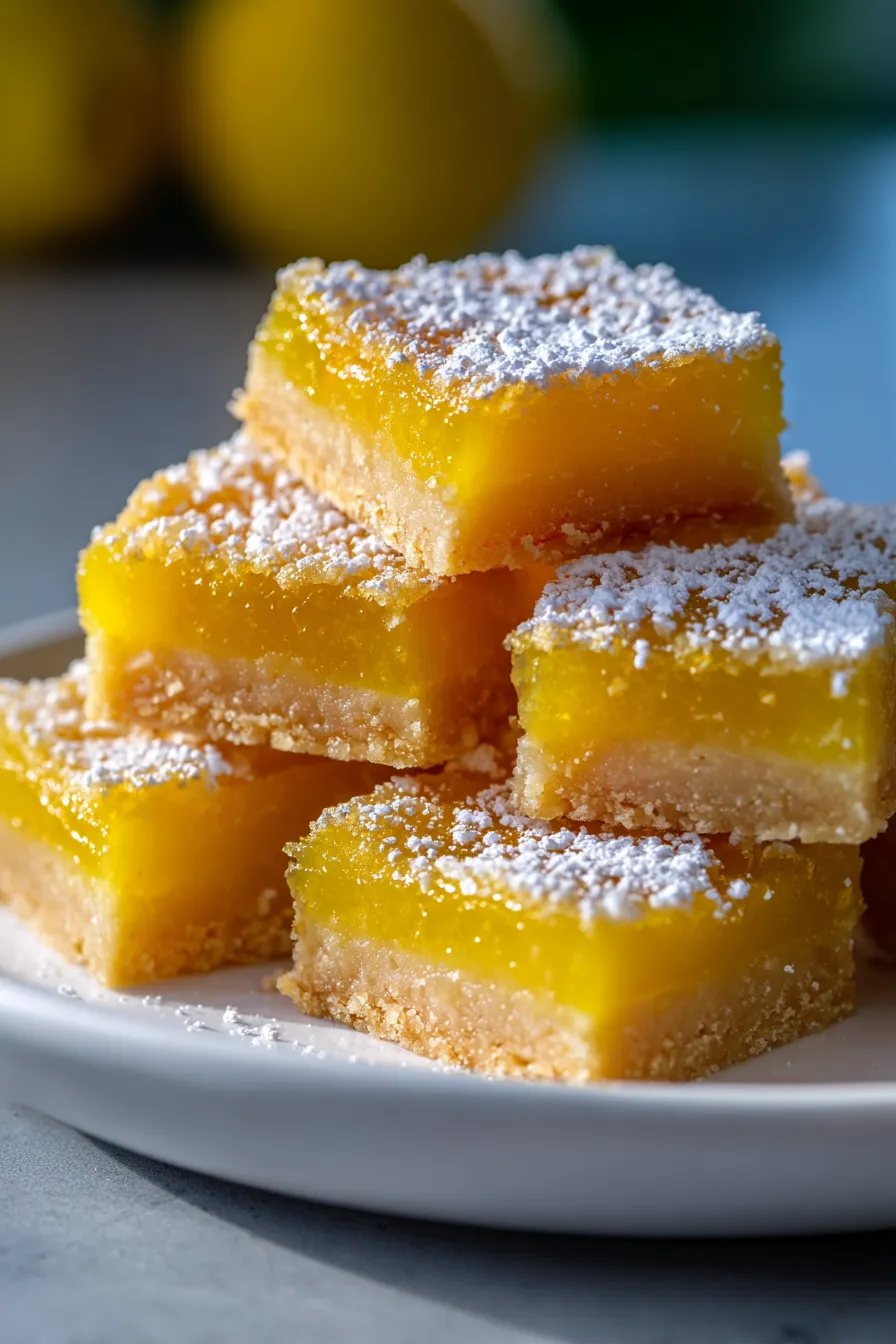
The Ultimate Easy Lemon Bar Recipe: Zesty & Sweet Perfection
Do you remember those childhood moments when a single bite could transport you? For me, it was always my grandmother’s kitchen, filled with the scent of lemons from her backyard tree, especially on a warm spring day. She’d always have a batch of her famous lemon bars cooling on the counter, their vibrant yellow beckoning. That simple, zesty sweet treat was more than just a dessert; it was a hug, a memory, pure joy in a square. It’s that exact feeling of sunshine and nostalgia I’ve poured into perfecting this Easy Lemon Bar Recipe.
Over the years, I’ve tried countless versions, but none quite captured that perfect balance of tangy lemon and sweet, buttery shortbread quite like hers, until now. This recipe isn’t just easy; it’s a meticulously tested, family-favorite dessert that consistently delivers a burst of bright, citrusy flavor. It’s perfect for a spring potluck, a delightful afternoon tea, or simply when you crave a comforting sweet treat that promises to brighten any day.
Get ready to create a dessert that will earn you rave reviews and become a staple in your kitchen. This is more than just a recipe; it’s an invitation to create those cherished, delicious memories for yourself and your loved ones. Let’s bake some sunshine!
Why You’ll Love This Recipe
❤️ Oh, let me count the ways you’ll fall head over heels for these luscious lemon bars:
- Effortlessly Easy: With a simple shortbread crust and a whisk-together lemon filling, these bars are surprisingly straightforward to make, even for novice bakers.
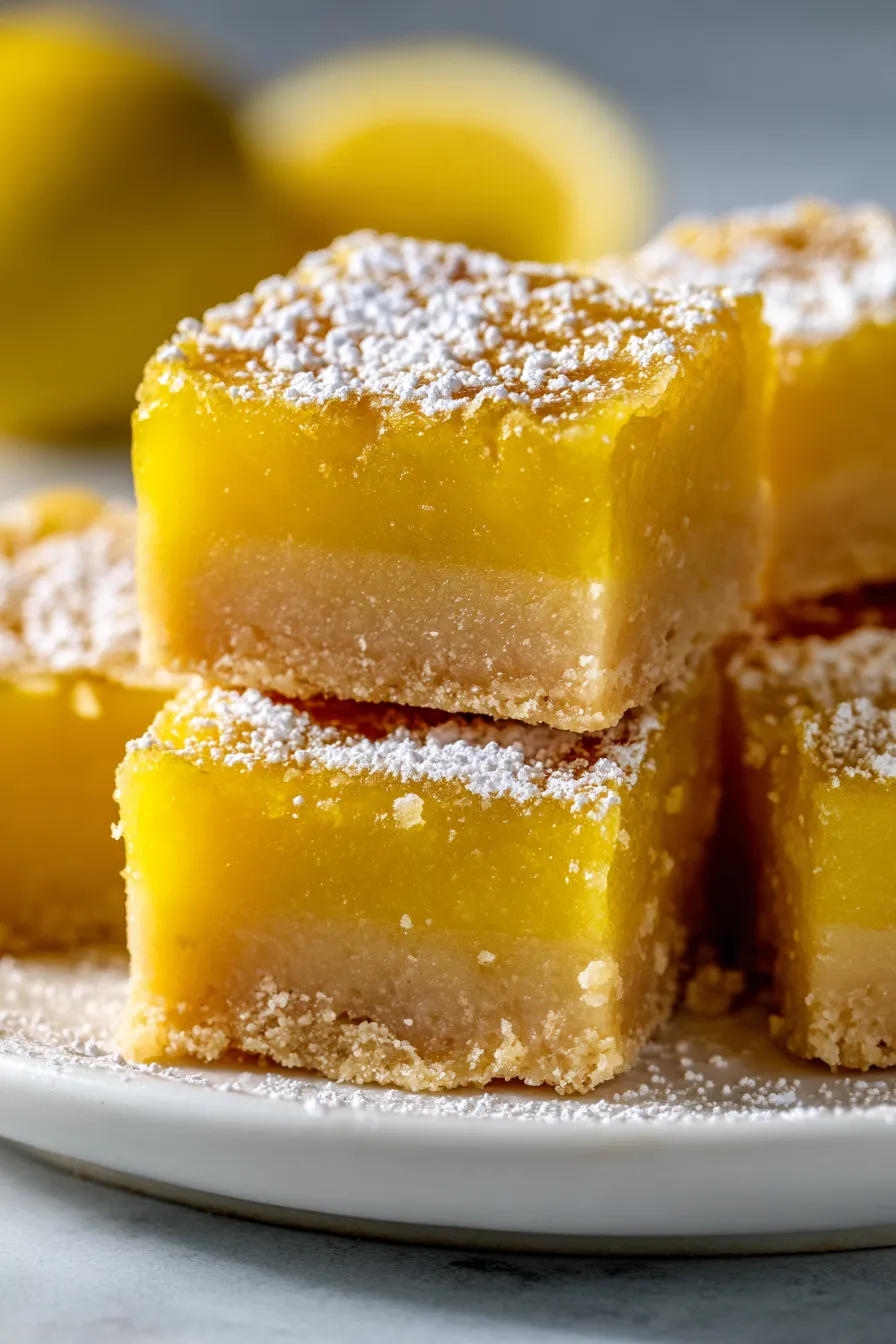
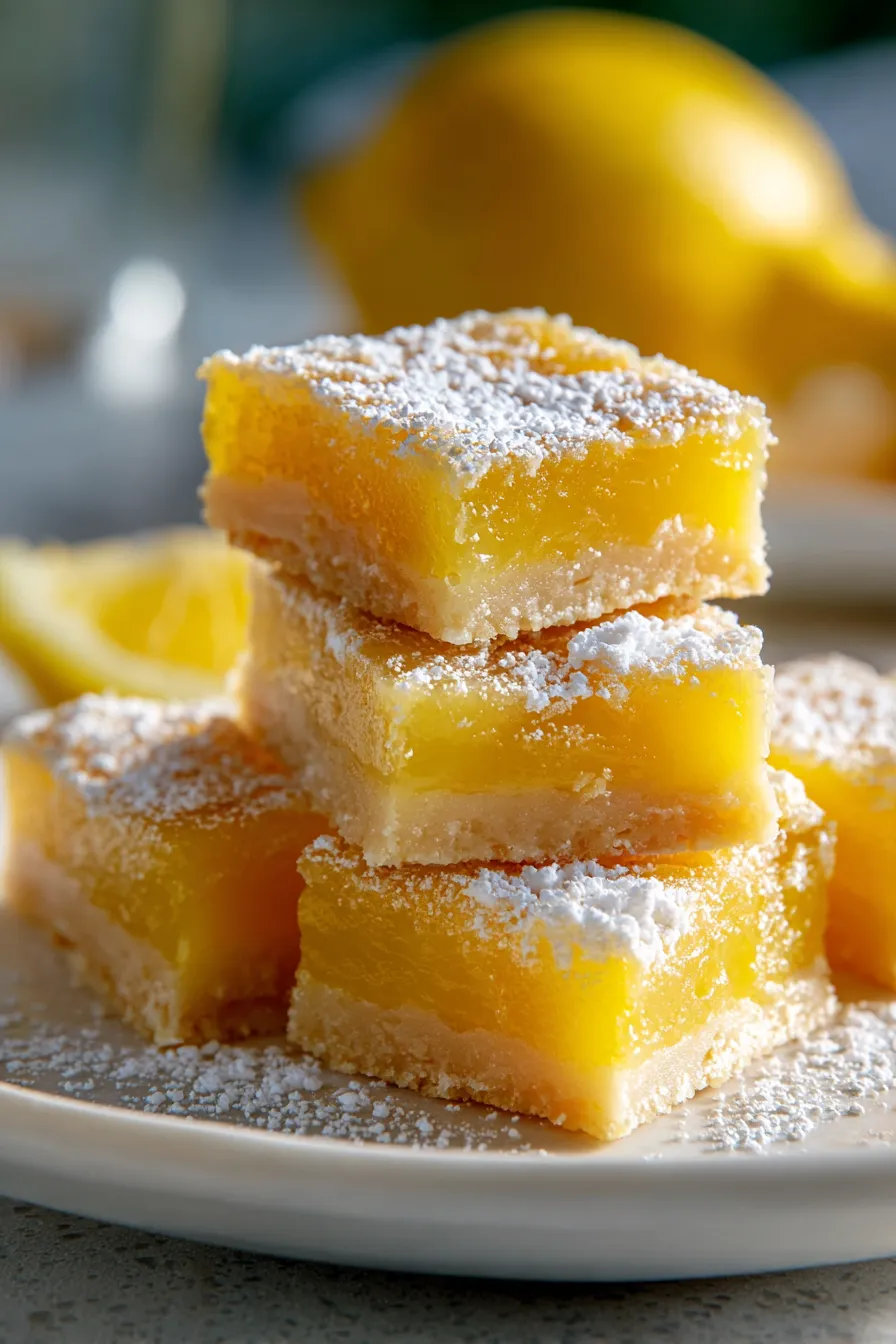
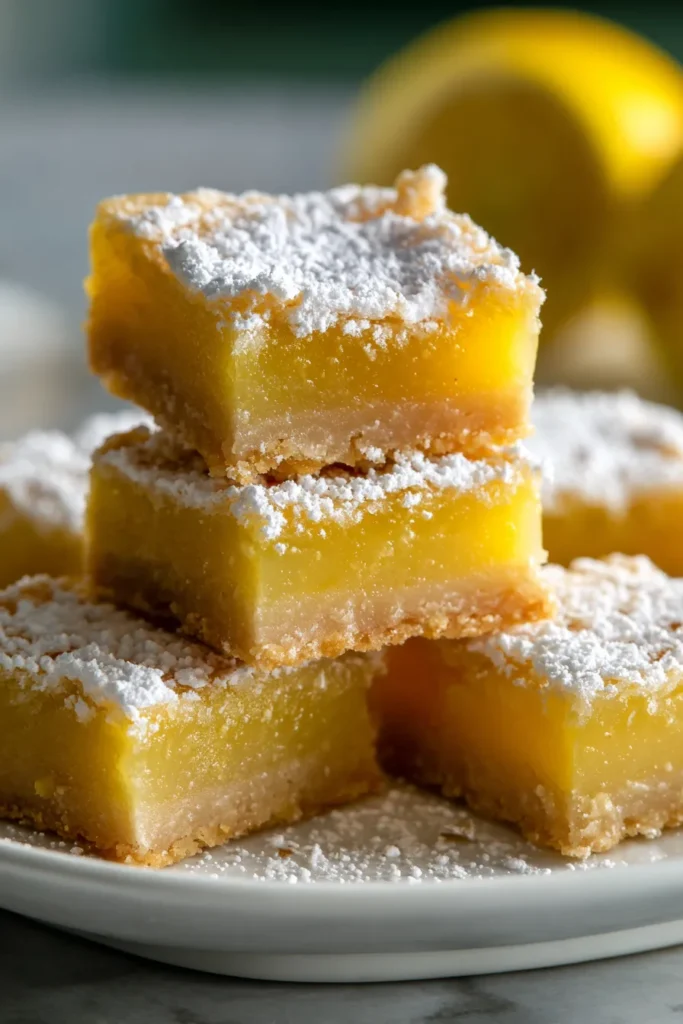
- Perfect Sweet-Tart Balance: Each bite delivers an explosion of bright, zesty lemon that’s beautifully mellowed by the sweet, buttery crust and a dusting of powdered sugar. It’s pure harmony!
- Crowd-Pleaser Guaranteed: From family dinners to holiday gatherings, these vibrant squares are always the first to disappear. Prepare for endless compliments and recipe requests!
- Visually Stunning: The gorgeous golden crust and shimmering yellow filling make for an absolutely beautiful presentation, especially when dusted with a delicate cloud of powdered sugar.
- Versatile for Any Occasion: Whether it’s a casual backyard BBQ, an elegant bridal shower, or a cozy evening at home, lemon bars fit every mood and moment.
- Make-Ahead Friendly: They actually taste even better the next day, allowing you to prep them in advance and enjoy stress-free entertaining.
- Pure Comfort: There’s something inherently comforting and uplifting about the taste of fresh lemon. These bars are like a ray of sunshine on a plate, guaranteed to lift your spirits.
What You Need
You only need a few simple pantry staples for this recipe, many of which you likely already have on hand! Fresh lemons are truly the star here, so grab a few extra for that vibrant zest. Check the full printable recipe card below for detailed measurements and a complete list of ingredients.
Expert Tips
💡 Achieving lemon bar perfection is easier than you think with these insider tips:
- For the Perfect Shortbread Crust:
- Don’t Overmix: Mix the butter, flour, and sugar just until combined and crumbly. Overmixing can develop the gluten too much, leading to a tough crust.
- Press Firmly & Evenly: Use the bottom of a flat glass or a measuring cup to press the crust mixture into an even layer in your pan. This ensures a consistent bake and prevents crumbling.
- Pre-bake for Crispness: Pre-baking the crust for about 15-20 minutes before adding the filling is crucial. It helps prevent a soggy bottom and gives you that perfect, crisp shortbread base.
- Maximize Lemon Flavor:
- Fresh is Best: Always use fresh lemons for both the zest and the juice. Bottled lemon juice simply doesn’t compare in terms of vibrant, authentic flavor.
- Zest Before Juicing: It’s much easier to zest a whole lemon than a juiced one. Use a microplane for fine zest, avoiding the bitter white pith.
- Room Temperature Lemons: If your lemons are cold, roll them on the counter with a bit of pressure before juicing. This helps release more juice.
- Achieving Silky Lemon Custard:
- Room Temperature Eggs: Use room temperature eggs for a smoother, more emulsified filling. They combine better with other ingredients.
- Don’t Overbake: The key to a perfectly set, yet still luscious, lemon filling is not to overbake it. The center should still have a slight “jiggle” when you gently shake the pan. It will continue to set as it cools.
- Sift Dry Ingredients: Sift your flour and powdered sugar for the filling to prevent lumps, ensuring a perfectly smooth and velvety texture.
- Cooling & Setting are CRUCIAL:
- Complete Cooling: Resist the urge to cut into them too soon! The bars need to cool completely at room temperature, and then ideally chill in the refrigerator for at least 2-3 hours (or even overnight) to fully set. This prevents a gooey mess.
- Patience is a Virtue: The filling firms up as it cools, transforming from a wobbly custard to a sliceable bar. Trust the process!
- Clean Cuts & Pretty Presentation:
- Warm Knife for Clean Slices: For perfectly clean squares, run a sharp knife under hot water, wipe it dry, and then make a cut. Repeat this process for each slice.
- Dust Right Before Serving: Dusting with powdered sugar makes these bars look absolutely gorgeous. For the best presentation, sift the powdered sugar over the cooled, cut bars right before serving, as it can absorb moisture over time.
Variations & Substitutions
While this classic Easy Lemon Bar Recipe is perfect as is, it’s also wonderfully adaptable! Here are a few ideas to customize your batch:
- Gluten-Free Lemon Bars: Easily make this recipe gluten-free by swapping the all-purpose flour in the crust for a 1:1 gluten-free baking flour blend that contains xanthan gum.
- Dairy-Free Option: For a dairy-free version, use a high-quality vegan butter substitute for the crust. The filling is naturally dairy-free (unless you count butter in the crust).
- Different Citrus:
- Lime Bars: Substitute lime zest and juice for the lemon for a tangy, tropical twist. Key lime bars are always a hit!
- Orange Bars: For a sweeter, milder citrus flavor, use orange zest and juice.
- Add-ins & Toppings:
- Berry Swirl: Swirl a tablespoon or two of raspberry or blueberry jam into the lemon filling just before baking for a pretty marbled effect and extra fruity notes.
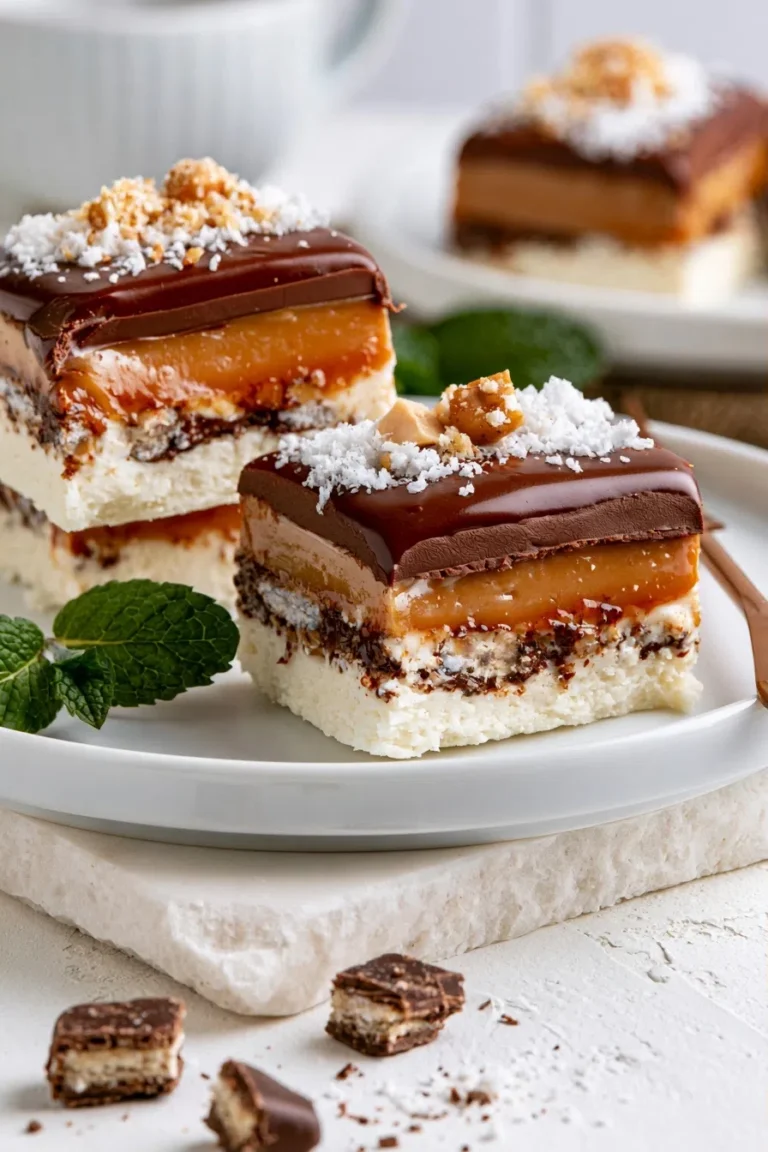
- Toasted Coconut: Sprinkle some toasted shredded coconut over the top after they’ve cooled for added texture and flavor.
- Spices: A tiny pinch of cardamom or ginger in the crust can add a sophisticated touch.
Storage & Freezing
Lemon bars are fantastic make-ahead treats! Here’s how to keep them fresh:
- Storage: Once completely cooled and cut, store the lemon bars in an airtight container in the refrigerator for up to 3-5 days. They tend to taste even better the next day as the flavors meld.
- Freezing: Yes, you can freeze lemon bars!
- Place completely cooled and cut bars in a single layer on a baking sheet and freeze until firm (about 1-2 hours).
- Once frozen, transfer them to an airtight freezer-safe container, separating layers with parchment paper to prevent sticking.
- They will keep well in the freezer for up to 2-3 months.
- Thawing: Thaw frozen bars in the refrigerator overnight or at room temperature for a few hours before serving. Dust with fresh powdered sugar if desired.
FAQ
Q: Why are my lemon bars gooey or not setting?
A: Most likely, they were underbaked or not chilled long enough. The center should still have a slight jiggle when pulled from the oven, but it will firm up considerably as it cools. Ensure you let them cool completely at room temperature and then chill them in the refrigerator for at least 2-3 hours, or even overnight, before cutting.
Q: Can I use bottled lemon juice instead of fresh?
A: While you technically *can*, I strongly recommend using fresh lemon juice and zest. The flavor profile will be significantly brighter, more authentic, and less artificial. Fresh lemons are key to that vibrant, tangy taste that makes these bars so special.
Q: How do I prevent the crust from getting soggy?
A: Pre-baking the shortbread crust is the best way to prevent sogginess. This allows it to crisp up and form a barrier before the wet lemon filling is added. Also, ensure the bars are properly cooled and chilled before storing, as warmth and humidity can contribute to a softer crust.
Q: How long do Easy Lemon Bar Recipes typically last?
A: When stored properly in an airtight container in the refrigerator, these lemon bars will stay fresh and delicious for 3 to 5 days. For longer storage, freezing is an excellent option!
Conclusion
And there you have it – your new go-to Easy Lemon Bar Recipe! These zesty, sweet squares are more than just a dessert; they’re a burst of sunshine, a delightful memory in the making, and a guaranteed crowd-pleaser. Whether you’re baking them for a special occasion or just because you deserve a little treat, I promise they’ll bring joy to every bite. Don’t forget to pin this recipe for later and share your creations with me!
Easy Lemon Bar Recipe: The Ultimate Zesty & Sweet Treat
Ingredients
- For the Crust:
- 1 cup (2 sticks) unsalted butter, softened
- 2 cups all-purpose flour
- 1/2 cup granulated sugar
- 1/4 teaspoon salt
- For the Lemon Filling:
- 4 large eggs
- 1 1/2 cups granulated sugar
- 1/4 cup all-purpose flour
- 1/2 cup fresh lemon juice (from 3-4 lemons)
- 2 tablespoons lemon zest
- Pinch of salt
- For Dusting:
- Powdered sugar
Instructions
- Step 1 1. Preheat oven to 350°F (175°C). Line a 9x13 inch baking pan with parchment paper, leaving an overhang.
- Step 2 2. Make the crust: In a large bowl, cream softened butter and sugar until light. Add flour and salt, mix until crumbly. Press evenly into the prepared pan.
- Step 3 3. Bake crust for 18-20 minutes, until lightly golden. Remove from oven.
- Step 4 4. Make the filling: While crust bakes, whisk eggs, sugar, flour, lemon juice, lemon zest, and a pinch of salt until well combined and smooth.
- Step 5 5. Pour the lemon filling evenly over the hot, pre-baked crust.
- Step 6 6. Return to oven and bake for another 20-25 minutes, or until the center is just set with a slight jiggle. Edges should be lightly golden.
- Step 7 7. Let cool completely at room temperature, then chill in the refrigerator for at least 2-3 hours (preferably overnight) before slicing and serving.
- Step 8 8. Dust generously with powdered sugar just before serving.