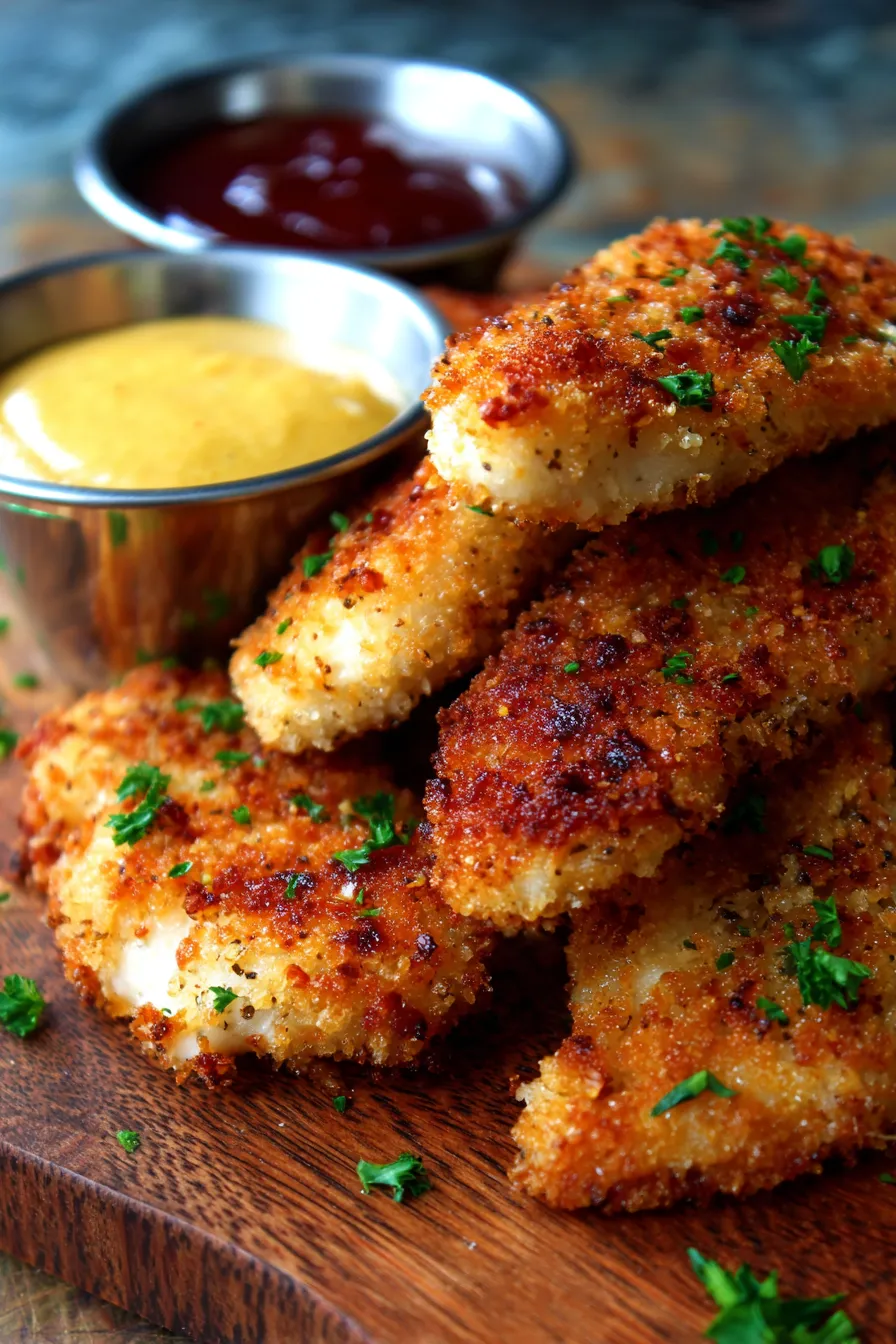
Best Ever Crispy Baked Chicken Tenders – Kid-Friendly Dinner Recipe
Remember those chaotic weeknights when dinner felt like a culinary battlefield? For years, I battled picky eaters and the endless quest for a meal that was both healthy and exciting. My kids, like many, had a serious love affair with anything crispy, but I desperately wanted to move beyond the deep fryer. It was on one particularly dreary, rainy Sunday, with spirits needing a serious lift, that I decided to tackle the challenge head-on.
I started reminiscing about my grandmother’s genius trick for making the crispiest potato latkes without a ton of oil. Her secret was all about the perfect coating and high heat. I wondered: could this magic apply to chicken? After a few joyful kitchen experiments (and a tiny bit of mess, as all good cooking adventures create!), I cracked the code. This Crispy Baked Chicken Tenders – Kid-Friendly Dinner Recipe emerged as the undisputed champion of our dinner table. It’s truly an easy dinner triumph, bringing comfort food vibes and happy smiles to everyone.
What makes these tenders so special? They’re perfectly golden, incredibly crunchy, and baked to juicy perfection, making them a healthier alternative to their fried counterparts. This recipe isn’t just tested; it’s a beloved family favorite, saving countless weeknights and proving that delicious, wholesome food can also be incredibly fun. Get ready to ditch the takeout menu and dive into a recipe that promises rave reviews!
Why You’ll Love This Recipe
❤️ Here’s why these Crispy Baked Chicken Tenders are about to become your family’s new obsession:
- Kid-Approved Magic: Seriously, even the pickiest eaters will ask for seconds (and thirds!). These tenders have that universally loved crunch and flavor that kids can’t resist, making dinner time a breeze.
- Healthier Alternative: Forget the deep fryer! We’re baking these beauties to golden perfection, significantly reducing the oil content while still delivering maximum crispiness. It’s a win-win for everyone.
- Unbelievably Crispy Texture: Thanks to a few clever tricks, these tenders boast an outer crunch that rivals any fried version. Each bite delivers that satisfying snap you crave, without any greasy residue.
- Effortless Preparation: This recipe is designed for real life. With simple steps and common pantry ingredients, you can have a fantastic meal on the table without feeling overwhelmed, even on the busiest weeknights.
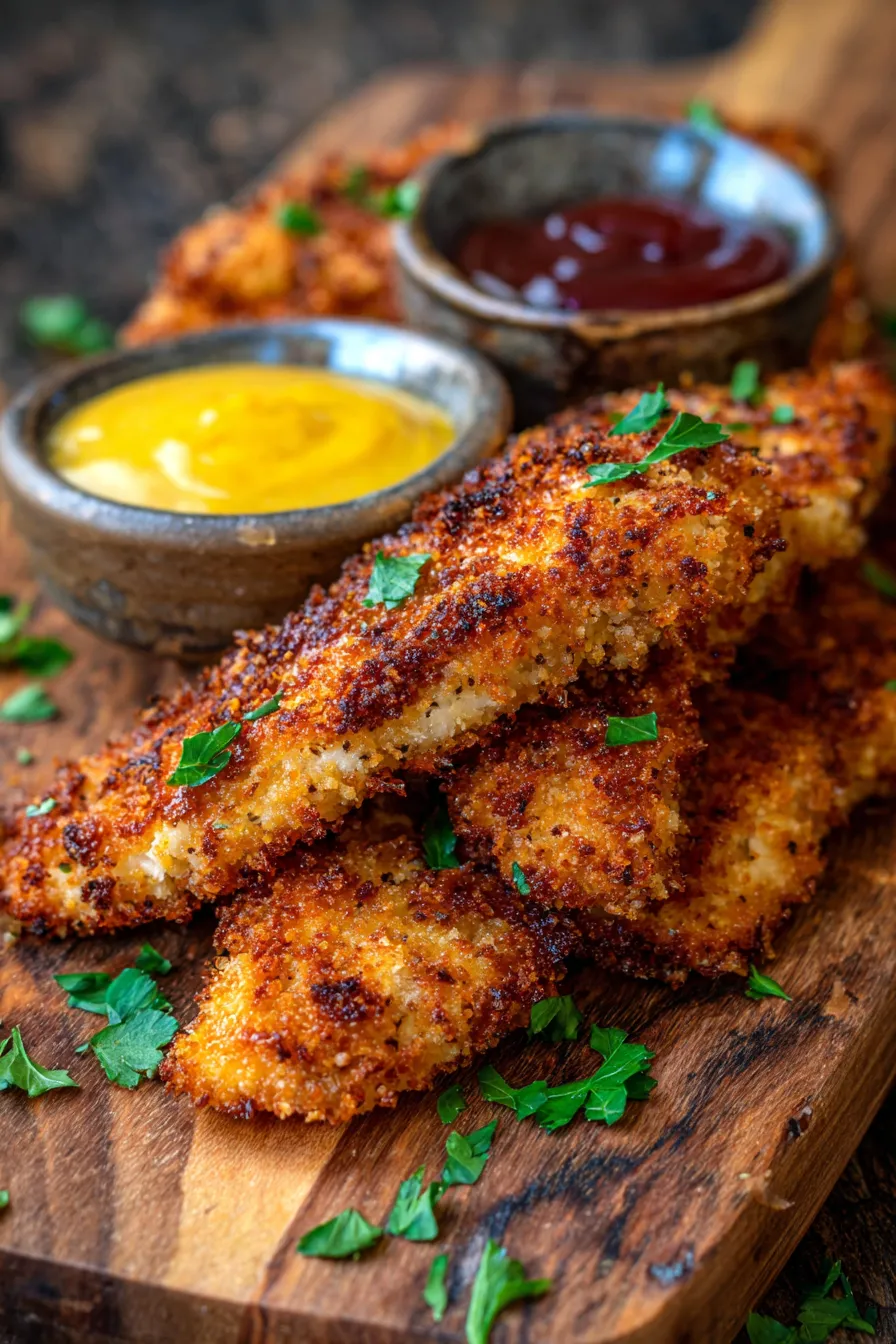
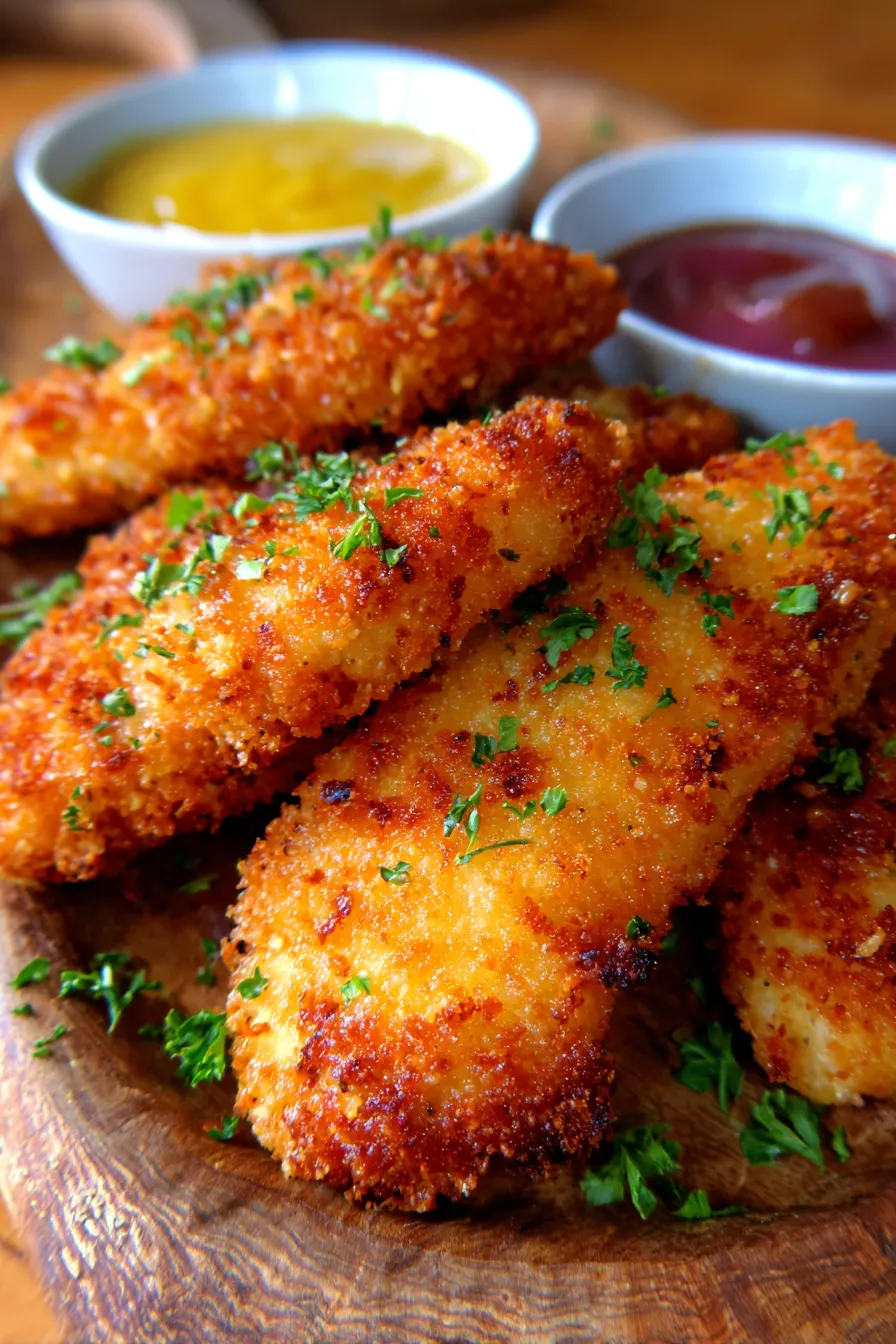
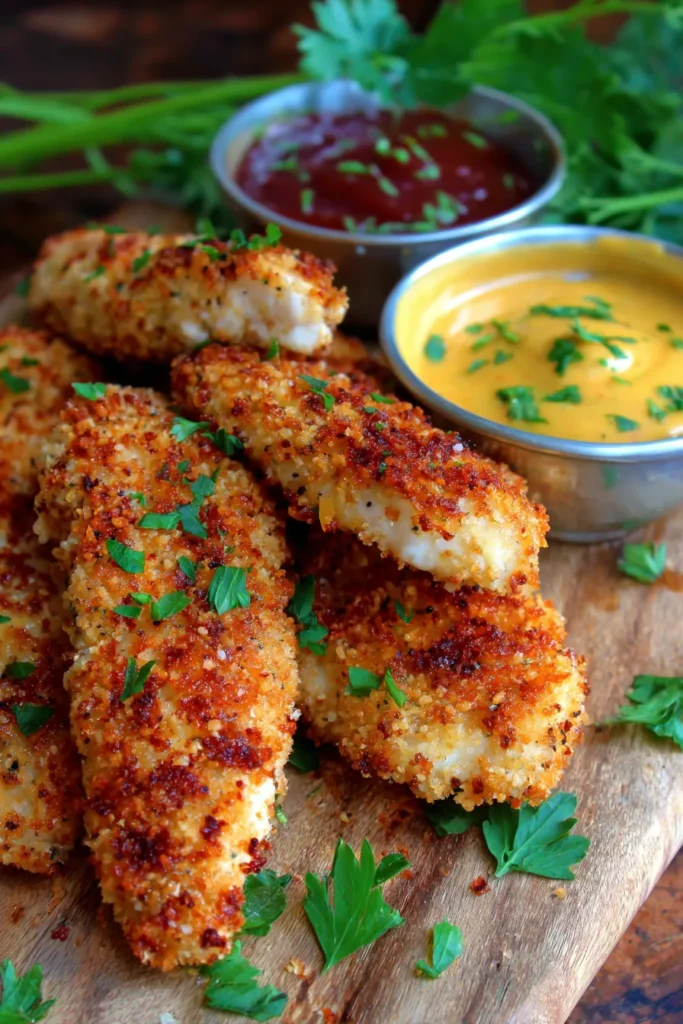
- Versatile & Customizable: These chicken tenders are a blank canvas for your favorite dipping sauces! Serve them with classic ketchup, tangy BBQ, sweet honey mustard, or a creamy ranch. You can also easily adjust the seasonings to suit your family’s palate.
- Perfect for Meal Prep: Looking to get ahead? These tenders are excellent for meal prepping. Cook a big batch and enjoy them throughout the week for quick lunches or easy dinners.
- Budget-Friendly Ingredients: You won’t need any fancy or expensive items for this recipe. It relies on staple ingredients you likely already have, making it an economical choice for feeding a crowd.
- Quick Weeknight Solution: From start to finish, you can have these delectable chicken tenders ready in under an hour. It’s the ultimate solution for those evenings when time is of the essence but you still want a homemade meal.
- Freezer-Friendly: Batch cook and freeze portions for future meals! They reheat beautifully, maintaining their fantastic texture and flavor, ready to rescue you on a moment’s notice.
- Family-Favorite Status Guaranteed: Prepare for this recipe to be requested again and again. It’s a proven crowd-pleaser that brings joy and deliciousness to any dinner occasion.
What You Need
You only need a few simple pantry staples for this recipe! We’re talking about basic ingredients that come together to create something truly spectacular. Check the full printable recipe card below for detailed measurements and a complete list.
Expert Tips for Perfect Crispy Baked Chicken Tenders
💡 Achieving that perfect crispy, juicy tender is easier than you think with these professional insights:
- Pat Your Chicken Dry: This is a non-negotiable step! Excess moisture is the enemy of crispiness. Use paper towels to thoroughly pat down each tenderloin before dredging. This allows the breading to adhere properly and ensures a crunchier result.
- Embrace Panko Breadcrumbs: While regular breadcrumbs work, Panko is the secret weapon for ultimate crispiness. Their larger, flakier structure creates more surface area for crunch, making a noticeable difference in texture.
- Set Up a Dredging Station: Organize your workspace like a pro! Use three shallow bowls: one for flour (seasoned!), one for whisked eggs, and one for Panko. This creates an efficient assembly line, keeping your hands cleaner and the process smooth.
- Season Every Layer: Don’t just season the chicken! Mix salt, pepper, garlic powder, and paprika into your flour and Panko for maximum flavor in every bite. This layering of seasoning builds depth.
- Don’t Overcrowd the Pan: Give your tenders space to breathe! Arrange them in a single layer on your baking sheet with some room between each piece. Overcrowding creates steam, which leads to soggy chicken. Use two baking sheets if necessary.
- Use a Wire Rack: For superior crispiness, place a wire rack on top of your baking sheet. This allows air to circulate all around the chicken tenders, ensuring even browning and crisping on both the top and bottom.
- High Heat is Key: Baking at a higher temperature (like 400°F / 200°C) helps the breading crisp up quickly and seals in the juices. This quick-cooking method prevents the chicken from drying out while achieving that golden crust.
- Flip Halfway Through: To ensure even crispness and browning on both sides, gently flip the chicken tenders halfway through the baking time. This step is crucial for an all-around golden exterior.
- Lightly Spray with Oil: Before baking, give the breaded tenders a light spritz of olive oil spray. This small detail helps achieve a beautifully golden-brown color and an extra layer of crunch without deep-frying.
- Check for Doneness: The best way to ensure perfectly cooked (and juicy!) chicken is to use an instant-read meat thermometer. Chicken should reach an internal temperature of 165°F (74°C). This prevents overcooking and keeps them tender.
- Allow a Short Rest: Just like steaks, chicken benefits from a few minutes of resting after cooking. This allows the juices to redistribute throughout the meat, resulting in a more tender and moist bite.
- Uniform Cuts: If your chicken tenderloins vary greatly in size, take a moment to cut larger pieces to match smaller ones. Uniformly sized pieces will cook more evenly, preventing some from drying out while others are still cooking.
- Pre-Toast Panko (Optional): For an even deeper golden color and nutty flavor, you can lightly toast the Panko breadcrumbs in a dry pan over medium heat for a few minutes before using. Let them cool completely before breading.
- Brine for Extra Juiciness: For an extra layer of moisture, consider a quick brine. Soak chicken tenders in a simple saltwater solution (1 tbsp salt per cup of water) for 15-30 minutes before patting dry and breading. This really locks in moisture.
Variations & Substitutions
These crispy tenders are fantastic as is, but here are some fun ways to mix things up:
- Spicy Kick: Add a pinch of cayenne pepper, chili powder, or a dash of hot sauce to your egg mixture or Panko for a zesty twist.
- Herby Goodness: Mix dried Italian seasoning, oregano, or a touch of dried thyme into the Panko breading for an aromatic flavor profile.
- Cheesy Parmesan: Grate some fresh Parmesan cheese into your Panko breadcrumbs for a savory, cheesy crust that’s utterly delicious.
- Gluten-Free Option: Simply swap out the all-purpose flour for a gluten-free all-purpose blend and use gluten-free Panko breadcrumbs. The method remains exactly the same!
- Keto / Low-Carb Friendly: For a low-carb version, replace the flour with almond flour or coconut flour, and use finely crushed pork rinds or a blend of almond flour and grated Parmesan as your breading.
- Air Fryer Method: To cook in an air fryer, preheat to 375°F (190°C). Spray the basket and tenders lightly with oil. Cook in batches for 12-15 minutes, flipping halfway, until golden and cooked through.
Storage & Freezing
These tenders are so good, you might not have leftovers! But if you do, here’s how to keep them fresh:
- Refrigeration: Store cooked and cooled chicken tenders in an airtight container in the refrigerator for up to 3-4 days.
- Reheating: For best results and to regain that crispiness, reheat tenders in an oven or air fryer at 350°F (175°C) for about 10-15 minutes, or until heated through and crisp again. Avoid the microwave, as it tends to make them soggy.
- Freezing Cooked Tenders: Once cooked and completely cooled, arrange tenders in a single layer on a baking sheet and freeze until solid (about 1-2 hours). Transfer the frozen tenders to a freezer-safe bag or airtight container. They will keep well for up to 2-3 months. Reheat from frozen in the oven, adding about 10-15 minutes to the reheating time.
- Freezing Uncooked Tenders: You can also bread the tenders and freeze them raw. Place the breaded, uncooked tenders on a baking sheet lined with parchment paper and freeze until solid. Once frozen, transfer them to a freezer bag. Bake from frozen, adding an extra 10-15 minutes to the cooking time, ensuring they reach 165°F (74°C) internal temperature.
Frequently Asked Questions
Q: Why aren’t my baked chicken tenders crispy?
A: Several factors can affect crispiness. Ensure you pat the chicken very dry before breading. Use Panko breadcrumbs, don’t overcrowd the baking sheet, and use a wire rack for better air circulation. Also, baking at a high temperature (around 400°F / 200°C) is crucial, and a light spray of oil can help.
Q: Can I use regular breadcrumbs instead of Panko?
A: Yes, you can use regular breadcrumbs, but Panko breadcrumbs are highly recommended for their superior crispiness. They are larger and flakier, creating a much lighter and crunchier texture than standard breadcrumbs.
Q: How do I prevent the chicken from drying out?
A: The key is not to overcook them! Use an instant-read thermometer to ensure the chicken reaches 165°F (74°C) and no higher. Patting the chicken dry and baking at a higher temperature for a shorter time also helps seal in juices. A quick brine (as mentioned in expert tips) can also add extra moisture.
Q: What are the best sides to serve with chicken tenders?
A: These tenders are incredibly versatile! Classic pairings include French fries, mashed potatoes, or macaroni and cheese. For a lighter meal, serve them with a fresh green salad, roasted vegetables, or sweet potato fries. Don’t forget a variety of dipping sauces!
Conclusion
And there you have it – the ultimate recipe for Crispy Baked Chicken Tenders that will delight every member of your family. Say goodbye to soggy, bland chicken and hello to perfectly golden, crunchy, and juicy bites that everyone will rave about. This recipe is more than just a meal; it’s an invitation to simpler, happier mealtimes. Give it a try tonight, and prepare for it to become a new staple in your home! Don’t forget to pin this recipe for later so you can easily find it whenever those crispy cravings strike!
Crispy Baked Chicken Tenders – Easy Kid-Friendly Recipe
Ingredients
- 1.5 lbs chicken tenderloins
- 1 cup all-purpose flour
- 1 tsp garlic powder
- 1 tsp onion powder
- 1/2 tsp paprika
- 1/2 tsp salt (plus more for seasoning chicken)
- 1/4 tsp black pepper (plus more for seasoning chicken)
- 2 large eggs, whisked
- 2 cups Panko breadcrumbs
- 2 tbsp olive oil (or olive oil spray for baking sheet and tenders)
Instructions
- Step 1 Preheat oven to 400°F (200°C). Place a wire rack on a large baking sheet and lightly spray with olive oil or cooking spray.
- Step 2 Pat chicken tenderloins completely dry with paper towels. Season lightly with salt and pepper.
- Step 3 Set up a dredging station: Place flour, garlic powder, onion powder, paprika, salt, and pepper in a shallow dish and mix well. In a second shallow dish, whisk eggs. In a third shallow dish, place Panko breadcrumbs.
- Step 4 Dredge each chicken tenderloin: first coat in the seasoned flour, shaking off excess. Then dip into the egg mixture, letting excess drip off. Finally, coat generously in the Panko breadcrumbs, pressing gently to adhere.
- Step 5 Arrange the breaded chicken tenders in a single layer on the prepared wire rack on the baking sheet, ensuring they don't touch. Lightly spray the tops of the tenders with olive oil or cooking spray.
- Step 6 Bake for 12-15 minutes, then flip the tenders over. Continue baking for another 10-12 minutes, or until golden brown, crispy, and cooked through (internal temperature reaches 165°F / 74°C).
- Step 7 Remove from oven and let rest for 5 minutes before serving with your favorite dipping sauces.