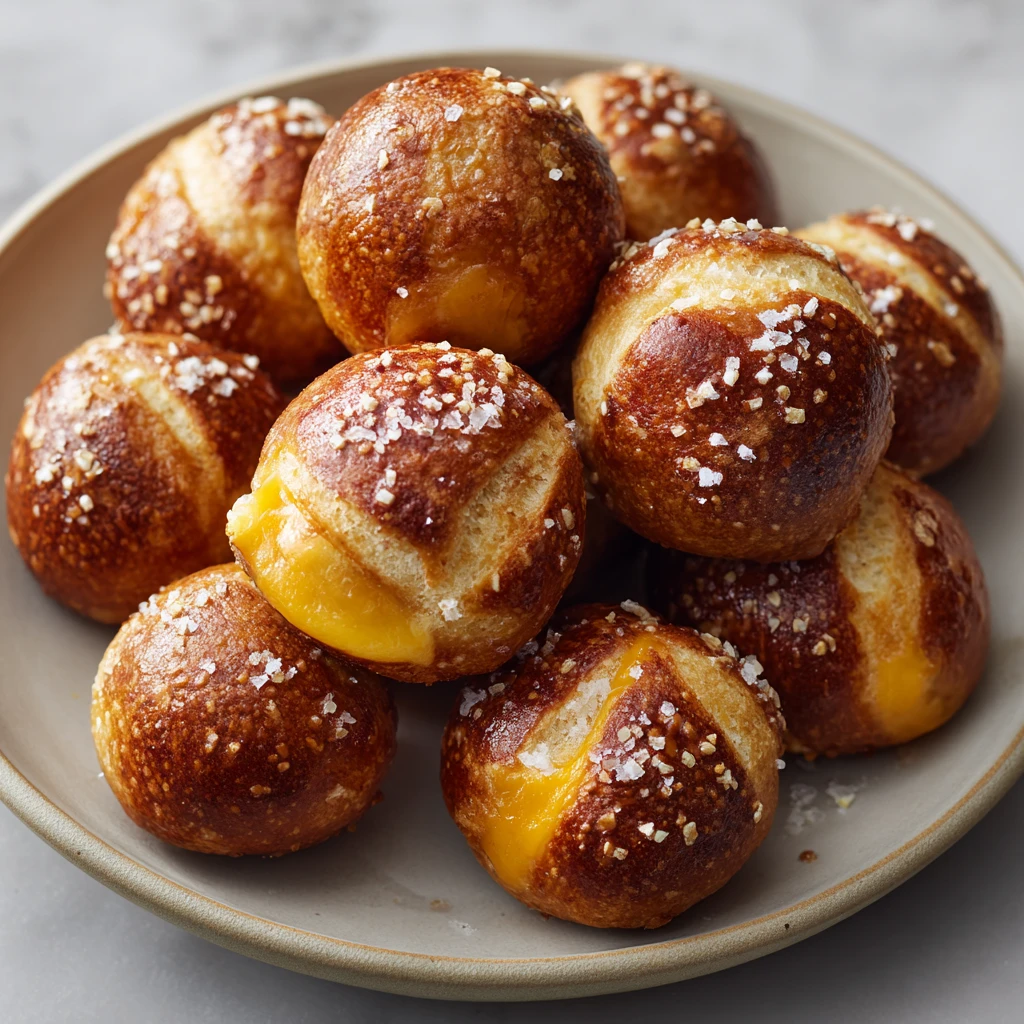
Cheddar-Stuffed Pretzel Bites
Ingredients
-
- For the Dough:
1 ½ cups warm water (105-115°F / 40-46°C)
1 tablespoon active dry yeast
1 teaspoon granulated sugar
4 cups all-purpose flour, plus more for dusting
1 teaspoon salt
2 tablespoons unsalted butter, melted
-
- For the Baking Soda Bath:
8 cups water
½ cup baking soda
-
- For the Filling & Topping:
8 ounces sharp cheddar cheese, cut into ½-inch cubes
1 large egg, whisked with 1 tablespoon water (egg wash)
Coarse sea salt, for sprinkling
Step-by-Step
1. Activate the Yeast: In a large bowl, combine the warm water, yeast, and sugar. Stir gently and let it sit for 5-10 minutes until foamy. This indicates the yeast is active.
2. Form the Dough: Add the flour, salt, and melted butter to the yeast mixture. Mix with a wooden spoon until a shaggy dough forms.
3. Knead the Dough: Transfer the dough to a lightly floured surface. Knead for 6-8 minutes until the dough is smooth and elastic.
4. First Rise: Lightly grease a clean bowl. Place the dough in the bowl, turning once to coat. Cover with plastic wrap and let rise in a warm place for 1 to 1 ½ hours, or until doubled in size.
5. Prepare the Filling: While the dough rises, cut the cheddar cheese into ½-inch cubes. Set aside.
6. Preheat Oven & Prepare Bath: Preheat your oven to 400°F (200°C). Line two baking sheets with parchment paper. In a large pot, bring 8 cups of water to a rolling boil. Carefully stir in the baking soda.
7. Shape the Bites: Punch down the risen dough and divide it into 4 equal portions. Roll each portion into a long rope, about ¾-inch thick. Cut each rope into 1-inch pieces.
8. Stuff the Bites: Flatten each dough piece slightly. Place a cheddar cube in the center and carefully pinch the dough around the cheese, sealing it completely to form a ball. Ensure there are no gaps.
9. Baking Soda Bath: Working in batches, carefully drop 8-10 stuffed pretzel bites into the boiling baking soda solution for 20-30 seconds. Do not overcrowd the pot.
10. Bake: Remove the bites with a slotted spoon, allowing excess water to drain. Place them on the prepared baking sheets, spacing them about 1 inch apart.
11. Egg Wash & Salt: Brush the tops of the pretzel bites with the egg wash and generously sprinkle with coarse sea salt.
12. Bake Until Golden: Bake for 12-15 minutes, or until the pretzel bites are golden brown and puffed. Serve warm and enjoy immediately.
The Irresistible Charm of Pretzel Bites
Cheddar-stuffed pretzel bites represent a delightful fusion of classic comfort food and innovative snacking. These small, golden-brown spheres offer a chewy exterior, a hint of signature pretzel flavor, and a gooey, molten cheddar surprise within. They are perfect for gatherings, game nights, or as a decadent snack.
Their popularity stems from their approachable size and universal appeal. They combine the best elements of a soft pretzel with the beloved taste of cheese. This makes them an instant crowd-pleaser for all ages.
A Brief History of Pretzels
The pretzel’s history dates back to medieval Europe, possibly invented by monks. Its distinctive twisted shape is thought to represent praying arms. Originally, pretzels were often hard and crisp.
Over centuries, various regional styles emerged, including the soft pretzel that Americans cherish today. These softer versions gained particular traction in Pennsylvania, becoming a staple of street food and bakeries.
Why Cheddar Stuffed?
The addition of a cheddar filling elevates the humble pretzel bite into something truly special. The sharpness of the cheddar perfectly complements the slightly salty, malty flavor of the pretzel dough. This creates a harmonious taste experience.
Cheese-filled breads and pastries have always held a special place in culinary traditions. Cheddar’s creamy texture when melted provides a delightful contrast to the pretzel’s chewiness. It transforms a simple snack into a satisfying mini-meal or appetizer.
Mastering the Pretzel Dough: Tips and Tricks
Crafting the perfect pretzel bite starts with a well-made dough. Achieving the right texture and consistency is crucial for both taste and structure. A soft, elastic dough will yield tender bites.
Proper technique ensures your pretzel bites are chewy yet light. Small adjustments can make a significant difference in the final product. Pay attention to each step of the dough-making process.
Choosing Your Flour
All-purpose flour is typically sufficient for excellent pretzel bites. However, using bread flour can result in a slightly chewier texture due to its higher protein content. Experiment to find your preferred outcome.
Ensure your flour is fresh and unexpired for optimal performance. Flour quality directly impacts the dough’s ability to rise and its final structure. Avoid old or poorly stored flour.
The Art of Kneading
Kneading develops the gluten in the dough, which is essential for its elasticity and chewiness. Knead for the recommended 6-8 minutes until the dough feels smooth and springs back when gently poked. Over-kneading can lead to a tough dough, while under-kneading will result in a crumbly texture.
If using a stand mixer, use the dough hook attachment on medium-low speed. Hand kneading is also effective and can be a therapeutic process. Just ensure the dough passes the windowpane test.
Perfect Proofing
Proofing allows the yeast to work, producing carbon dioxide that makes the dough rise and become airy. A warm, draft-free environment is ideal for the first rise. If your kitchen is cool, place the covered bowl in a slightly warm oven (turned off) or near a sunny window.
The dough should double in size, indicating proper fermentation. An under-proofed dough will be dense, while an over-proofed dough might collapse during baking. Patience is key during this stage.
The Secret to Golden Perfection: The Lye Bath Alternative
The signature deep brown color and distinctive flavor of authentic pretzels come from a brief dip in an alkaline solution. Historically, this was a lye bath, but a baking soda solution offers a safer, home-friendly alternative. This step is non-negotiable for true pretzel character.
It creates a chemical reaction on the dough’s surface, promoting superior browning and a unique crust. Skipping this step would result in plain bread rolls rather than genuine pretzel bites. It’s an essential part of the process.
Why the Baking Soda Bath?
When the dough hits the hot baking soda solution, a chemical reaction occurs. The alkaline environment changes the pH of the dough’s surface, accelerating the Maillard reaction during baking. This reaction is responsible for the deep golden-brown color and the distinct chewy crust.
It also imparts that characteristic malty flavor that defines a pretzel. Without this bath, your pretzel bites would lack their iconic appearance and taste. It’s the “secret sauce” of pretzel making.
Safety First
While a baking soda bath is much safer than a traditional lye bath, caution is still advised. Wear gloves if you have sensitive skin, as the solution can be irritating. Always add baking soda to water carefully, as it can cause fizzing.
Ensure good ventilation and avoid splashing the hot solution. Children should be supervised if involved in this step. Safety in the kitchen is always paramount when working with hot liquids.
Achieving the Signature Crust
The short dip in the baking soda solution is just enough to create the desired surface treatment. Avoid leaving the pretzel bites in the bath for too long, as this can lead to a soapy flavor or overly tough crust. Twenty to thirty seconds per side is usually ideal.
Immediately after the bath, drain any excess liquid before placing them on the baking sheet. This ensures the crust develops properly without being soggy. The subsequent egg wash further enhances browning.
Creative Variations and Serving Suggestions
While cheddar-stuffed pretzel bites are delicious on their own, there’s always room for customization. Experimenting with different fillings and serving methods can elevate them for any occasion. These versatile bites can adapt to various tastes and preferences.
Consider these ideas to make your pretzel bites truly unique. Your culinary imagination is the only limit. Have fun with different flavor profiles and presentations.
Beyond Cheddar: Other Fillings
Don’t limit yourself to just cheddar. A smoked gouda or mozzarella cheese can provide a different flavor and melt beautifully. For a spicy kick, try pepper jack cheese.
You can also incorporate other ingredients. Add a tiny sliver of cooked jalapeño with the cheddar for a spicy cheese bite. A dollop of cream cheese with chives could offer a savory, tangy option. Even mini hot dogs can be wrapped for pretzel dogs.
Perfect Pairings and Dips
Serve your cheddar-stuffed pretzel bites with a variety of complementary dips. A classic whole grain mustard is always a winner. Honey mustard offers a sweeter contrast.
For a richer experience, consider a warm beer cheese dip or a simple marinara sauce. Ranch dressing or a spicy sriracha mayo can also add exciting flavor profiles. Don’t forget a sprinkle of fresh chives or parsley for garnish.
Serving Occasions
These delightful bites are incredibly versatile for various events. They make an excellent appetizer for holiday parties, Super Bowl gatherings, or casual get-togethers. Their handheld nature makes them perfect for mingling.
Pack them in lunchboxes for a special treat, or serve them as an after-school snack. They are also a fantastic addition to brunch spreads or potlucks. Their widespread appeal ensures they’re always a hit.
Storing, Reheating, and Make-Ahead Tips
To fully enjoy your cheddar-stuffed pretzel bites, knowing how to store and reheat them properly is essential. Freshly baked is always best, but with a few tips, you can extend their deliciousness. Planning ahead can also save time.
These strategies ensure minimal waste and maximum flavor for your efforts. Never let perfectly good food go to waste. A little preparation goes a long way.
Keeping Them Fresh
Cheddar-stuffed pretzel bites are best enjoyed the day they are baked. If you have leftovers, store them in an airtight container at room temperature for up to 2 days. For longer storage, refrigerate them for up to 4-5 days.
The cheese filling can make them slightly moist over time, so proper sealing is key. Prevent them from drying out or becoming stale. A paper towel in the container can absorb excess moisture.
Reheating for Best Results
To restore their original chewiness and melt the cheese, reheating is highly recommended. The best method is to use an oven or toaster oven. Preheat to 350°F (175°C) and bake for 5-7 minutes, or until warmed through and the cheese is gooey again.
Microwaving can make them soft and rubbery, so it’s generally not advised. If you must use a microwave, heat in short bursts of 15-20 seconds. This prevents them from becoming overly chewy.
Make-Ahead Strategies
You can prepare the dough in advance. After the first rise, punch it down and refrigerate it for up to 24 hours. Let it come to room temperature for 30 minutes before shaping and stuffing.
Alternatively, you can prepare and stuff the pretzel bites, then freeze them before the baking soda bath. Place them on a parchment-lined baking sheet and freeze until solid. Transfer to a freezer-safe bag for up to 1 month. When ready to bake, thaw slightly, then proceed with the bath, egg wash, and baking.

FAQ Section
Can I use pre-made dough for Cheddar-Stuffed Pretzel Bites?
Yes, you can absolutely use store-bought pizza dough or even frozen bread dough. Ensure it’s thawed and at room temperature before shaping. The texture might vary slightly from homemade pretzel dough, but it will still be delicious.
What kind of cheddar cheese is best for stuffing?
Sharp cheddar is generally recommended for its robust flavor, which stands up well to the pretzel. Medium cheddar also works. Avoid pre-shredded cheese as it contains anti-caking agents that can affect melt.
How do I store leftover pretzel bites?
Store cooled pretzel bites in an airtight container at room temperature for up to two days, or in the refrigerator for up to five days. Ensure they are completely cool before storing to prevent condensation.
Can I freeze cheddar-stuffed pretzel bites?
Yes, you can freeze them! After shaping and stuffing, place the uncooked bites on a parchment-lined baking sheet and freeze until solid. Transfer them to a freezer-safe bag for up to one month. Thaw slightly before dipping in the baking soda bath and baking.
Why did my pretzel bites turn out tough or dry?
This could be due to several factors. Over-kneading the dough can make it tough, as can over-baking. Ensure you don’t leave them in the baking soda bath for too long, which can also affect texture. Always follow recipe times closely.