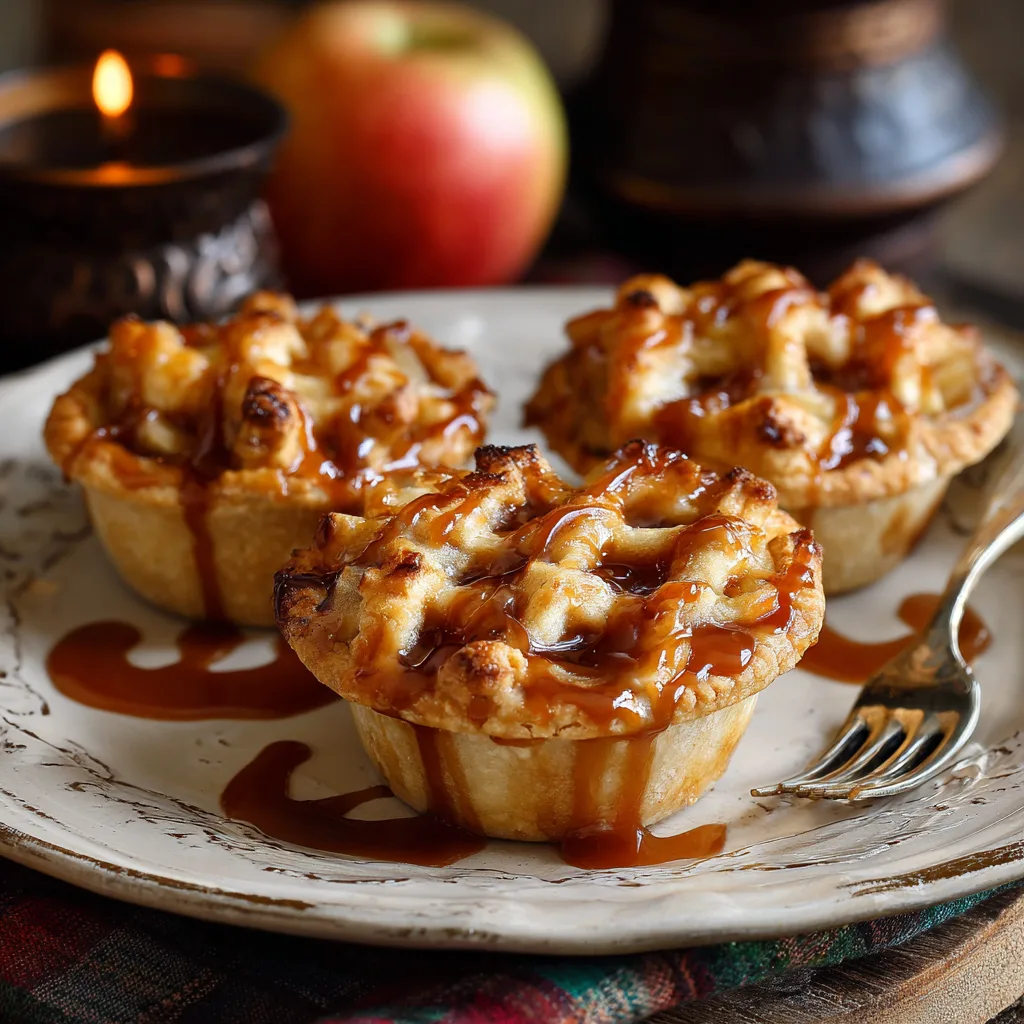
The Ultimate Caramel Apple Mini Pies: A Perfect Seasonal Treat
There is something inherently comforting about the aroma of cinnamon and baking apples wafting through a kitchen, but traditional pies can often feel like a daunting undertaking. Enter the caramel apple mini pie: a perfectly portioned, handheld delight that captures the essence of autumn in every bite. These miniature treats offer the ideal balance of tart fruit, rich caramel, and flaky pastry, making them a standout choice for holiday dessert tables, cozy weekend gatherings, or even as a sophisticated alternative to standard party snacks. By shrinking the classic apple pie into a muffin-tin format, you achieve a higher crust-to-filling ratio, ensuring that every mouthful is packed with texture and flavor.
The Essential Caramel Apple Mini Pie Recipe
Ingredients
-
For the Crust:
-
2 ½ cups all-purpose flour
-
1 cup (2 sticks) unsalted butter, cold and cubed
-
1 teaspoon granulated sugar
-
½ teaspoon salt
-
6–8 tablespoons ice water
-
Note: You can substitute with two pre-made refrigerated pie crusts for a quicker version.
-
-
For the Filling:
-
3 large Granny Smith apples, peeled, cored, and finely diced (approx. 3 cups)
-
¼ cup granulated sugar
-
2 tablespoons brown sugar, packed
-
1 tablespoon lemon juice
-
1 ½ teaspoons ground cinnamon
-
¼ teaspoon ground nutmeg
-
1 tablespoon all-purpose flour
-
-
For Assembly and Topping:
-
½ cup thick caramel sauce (homemade or high-quality store-bought)
-
1 egg (beaten with 1 tablespoon water for egg wash)
-
Coarse sparkling sugar or cinnamon sugar for sprinkling
-

Step-by-Step Instructions
-
Prepare the Pastry: In a large bowl or food processor, combine flour, sugar, and salt. Add the cold cubed butter and pulse or use a pastry cutter until the mixture resembles coarse crumbs. Gradually add ice water, one tablespoon at a time, until the dough just comes together. Divide into two discs, wrap in plastic, and refrigerate for at least 30 minutes.
-
Make the Filling: In a medium bowl, toss the finely diced apples with lemon juice, granulated sugar, brown sugar, cinnamon, nutmeg, and one tablespoon of flour. Let the mixture sit for 10 minutes to allow the flavors to meld and the apples to soften slightly.
-
Prepare the Oven and Tin: Preheat your oven to 375°F (190°C). Lightly grease a standard 12-cup muffin tin with butter or non-stick cooking spray.
-
Cut the Crust: On a lightly floured surface, roll out the first disc of dough to about 1/8-inch thickness. Use a 4-inch circular cutter (or a wide glass) to cut out 12 circles. Gently press each circle into the bottom and up the sides of the muffin cups.
-
Assemble the Pies: Place a small spoonful (about 1 teaspoon) of caramel sauce into the bottom of each pastry shell. Top with the apple filling, packing it down gently. Drizzle another teaspoon of caramel over the top of the apples.
-
Add the Top Crust: Roll out the second disc of dough. You can cut 12 smaller circles (3-inch) to cover the pies, or cut thin strips to create a mini lattice design. If using a full circle top, cut a small “X” in the center to vent steam. Crimp the edges to seal.
-
Finish and Bake: Brush the tops of the pies with the egg wash and sprinkle generously with coarse sugar. Bake for 22–26 minutes, or until the pastry is deep golden brown and the filling is bubbling.
-
Cool and Serve: Allow the mini pies to cool in the tin for at least 10–15 minutes. Run a thin knife around the edges to loosen them before carefully lifting them out. Serve warm or at room temperature.
Mastering the Filling: Selecting the Best Apples and Caramel
The success of a caramel apple mini pie hinges on the contrast between the tartness of the fruit and the sweetness of the caramel. Because these pies are small, the texture of the filling is paramount. Large chunks of apple can result in air pockets and uneven cooking; therefore, finely dicing the fruit—aiming for pieces roughly a quarter-inch in size—is the secret to a dense, jammy interior.
Granny Smith apples remain the gold standard for baking due to their firm texture and sharp acidity, which cuts through the richness of the caramel. However, for a more complex flavor profile, consider blending Granny Smiths with Honeycrisp or Braeburn apples. These varieties hold their shape well under heat while contributing a subtle floral sweetness.
The caramel component requires careful consideration as well. If using store-bought sauce, look for “sea salt caramel” or a thick “fleur de sel” variety. Thinner, syrup-like caramels often used for coffee can vanish into the crust or cause the bottom to become soggy. A thick, high-quality caramel will stay somewhat intact during the baking process, creating a gooey, decadent layer that anchors the fruit.
The Secret to a Flaky, No-Soggy-Bottom Crust
When baking mini pies in a muffin tin, the most common challenge is the “soggy bottom.” Because the pastry is enclosed in a metal tin, moisture from the apples can easily trap itself against the dough. To prevent this, the pastry must be kept as cold as possible before it hits the oven. Cold butter creates steam as it melts, which is what produces those coveted flaky layers.
Another professional tip is to add a thickening agent to the filling. While flour is used in the recipe above, some bakers prefer cornstarch or instant clear gel for a more transparent, glossy finish. These thickeners bind the juices released by the apples, preventing them from saturating the bottom crust.
Furthermore, preheating your oven thoroughly and even placing the muffin tin on a preheated baking sheet can help. This provides an immediate burst of heat to the bottom of the tin, setting the pastry quickly and ensuring a crisp, golden base. If you find your crusts are still softening, a light dusting of breadcrumbs or ground nuts at the bottom of the pastry shell before adding the filling can act as a moisture barrier.
Creative Variations and Decorative Finishes
One of the joys of mini pies is their versatility. While the classic lattice top is visually stunning, there are several ways to customize these treats to suit your personal style or the specific occasion. For a rustic look, try a “streusel” or crumble topping instead of a top crust. A mixture of oats, brown sugar, butter, and pecans adds a delightful crunch that complements the soft apple interior.
Flavor infusions can also elevate the recipe. Consider adding a teaspoon of freshly grated ginger to the apple mixture for a spicy kick, or incorporate a splash of bourbon into the caramel sauce for an “adult” version of the dessert. For those who enjoy the “salted” aspect of caramel, a tiny pinch of Maldon sea salt flakes sprinkled on top of the pies immediately after they emerge from the oven provides a sophisticated flavor contrast.
If you are serving these at a formal event, appearance is key. Using small decorative pie crust cutters—such as tiny leaves, stars, or hearts—to create the top crust adds a professional, artisanal touch. These small details transform a simple snack into a centerpiece-worthy dessert.
Serving, Storage, and Reheating Best Practices
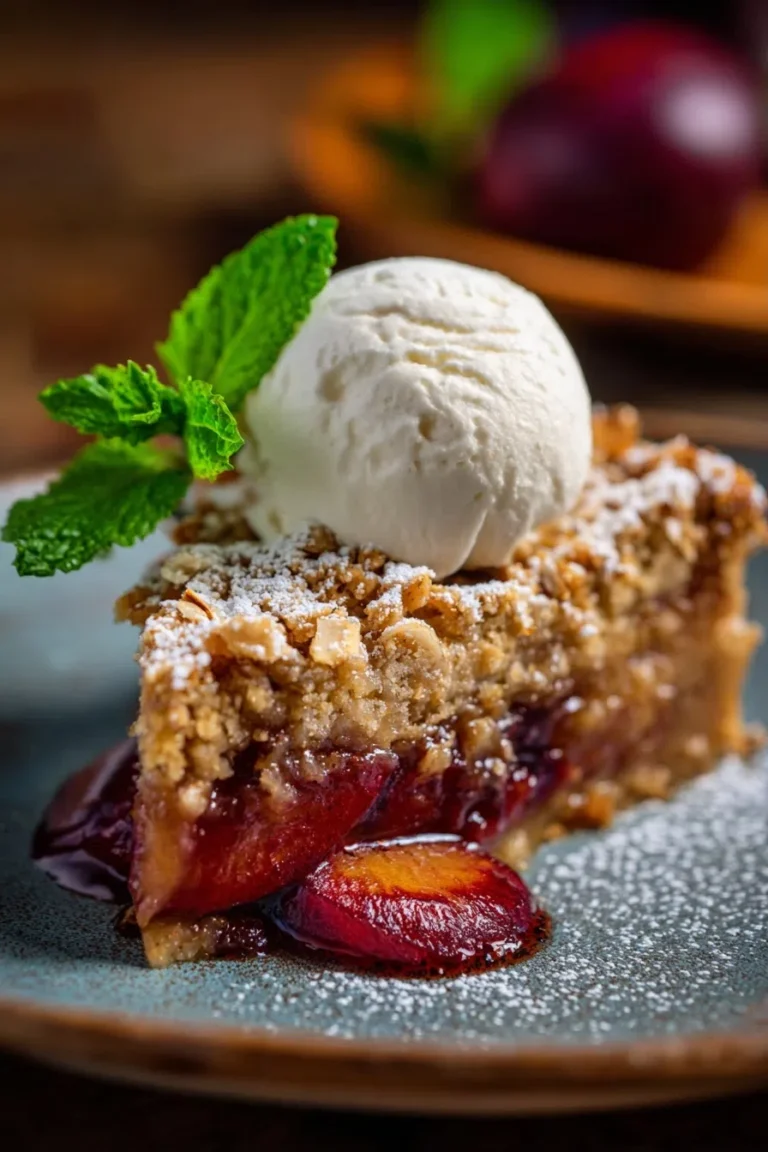
Caramel apple mini pies are best enjoyed slightly warm, perhaps accompanied by a small dollop of whipped cream or a tiny scoop of vanilla bean ice cream. The warmth softens the caramel and enhances the aromatic spices, creating the ultimate sensory experience.
If you have leftovers, these pies store remarkably well. They can be kept in an airtight container at room temperature for up to two days, or in the refrigerator for up to five days. To maintain the crispness of the crust, avoid microwaving them. Instead, reheat the pies in a 350°F (175°C) oven or a toaster oven for 5–8 minutes. This restores the pastry’s texture while gently warming the filling.
For those who like to plan ahead, mini pies are excellent candidates for freezing. You can freeze them unbaked: simply assemble the pies in the tin, freeze until solid, then transfer them to a freezer-safe bag. When ready to eat, bake them directly from frozen, adding an extra 5–10 minutes to the total baking time. Alternatively, fully baked pies can be frozen for up to three months. Simply thaw them overnight in the refrigerator before reheating. This makes them an ideal “make-ahead” dessert for busy holiday seasons, ensuring you always have a gourmet treat ready at a moment’s notice.