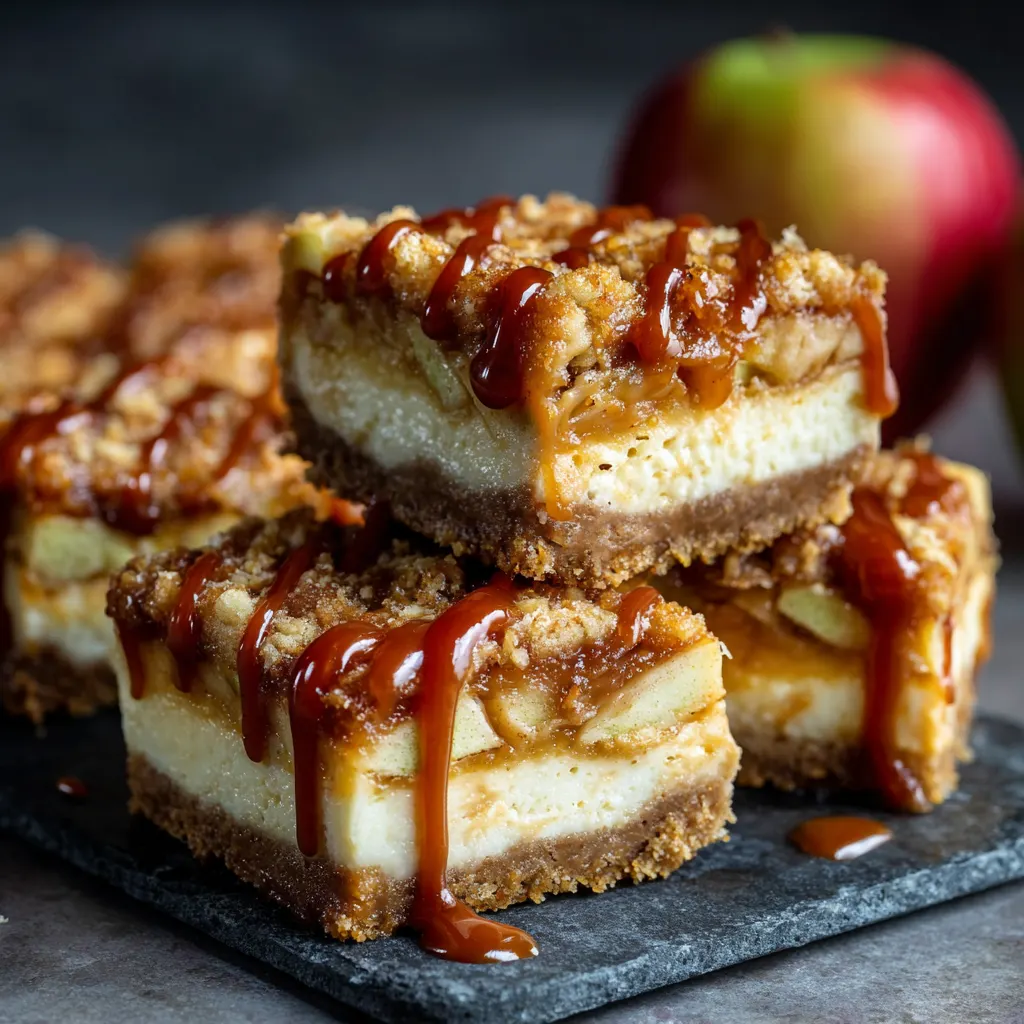
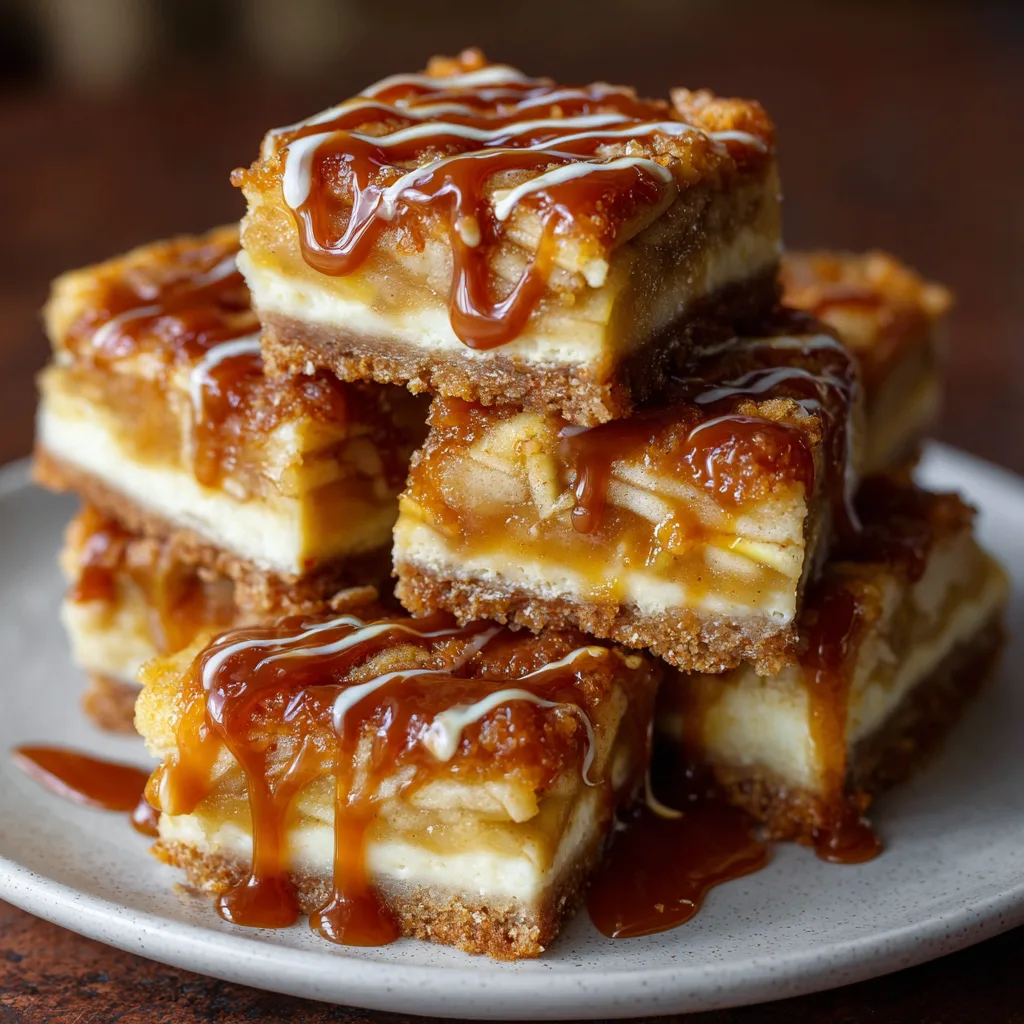
The Ultimate Caramel Apple Cheesecake Bars
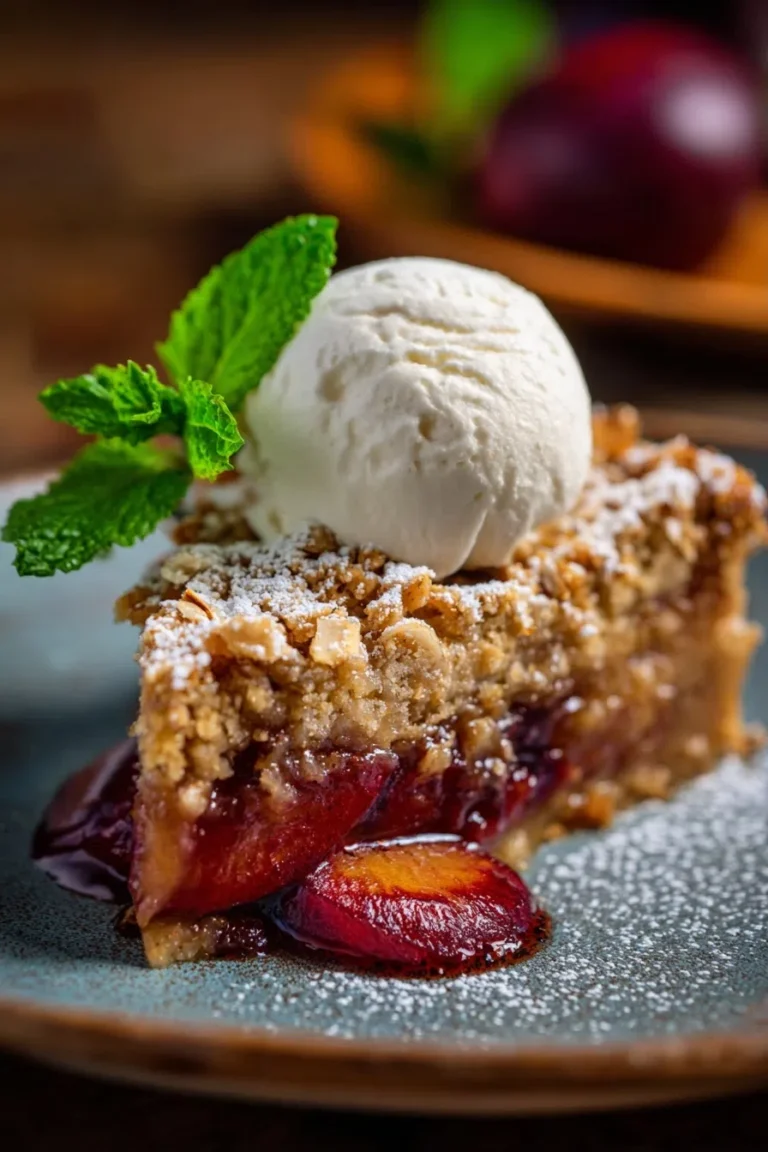
When autumn arrives and the air turns crisp, few desserts capture the essence of the season quite like Caramel Apple Cheesecake Bars. This decadent treat combines the buttery crunch of a shortbread crust with a silky-smooth cheesecake layer, topped with cinnamon-spiced apples, a golden oat streusel, and a generous drizzle of salted caramel. It is the perfect marriage of a classic apple crisp and a rich New York-style cheesecake, making it a show-stopping addition to any Thanksgiving table, orchard outing, or weekend baking project.
Ingredients
For the Shortbread Crust:
-
2 cups all-purpose flour
-
½ cup light brown sugar, packed
-
¾ cup unsalted butter, softened
For the Cheesecake Filling:
-
16 oz (two 8-oz blocks) cream cheese, softened to room temperature
-
½ cup granulated sugar
-
2 large eggs, room temperature
-
1 tsp pure vanilla extract
For the Apple Topping:
-
3 large Granny Smith apples, peeled, cored, and finely chopped
-
2 tbsp granulated sugar
-
½ tsp ground cinnamon
-
¼ tsp ground nutmeg
For the Oat Streusel:
-
½ cup light brown sugar
-
½ cup all-purpose flour
-
¼ cup rolled oats
-
¼ cup unsalted butter, cold and cubed
For the Finishing Touch:
-
¼ cup high-quality caramel sauce (store-bought or homemade)
-
Optional: A pinch of flaky sea salt
Step-by-Step Instructions
-
Prepare the Oven and Pan: Preheat your oven to 350°F (175°C). Line a 9×9-inch baking pan with parchment paper, leaving an overhang on the sides to easily lift the bars out later.
-
Make the Crust: In a medium bowl, combine the flour and brown sugar. Cut in the softened butter using a pastry blender or your fingers until the mixture resembles coarse crumbs. Press the mixture firmly into the bottom of the prepared baking pan. Bake for 12–15 minutes or until the edges are very lightly golden.
-
Prepare the Filling: While the crust bakes, beat the cream cheese and granulated sugar in a large bowl until smooth. Add the eggs one at a time, followed by the vanilla extract, beating on low speed just until combined. Avoid over-mixing to prevent air bubbles.
-
Sauté the Apples: In a small bowl, toss the chopped apples with the sugar, cinnamon, and nutmeg. If you prefer a softer apple texture, you can sauté them in a pan for 3–5 minutes before adding them to the bars, though they will soften beautifully in the oven regardless.
-
Assemble the Layers: Pour the cheesecake filling over the warm, pre-baked crust. Spread the apple mixture evenly over the cheesecake layer.
-
Add the Streusel: In a small bowl, combine the brown sugar, flour, and oats. Cut in the cold butter until the mixture is crumbly. Sprinkle the streusel generously over the apple layer.
-
Bake: Return the pan to the oven and bake for 40–45 minutes. The cheesecake should be set around the edges but still have a slight jiggle in the center.
-
Cool and Chill: This is the most critical step. Allow the bars to cool to room temperature on a wire rack, then refrigerate for at least 3 hours (preferably overnight).
-
Drizzle and Serve: Once fully chilled, use the parchment overhang to lift the bars out of the pan. Drizzle with caramel sauce and sprinkle with sea salt if desired. Slice into squares and serve.
Choosing the Best Ingredients for Maximum Flavor
The secret to a bakery-quality cheesecake bar lies in the quality and type of ingredients used. For the fruit layer, Granny Smith apples are the industry standard for baking. Their firm texture holds up under high heat without turning into mush, and their signature tartness provides a necessary contrast to the sweet caramel and rich cream cheese. If you prefer a slightly sweeter profile, Honeycrisp or Braeburn apples are excellent alternatives that still maintain their structural integrity during the baking process.
When it comes to the cheesecake base, always opt for full-fat brick cream cheese rather than the spreadable kind found in tubs. The brick variety contains less moisture and more stabilizers, which ensures the bars set firmly enough to be held by hand. Furthermore, ensuring your eggs and cream cheese are at true room temperature before mixing is non-negotiable. Cold ingredients often result in a lumpy batter, whereas room-temperature components emulsify into a velvety, professional-grade filling.
Finally, do not overlook the caramel. While a quick store-bought squeeze bottle works in a pinch, a thick, jarred sea salt caramel or a homemade version made with heavy cream and butter will elevate the dish significantly. The caramel shouldn’t just be a garnish; it should be a flavor component that ties the spiced apples and the buttery crust together.
Expert Tips for the Perfect Layered Texture
Achieving the perfect multi-layered bar requires a bit of finesse, particularly when balancing the moisture of the apples with the creaminess of the cheesecake. One common pitfall is a “soggy” middle layer. To avoid this, ensure your chopped apples are uniform in size—about a quarter-inch dice is ideal. If the apples are too large, they won’t cook through; if they are too small, they may release too much juice and thin out the cheesecake batter.
The “blind bake” of the crust is another essential technique. By baking the shortbread base for a few minutes before adding the wet ingredients, you create a barrier that prevents the cheesecake from soaking into the crust. This results in a distinct, crunchy bottom layer that provides a satisfying structural snap when you bite into the bar.
For the streusel topping, the temperature of the butter is key. Using cold, cubed butter—rather than melted butter—ensures that the topping remains crumbly and “nugget-like” rather than melting into a flat sheet. If your kitchen is particularly warm, consider tossing the streusel mixture into the freezer for five minutes before sprinkling it over the apples. This helps the oats and flour maintain their shape, providing that iconic “crisp” texture that contrasts so well with the soft cheesecake.
Storage, Make-Ahead, and Freezing Instructions
Caramel Apple Cheesecake Bars are an ideal “make-ahead” dessert because they actually improve with time. As the bars sit in the refrigerator, the flavors of the cinnamon and nutmeg penetrate the cheesecake, and the crust softens just enough to make slicing easy while remaining crisp on the bottom. You can safely prepare these bars up to two days in advance. Simply keep them in the refrigerator, covered tightly with foil or plastic wrap, and wait to add the caramel drizzle until just before serving to prevent the topping from becoming sticky.
If you have leftovers, they will stay fresh in an airtight container in the refrigerator for up to five days. Because of the dairy content, they should never be left out at room temperature for more than two hours.
For those who like to plan well in advance, these bars freeze beautifully. To freeze, let the baked bars cool and chill completely in the refrigerator. Cut them into squares, but do not add the caramel drizzle. Wrap each square individually in plastic wrap and then place them in a heavy-duty freezer bag. They will maintain their quality for up to three months. When you are ready to enjoy them, thaw the bars in the refrigerator overnight and apply the caramel sauce fresh.
Serving Suggestions and Creative Variations
While these bars are spectacular on their own, there are several ways to customize them to suit different dietary needs or flavor preferences. For a “Salted Caramel” twist, incorporate a half-teaspoon of flaky sea salt directly into the caramel drizzle or even into the shortbread crust. If you enjoy a bit of crunch, adding a half-cup of chopped pecans or walnuts to the oat streusel provides an earthy depth that complements the apples perfectly.
For those requiring a gluten-free option, the all-purpose flour in both the crust and the streusel can be replaced with a 1-to-1 gluten-free baking flour blend. Since the cheesecake filling is naturally gluten-free (just double-check your vanilla extract), this is an easy modification that doesn’t sacrifice flavor.
When it comes to presentation, these bars are versatile. For a casual gathering, serve them as handheld squares on a rustic wooden platter. For a more formal plated dessert, serve a slightly warmed bar with a scoop of premium vanilla bean ice cream on the side. The heat from the bar will slightly melt the ice cream, creating a “pie a la mode” experience that feels incredibly indulgent. No matter how you choose to serve them, the combination of warm spices, tart fruit, and cool cream cheese is a timeless flavor profile that defines the best of autumnal baking.