Best Ever Caramel Apple Cheesecake Bars: Your New Fall Favorite
The air grows crisp, leaves begin to paint the world in fiery hues, and my kitchen starts to hum with the sweet, comforting scents of autumn baking. It brings me right back to my grandmother’s kitchen, where every fall, she’d pull out her cherished apple recipes. One particularly blustery Sunday afternoon, with the rain drumming against the windowpanes, I remember her saying, “There’s nothing quite like a warm dessert to chase away the chill.” That day, inspired by her love for classic flavors and my own cheesecake obsession, I first dreamed up these incredible Caramel Apple Cheesecake Bars. They quickly became a staple, a true family favorite, perfect for any cozy gathering or just a quiet evening at home.
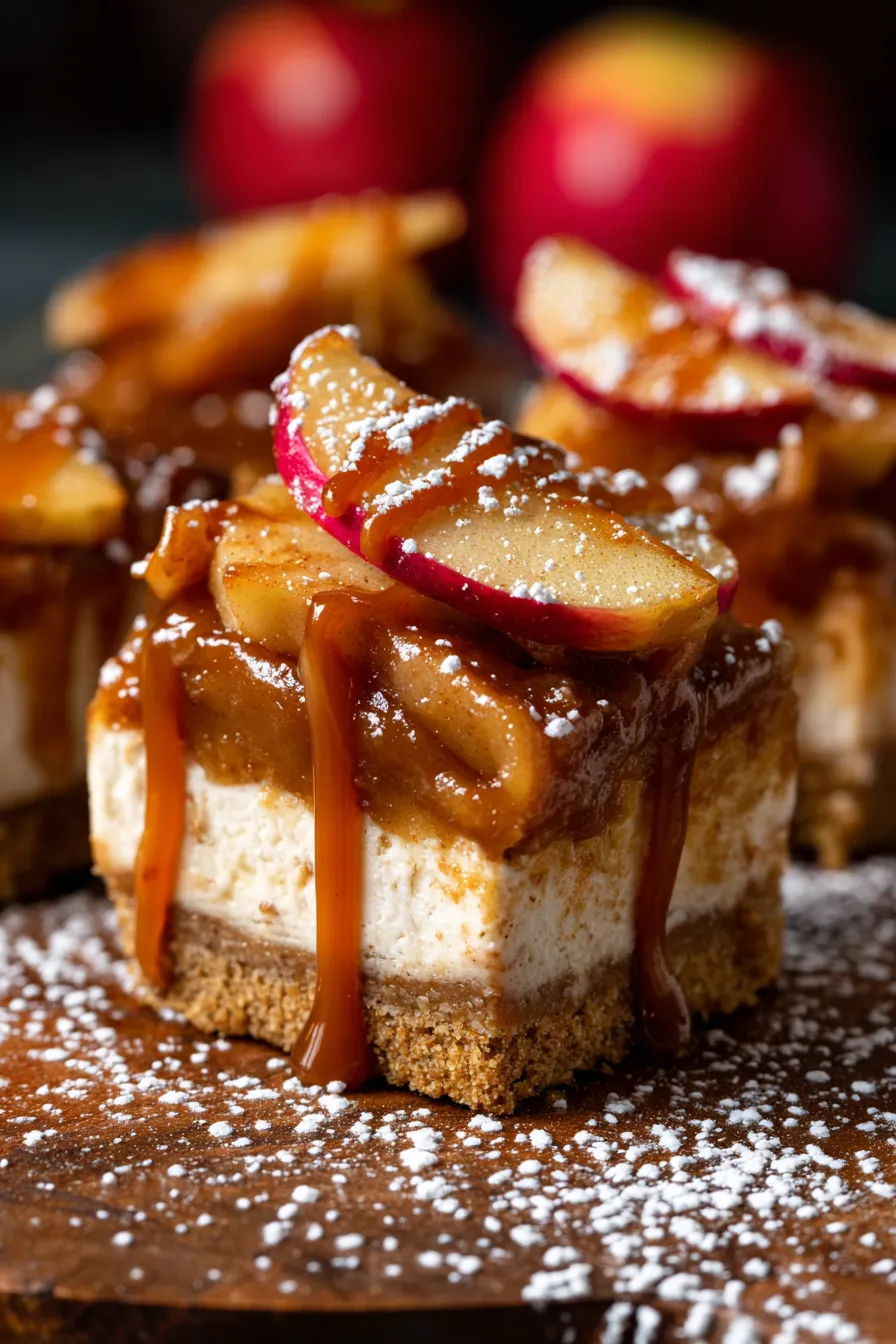
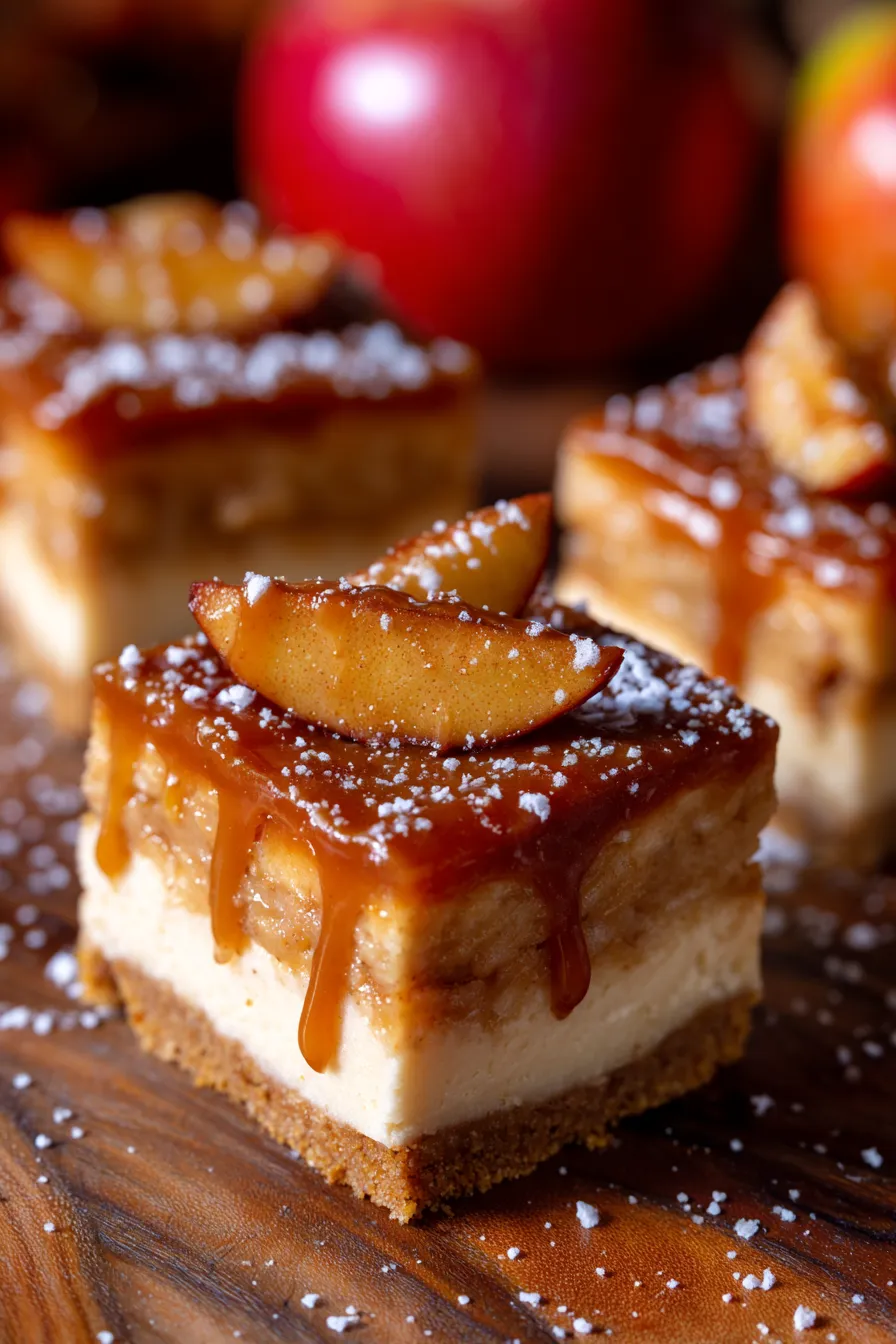
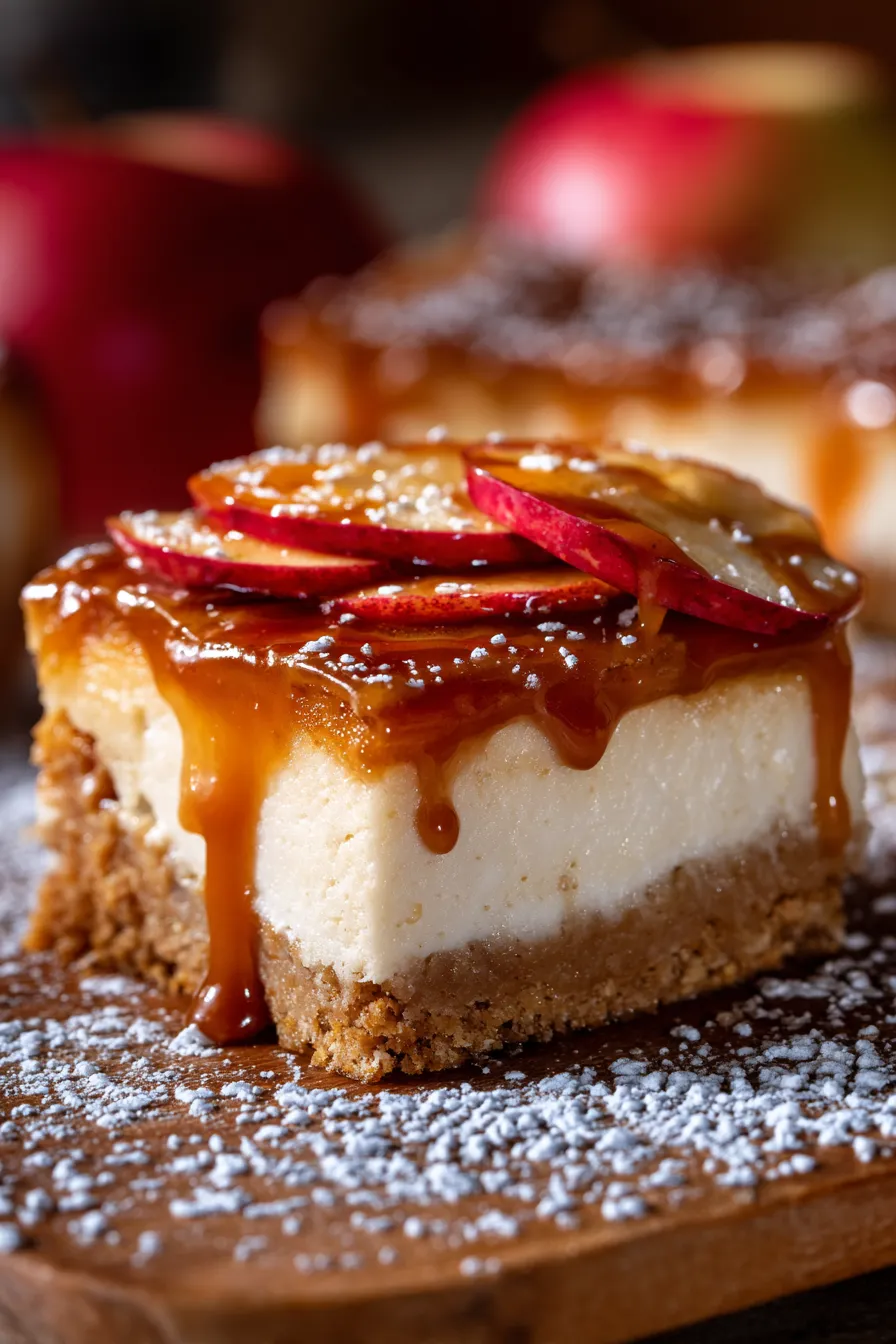
These bars are more than just a dessert; they’re an experience, a delightful symphony of textures and tastes. Imagine a golden, buttery graham cracker crust, a silky-smooth, perfectly spiced cream cheese filling, and a luscious layer of tender, cinnamon-kissed apples, all crowned with a generous drizzle of rich, gooey caramel. It’s the ultimate comfort food for fall, an easy dessert that looks utterly impressive without demanding hours of your time. Every single batch of these Caramel Apple Cheesecake Bars is rigorously tested, ensuring you get perfect results every single time.
This recipe is designed to bring joy and warmth into your home, whether you’re a seasoned baker or just starting your culinary journey. It perfectly captures the essence of autumn in every bite, blending the tangy sweetness of apples with the creamy richness of cheesecake and the irresistible allure of caramel. Get ready to fall in love with your new go-to seasonal treat!
Why You’ll Love These Caramel Apple Cheesecake Bars
- Irresistible Flavor Combination: Picture this: the sweet, tangy warmth of baked apples, the creamy tang of classic cheesecake, and the rich, buttery notes of caramel. It’s a flavor explosion that truly embodies the magic of autumn in every single bite. Each element works in perfect harmony, creating a dessert that’s both familiar and wonderfully indulgent.
- Perfect Texture Play: You’ll adore the delightful contrast! We start with a crisp, buttery graham cracker crust that provides a satisfying crunch. This is beautifully complemented by the velvety smooth, melt-in-your-mouth cheesecake layer. And then, there are the tender, yet still slightly firm, spiced apples that add another layer of textural intrigue. The final drizzle of gooey caramel pulls it all together, adding a luscious finish.
- Easier Than a Full Cheesecake: While they deliver all the wow-factor of a traditional cheesecake, these bars are significantly simpler to prepare. No fussy water baths, no intricate springform pan worries, and the baking time is much shorter. You get all the elegance and flavor with half the effort, making them perfect for busy weeknights or impromptu gatherings.
- Ideal for Sharing (or Not!): Whether you’re hosting a fall feast, bringing a treat to a potluck, or just want something special for your family, these bars are perfectly portioned. They slice beautifully into neat squares, making them easy to serve and enjoy. Plus, they’re always a huge crowd-pleaser, disappearing faster than you can say “autumn leaves.”
- Make-Ahead Magic: These bars actually taste even better the next day once the flavors have had a chance to meld and deepen in the fridge. This makes them an absolute dream for entertaining, as you can prepare them in advance and simply pull them out when it’s time for dessert. Fewer last-minute stresses mean more time to enjoy your company!
- Visually Stunning: With their distinct layers of golden crust, creamy white cheesecake, jewel-toned apples, and glistening caramel drizzle, these bars are absolutely gorgeous. They look incredibly professional and inviting, sure to impress anyone who sees them on your dessert table. They’re a feast for the eyes before they even reach your palate!
- Versatile & Adaptable: While the classic recipe is divine, these bars are also incredibly forgiving and open to customization. Want to try a different fruit? Go for it! Prefer a nuttier crust? Easy! We’ll cover some fun variations later in this post, so you can truly make this recipe your own and experiment with different flavors to suit your cravings.
What You Need
You only need a few simple pantry staples for these divine Caramel Apple Cheesecake Bars! We’re talking basic ingredients that come together to create something truly spectacular. Make sure your cream cheese is softened, your butter is melted, and your apples are ready for their sweet transformation. Check the full printable recipe card below for detailed measurements and a complete list of everything you’ll need to bake up this autumn masterpiece.
Expert Tips for Cheesecake Bar Perfection
- Soften That Cream Cheese: This is non-negotiable for a silky-smooth cheesecake layer! Cold cream cheese will result in a lumpy batter, no matter how much you beat it. Take it out of the fridge at least an hour or two before you start, or gently warm it in the microwave in 15-second intervals until it’s pliable.
- Don’t Overmix the Cheesecake: Once you add the eggs to the cream cheese mixture, mix *just* until they are incorporated. Overmixing introduces too much air, which can cause the cheesecake to puff up significantly in the oven and then crack as it cools. Gentle stirring is key!
- Choose the Right Apples: For baking, you want apples that hold their shape and offer a good balance of sweet and tart. Honeycrisp, Granny Smith, Fuji, or Gala are all excellent choices. Avoid apples that turn mushy quickly, like Red Delicious. Cut them into small, even dice for consistent cooking.
- Cook Apples Until Tender-Crisp: You don’t want mushy apples in your bars! Cook them just until they are tender but still have a slight bite. They will continue to soften a little during the cheesecake baking process. This ensures a lovely texture in the finished bars.
- Pre-bake the Crust: Don’t skip this step! Pre-baking the graham cracker crust helps it set up, preventing it from becoming soggy once the cheesecake filling is added. It also enhances the nutty, buttery flavor. Just a quick 10 minutes is all it takes.
- Cooling is CRUCIAL: Patience is a virtue, especially with cheesecake. After baking, turn off the oven and let the bars cool *in the oven* with the door slightly ajar for about 30 minutes. This slow cooling process helps prevent dramatic temperature changes that can lead to cracking.
- Chill, Chill, Chill: These bars absolutely need ample time to chill in the refrigerator. A minimum of 4 hours, but ideally overnight, will allow the cheesecake to fully set and the flavors to meld beautifully. Trying to slice them too early will result in a messy, unset dessert.
- Use Parchment Paper: Lining your baking pan with parchment paper (with an overhang on the sides) is a lifesaver! It makes lifting the fully cooled and chilled bars out of the pan incredibly easy, allowing for clean, perfect slices.
- Warm Your Caramel Drizzle: If using store-bought caramel sauce, warm it slightly in the microwave for a few seconds before drizzling. This makes it much smoother and easier to spread evenly over the chilled bars, creating those beautiful, glossy ribbons.
- Clean Slices Every Time: For perfectly neat bars, use a sharp, warm knife. Wipe the knife clean with a damp cloth after each slice. This prevents the cheesecake and caramel from sticking and ensures every piece looks professional and inviting.
Variations & Substitutions for Creative Baking
These Caramel Apple Cheesecake Bars are wonderfully versatile, lending themselves to all sorts of delicious tweaks!
- Different Fruits: Instead of apples, try pears, peaches (canned or fresh), or even a mix of berries for a different seasonal twist. Adjust the spices accordingly – cinnamon works beautifully with most fruits!
- Crust Creativity: No graham crackers? No problem! Use crushed Biscoff cookies, vanilla wafers, or even shortbread cookies for a unique crust. For a gluten-free option, simply use gluten-free graham crackers or a nut-based crust.
- Spice It Up: Add a pinch of ginger, allspice, or cardamom to your apple mixture for extra warmth and complexity. A tiny amount of apple pie spice blend works wonders too!
- Nutty Additions: Fold chopped pecans or walnuts into the graham cracker crust for extra crunch and flavor. You could also sprinkle some toasted nuts over the top of the finished bars for a beautiful garnish.
- Flavorful Caramel: Experiment with different types of caramel! A salted caramel sauce adds a sophisticated touch, or try a bourbon caramel for an adult twist. You can even make your own homemade caramel for the freshest taste.
- Cream Cheese Swirl: For an even prettier presentation, once you’ve spooned the apples over the cheesecake layer, add a few dollops of extra cream cheese mixture (if you saved a little before adding eggs) and swirl it gently with a knife for a marbled effect.
Storage & Freezing Instructions
Proper storage ensures your Caramel Apple Cheesecake Bars stay fresh and delicious for days!
- Refrigerator: Store leftover bars in an airtight container in the refrigerator for up to 4-5 days. They actually taste fantastic chilled, allowing the flavors to meld even further.
- Freezing: Yes, you can freeze these! For best results, slice the chilled bars first. Place them in a single layer on a parchment-lined baking sheet and freeze until firm (about 1-2 hours). Once firm, transfer the individual bars to an airtight freezer-safe container or a freezer bag, separating layers with parchment paper.
- Thawing: Thaw frozen bars overnight in the refrigerator or at room temperature for an hour or two before serving. Add a fresh drizzle of caramel if desired after thawing. They will keep in the freezer for up to 1-2 months.
Frequently Asked Questions (FAQ)
Q: Can I use store-bought caramel sauce?
A: Absolutely! Store-bought caramel sauce is a fantastic shortcut and works wonderfully for these bars. Just make sure to warm it slightly before drizzling for the best consistency.
Q: What kind of apples are best for this recipe?
A: For optimal flavor and texture, I recommend using a firm, slightly tart apple variety like Honeycrisp, Granny Smith, Fuji, or Gala. These hold their shape well during baking and provide a lovely contrast to the sweet cheesecake.
Q: How do I prevent the cheesecake from cracking?
A: The key is slow, gentle cooling! Don’t overmix the batter, and after baking, turn off the oven and let the bars cool inside with the door slightly ajar for 30 minutes. Then, remove and cool completely on a wire rack before chilling. This gradual temperature change minimizes cracks.
Q: Can I make these Caramel Apple Cheesecake Bars ahead of time?
A: Yes, absolutely! These bars are actually perfect for making ahead. The flavors deepen and the texture sets beautifully after a good chill in the refrigerator, making them an excellent option for entertaining. Prepare them the day before for best results.
Q: What if I don’t have a 9×13 inch pan?
A: You can use an 8×8 or 9×9 inch square pan for thicker bars, but you’ll likely need to increase the baking time slightly. Alternatively, a 10×15 inch jelly roll pan will yield thinner bars with a shorter baking time. Just watch for the center to be mostly set.
Conclusion
There you have it – the ultimate recipe for Caramel Apple Cheesecake Bars that will undoubtedly become a cherished part of your autumn traditions. They’re easy, incredibly flavorful, and perfectly capture the cozy spirit of the season. I truly hope you enjoy making and sharing these delightful treats as much as I do. Don’t forget to snap a picture and tag me if you try them! Happy baking, and happy fall! Pin this recipe for later so you always have the perfect fall dessert at your fingertips.

Caramel Apple Cheesecake Bars: The Ultimate Fall Dessert
Ingredients
- For the Crust:
- 1 ½ cups graham cracker crumbs
- ¼ cup granulated sugar
- ½ cup unsalted butter, melted
- For the Cheesecake Filling:
- 2 (8-ounce) packages cream cheese, softened
- ½ cup granulated sugar
- 2 large eggs
- 1 teaspoon vanilla extract
- 1 tablespoon all-purpose flour
- For the Apple Topping:
- 2 medium apples (Honeycrisp or Granny Smith), peeled, cored, and diced
- 2 tablespoons unsalted butter
- ¼ cup brown sugar, packed
- ½ teaspoon ground cinnamon
- Pinch of nutmeg
- For the Caramel Drizzle:
- ½ cup store-bought or homemade caramel sauce
Instructions
- Step 1 1. Preheat oven to 350°F (175°C). Line a 9x13 inch baking pan with parchment paper, leaving an overhang on the sides.
- Step 2 2. Make the Crust: In a medium bowl, combine graham cracker crumbs, granulated sugar, and melted butter. Press firmly into the bottom of the prepared pan. Bake for 10 minutes. Remove and let cool slightly.
- Step 3 3. Prepare the Apple Topping: In a skillet over medium heat, melt 2 tablespoons butter. Add diced apples, brown sugar, cinnamon, and nutmeg. Cook, stirring occasionally, until apples are tender-crisp, about 5-7 minutes. Set aside to cool.
- Step 4 4. Make the Cheesecake Filling: In a large bowl, beat softened cream cheese and ½ cup granulated sugar with an electric mixer until smooth and creamy. Beat in eggs one at a time, mixing just until combined. Stir in vanilla extract and flour until smooth.
- Step 5 5. Assemble: Pour the cheesecake filling over the cooled crust. Spoon the cooled apple topping evenly over the cheesecake layer. You can swirl it slightly with a knife if desired.
- Step 6 6. Bake: Bake for 30-35 minutes, or until the center is set but still slightly wobbly. Turn off the oven, crack the door slightly, and let the cheesecake bars cool in the oven for 30 minutes. This helps prevent cracking.
- Step 7 7. Chill: Remove from oven and let cool completely on a wire rack. Once fully cooled, cover and refrigerate for at least 4 hours, or preferably overnight.
- Step 8 8. Finish: Once chilled, lift the bars out of the pan using the parchment paper overhang. Drizzle generously with caramel sauce before slicing and serving. Enjoy!