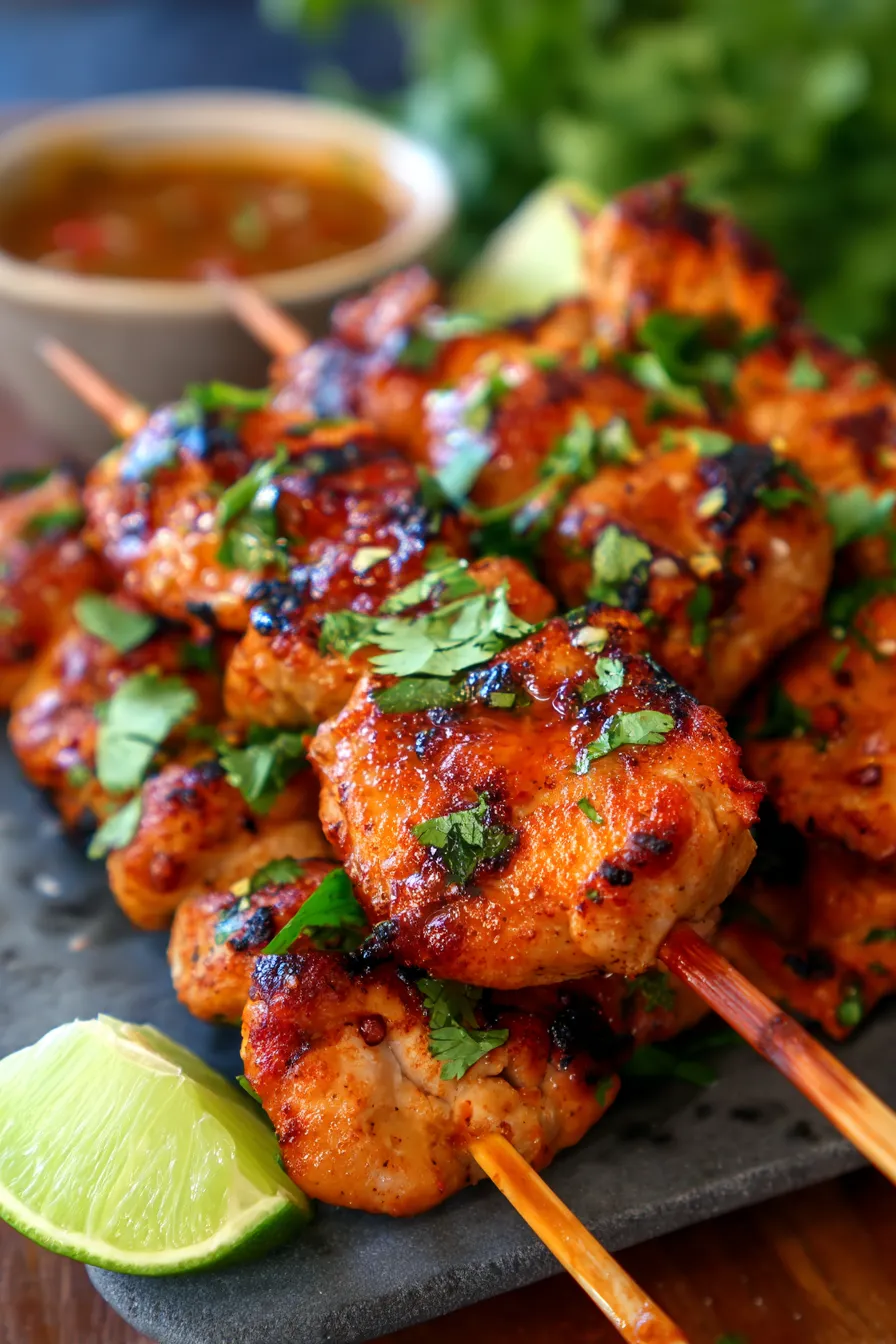
Best Ever Thai Chicken Satay (Baked or Grilled) with Peanut Sauce
There’s something incredibly special about food that transports you, isn’t there? For me, Thai Chicken Satay holds that magic. I can vividly remember the first time I made this for a relaxed Sunday family dinner, years ago. The aroma of the marinade filling my kitchen brought back memories of backpacking through bustling Bangkok markets, and suddenly, a quiet evening at home felt like a vibrant street food adventure.
That evening, plates were cleared faster than I could blink, and my family declared it an instant hit. From then on, this Thai Chicken Satay (Baked or Grilled) has been a constant request, a true family favorite and an easy weeknight dinner solution that never disappoints. It’s the perfect blend of sweet, savory, and a hint of spice, making it the ultimate comfort food for any occasion.
Whether you’re craving a taste of Thailand or just looking for a flavorful meal that’s simple to prepare, this tested and perfected recipe is for you. Get ready to impress your taste buds with tender, marinated chicken and the most luscious homemade peanut sauce you’ve ever tasted!

Why You’ll Love This Recipe
❤️ Oh, let me count the ways you’re going to fall head over heels for this incredible Thai Chicken Satay recipe!
- Authentic Thai Flavors, Made Easy: We’re talking about that perfect balance of savory, sweet, and a touch of tang. All the exotic flavors you love from your favorite Thai restaurant are achievable right in your own kitchen with minimal fuss. No special equipment or obscure ingredients needed!
- Incredibly Versatile Cooking Methods: Whether the sun is shining for a backyard barbecue or you’re stuck indoors on a chilly evening, this recipe has you covered. You can easily grill these skewers for that classic smoky char or bake them in the oven for a hands-off, equally delicious result. Both methods yield wonderfully tender and juicy chicken.
- The Best Homemade Peanut Sauce: Forget store-bought! Our quick and easy peanut sauce is rich, creamy, and packed with irresistible flavor. It’s the secret weapon that elevates the entire dish, and trust me, you’ll want to drizzle it on everything. It comes together in minutes.
- Perfect for Meal Prep: The marinade does all the heavy lifting, infusing the chicken with amazing taste. You can marinate the chicken a day in advance, making dinner prep a breeze on busy weeknights. Plus, the cooked skewers and sauce store beautifully for delicious leftovers.
- A Certified Crowd-Pleaser: From picky eaters to gourmet enthusiasts, everyone adores chicken satay. It’s fantastic as an appetizer for parties, a fun family dinner, or even packed into lunchboxes. The vibrant flavors and easy-to-eat skewer format make it universally loved.
- Healthy & Wholesome: Made with lean chicken fillets and a homemade sauce free from excessive additives, this recipe is a healthier option than many takeout dishes. You control the ingredients, ensuring a fresh and nutritious meal for your loved ones. It’s light yet incredibly satisfying.
- Customizable to Your Taste: Want more spice? Add extra chili. Prefer it sweeter? Adjust the brown sugar. This recipe is wonderfully forgiving and easy to adapt to your personal preferences. You can truly make it your own!
What You Need
You only need a few simple pantry staples for this recipe, many of which you likely already have! The key is fresh, quality ingredients for the best flavor. Check the full printable recipe card below for detailed measurements and a complete list.

Expert Tips for Perfect Thai Chicken Satay
💡 Achieving restaurant-quality satay at home is totally doable with these insider tips:
- Marinate for Maximum Flavor: Don’t skimp on marinating time! For the best, most tender, and flavorful chicken, aim for at least 2 hours, but ideally 4-6 hours, or even overnight in the refrigerator. The longer the chicken soaks up those incredible aromatics, the more depth of flavor it will have. This is truly the secret to succulent satay.
- Cut Chicken Evenly: When slicing your chicken fillets, try to keep them uniform in thickness and size. This ensures that all pieces cook at the same rate, preventing some from drying out while others are still undercooked. Thin, even strips work best for skewers.
- Soak Your Skewers: If using bamboo skewers, always soak them in water for at least 30 minutes (or longer!) before threading the chicken. This prevents them from burning and charring excessively, especially if you’re grilling or baking at high heat.
- Don’t Overcrowd the Skewers: Leave a little space between each piece of chicken on the skewer. Overcrowding can lead to steaming instead of searing, preventing that beautiful caramelization and even cooking. Airflow is your friend!
- High Heat is Key (Grilling): For grilling, preheat your grill to medium-high heat. You want a good sizzle when the chicken hits the grates to achieve those gorgeous grill marks and a slightly crispy exterior, while keeping the inside juicy. Clean grill grates also prevent sticking.
- Don’t Overcook: Chicken can dry out quickly. Cook until the internal temperature reaches 165°F (74°C). The cooking time will vary depending on the thickness of your chicken and the heat of your grill/oven. Use a meat thermometer for accuracy.
- Rest the Chicken: Once cooked, let the chicken skewers rest for a few minutes before serving. This allows the juices to redistribute, resulting in more tender and moist chicken. A quick rest makes a big difference!
- Make Peanut Sauce Ahead: The peanut sauce can be made a day or two in advance and stored in the refrigerator. This frees up precious time on cooking day and allows the flavors to meld even further, making it even more delicious. If it’s too thick after chilling, thin it with a little warm water or coconut milk.
- Serving Suggestions: While delicious on its own, satay pairs wonderfully with jasmine rice, a crisp cucumber salad, or steamed greens. A sprinkle of fresh cilantro and a squeeze of lime juice just before serving brightens all the flavors.
Variations & Substitutions
This recipe is incredibly adaptable! Feel free to get creative and make it your own:
- Different Proteins: Not a fan of chicken? This marinade works beautifully with pork tenderloin, beef sirloin, or even firm white fish fillets. Just adjust cooking times accordingly.
- Vegetarian/Vegan Option: Swap chicken for firm or extra-firm tofu (pressed well), tempeh, or hearty mushrooms like portobellos. Marinate for at least 30 minutes. Ensure your fish sauce is vegan (or omit), and use a vegan peanut butter and plant-based milk for the sauce.
- Gluten-Free: Easily make this GF by using tamari instead of regular soy sauce in both the marinade and the peanut sauce. Always double-check ingredient labels for hidden gluten.
- Spice Level: For more heat, add an extra pinch of red pepper flakes to the marinade or a dash of Sriracha to the peanut sauce. For less spice, simply reduce or omit the chili flakes.
- Nut-Free: If you have nut allergies, you can try a seed butter like sunflower seed butter for the sauce, though the flavor profile will change significantly. Always ensure all ingredients are safe for severe allergies.
Storage & Freezing
This Thai Chicken Satay is fantastic for meal prep and leftovers!
- Refrigeration: Cooked chicken satay skewers can be stored in an airtight container in the refrigerator for up to 3-4 days. The peanut sauce also keeps well in a separate airtight container for up to a week.
- Reheating: Gently reheat the skewers in the oven at 300°F (150°C) for about 10-15 minutes, or in a microwave until warmed through. Be careful not to overcook, as this can dry out the chicken.
- Freezing Cooked Satay: Once cooled, you can freeze cooked chicken satay (without the sauce) in a freezer-safe bag or container for up to 2-3 months. Thaw overnight in the refrigerator before reheating.
- Freezing Peanut Sauce: The peanut sauce also freezes surprisingly well! Store it in an airtight container for up to 3 months. Thaw in the fridge, then stir well and thin with a little warm water or coconut milk if needed to restore its creamy consistency.
FAQ
Q: Can I prepare the chicken satay ahead of time?
Absolutely! The chicken can be marinated for up to 24 hours in the refrigerator. You can also thread the chicken onto skewers and keep them covered in the fridge for a few hours before cooking. The peanut sauce can be made 1-2 days in advance and stored in the refrigerator, making this an ideal recipe for entertaining or busy weekdays.
Q: What should I serve with Thai Chicken Satay?
For a complete meal, Thai Chicken Satay pairs wonderfully with fluffy jasmine rice or fragrant coconut rice. A refreshing side salad, like a simple cucumber salad or a vibrant mixed green salad with a lime vinaigrette, complements the richness of the peanut sauce beautifully. Steamed green beans or blanched broccoli also make excellent additions.
Q: Is this recipe very spicy?
The base recipe has a mild, pleasant warmth from the curry powder and a hint of chili flakes, which most palates find enjoyable. If you prefer more heat, you can easily add extra red pepper flakes to the marinade or a dash of sriracha or chili garlic sauce to the peanut sauce. For a milder version, simply reduce or omit the chili flakes entirely.
Q: Can I use chicken thighs instead of fillets?
Yes, absolutely! Chicken thighs are a fantastic alternative. They tend to stay even more moist and tender due to their higher fat content. Just be sure to trim any excess fat and cut them into even strips or cubes. The cooking time might be slightly longer, so always check for an internal temperature of 165°F (74°C) to ensure they are fully cooked.
There you have it! Your ultimate guide to making the most delicious, crowd-pleasing Thai Chicken Satay (Baked or Grilled) right in your own kitchen. Whether it’s a weeknight treat or a special occasion, this recipe is sure to become a beloved staple. Don’t forget to pin this recipe for later and share your creations with us!

Best Thai Chicken Satay (Baked or Grilled) + Peanut Sauce
Ingredients
- 1.5 lbs chicken fillets, cut into 1-inch strips
- 1/2 cup full-fat coconut milk
- 2 tbsp red curry paste
- 1 tbsp turmeric powder
- 2 tbsp light brown sugar
- 1 tbsp fish sauce
- 1 tbsp lime juice
- 1/2 tsp salt
- 1/4 tsp black pepper
- 1 cup creamy peanut butter
- 1/2 cup full-fat coconut milk (for sauce)
- 2 tbsp soy sauce (or tamari for GF)
- 1 tbsp rice vinegar
- 1 tbsp brown sugar (for sauce)
- 1 tbsp lime juice (for sauce)
- 1 clove garlic, minced
- 1 tsp grated fresh ginger
- 1/4 tsp red pepper flakes (optional, for spice)
- Warm water, as needed for thinning sauce
- Wooden skewers, soaked in water
Instructions
- Step 1 Prepare the Marinade: In a medium bowl, combine 1/2 cup coconut milk, red curry paste, turmeric, 2 tbsp brown sugar, fish sauce, 1 tbsp lime juice, salt, and pepper. Whisk until well combined.
- Step 2 Marinate the Chicken: Add the chicken strips to the marinade, ensuring all pieces are fully coated. Cover the bowl and refrigerate for at least 2 hours, or up to 24 hours for best flavor.
- Step 3 Thread Skewers: Once marinated, thread the chicken strips onto the soaked wooden skewers. Try to leave a small space between each piece for even cooking.
- Step 4 Preheat Oven/Grill: If baking, preheat oven to 400°F (200°C). Line a baking sheet with parchment paper. If grilling, preheat grill to medium-high heat.
- Step 5 Cook the Chicken (Baked): Arrange skewers on the prepared baking sheet. Bake for 15-20 minutes, flipping halfway through, until chicken is cooked through and lightly golden. Internal temperature should reach 165°F (74°C).
- Step 6 Cook the Chicken (Grilled): Place skewers on the preheated grill. Grill for 3-5 minutes per side, turning occasionally, until chicken is cooked through with nice char marks. Internal temperature should reach 165°F (74°C).
- Step 7 Make the Peanut Sauce: While chicken cooks, prepare the sauce. In a small saucepan over low heat, combine peanut butter, 1/2 cup coconut milk, soy sauce, rice vinegar, 1 tbsp brown sugar, 1 tbsp lime juice, minced garlic, grated ginger, and red pepper flakes (if using). Stir constantly until smooth and warmed through. If the sauce is too thick, add warm water 1 tablespoon at a time until desired consistency is reached.
- Step 8 Serve: Arrange cooked chicken satay skewers on a platter. Serve immediately with the warm homemade peanut sauce for dipping. Garnish with fresh cilantro and lime wedges, if desired.