Decadent Mini Classic Cheesecakes: Your New Go-To Dessert!
Oh, the simple joys of a perfectly crafted dessert! I still remember the first time I truly fell in love with cheesecakes. It was a bustling Saturday afternoon at my grandma’s house, and the air was thick with the scent of vanilla and baking. She’d just pulled a tray of her famous Mini Classic Cheesecakes from the oven, each one a tiny masterpiece, cooling on the counter. The way she’d carefully spooned a dollop of berry compote on top, her eyes twinkling, is a memory I cherish. Those little treats weren’t just dessert; they were pure comfort food, a symbol of family gatherings and sweet traditions.
Fast forward to today, and these miniature delights are still a top contender for any occasion in my home. From quick weeknight indulgence to elegant party treats, they consistently steal the show. Over the years, I’ve perfected this recipe, making it incredibly simple yet undeniably decadent. It’s a tested, fool-proof method that brings all the rich, creamy goodness of a classic cheesecake into a delightful, portion-controlled package.
Get ready to impress everyone (including yourself!) with these unbelievably easy, creamy, and utterly delicious mini cheesecakes. You won’t believe how simple it is to achieve such a gourmet result at home. Let’s bake some magic!
❤️ Why You’ll Love This Recipe
- Perfectly Portioned Pleasure: Say goodbye to slicing and serving! Each mini cheesecake is a delightful individual serving, making them ideal for parties, potlucks, or simply portion control. No more fighting over the last slice!
- Effortlessly Elegant: Despite their sophisticated appearance, these cheesecakes are surprisingly easy to make. They look like you spent hours in the kitchen, but the actual hands-on time is minimal, allowing you more time to enjoy your guests or relax.
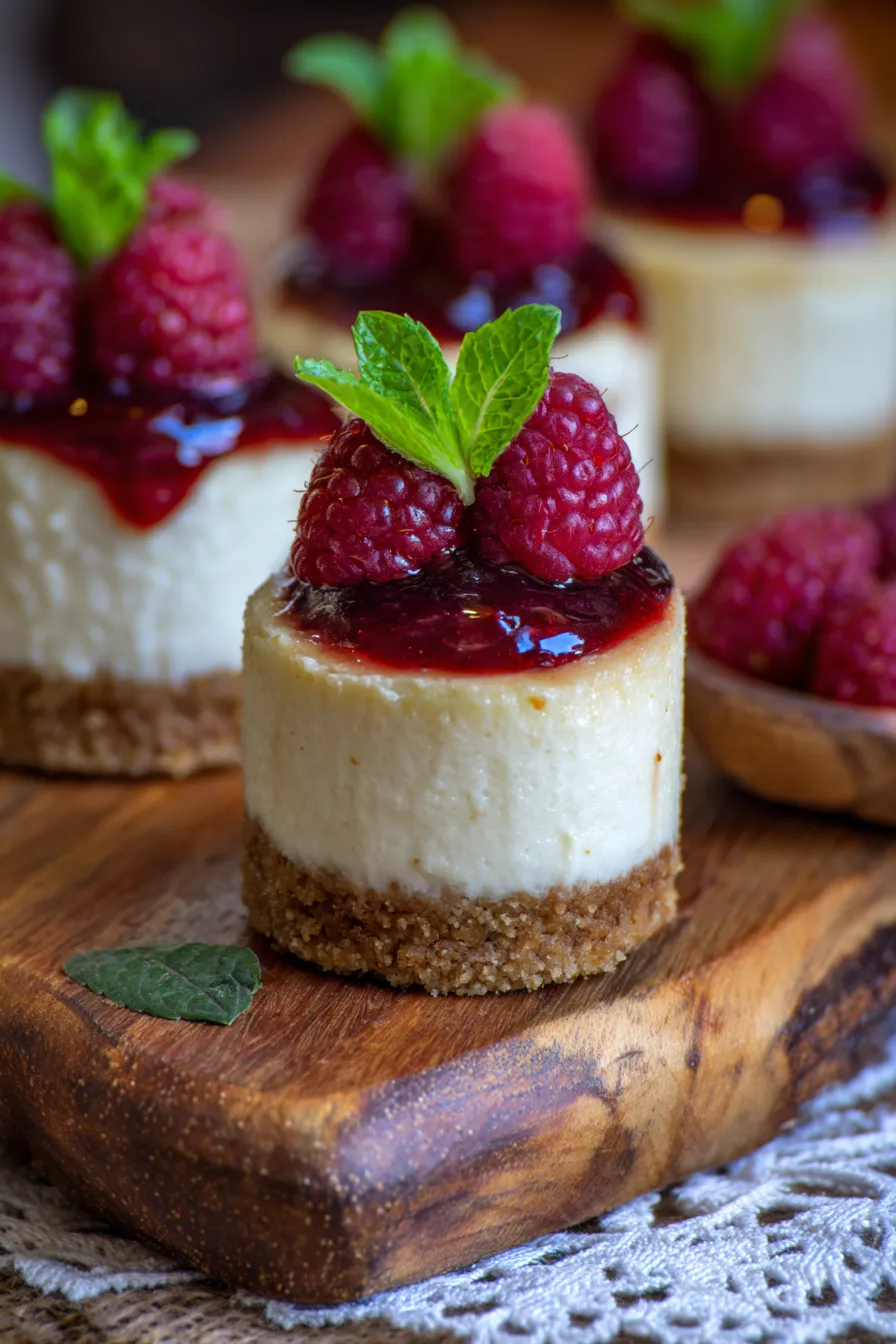
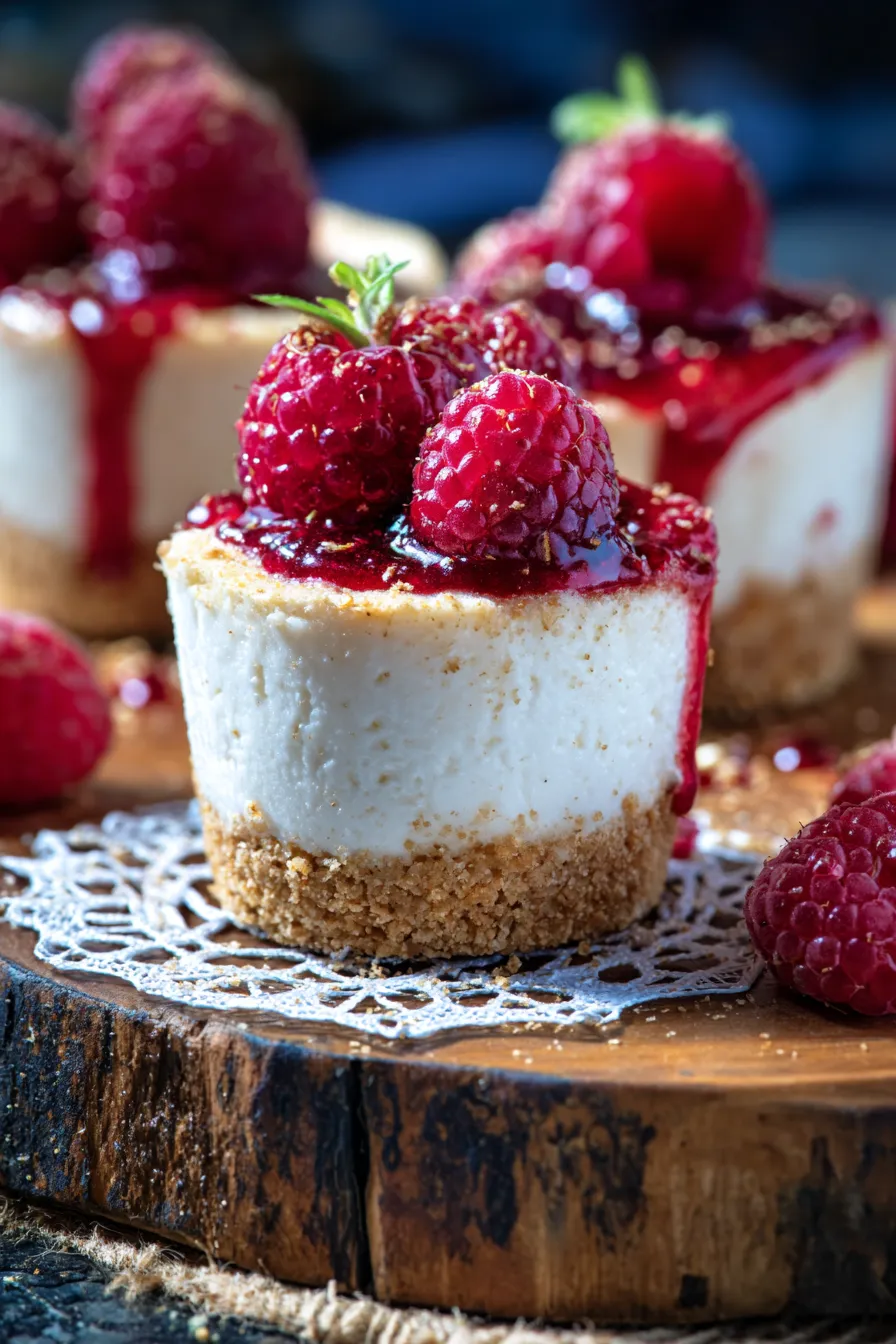
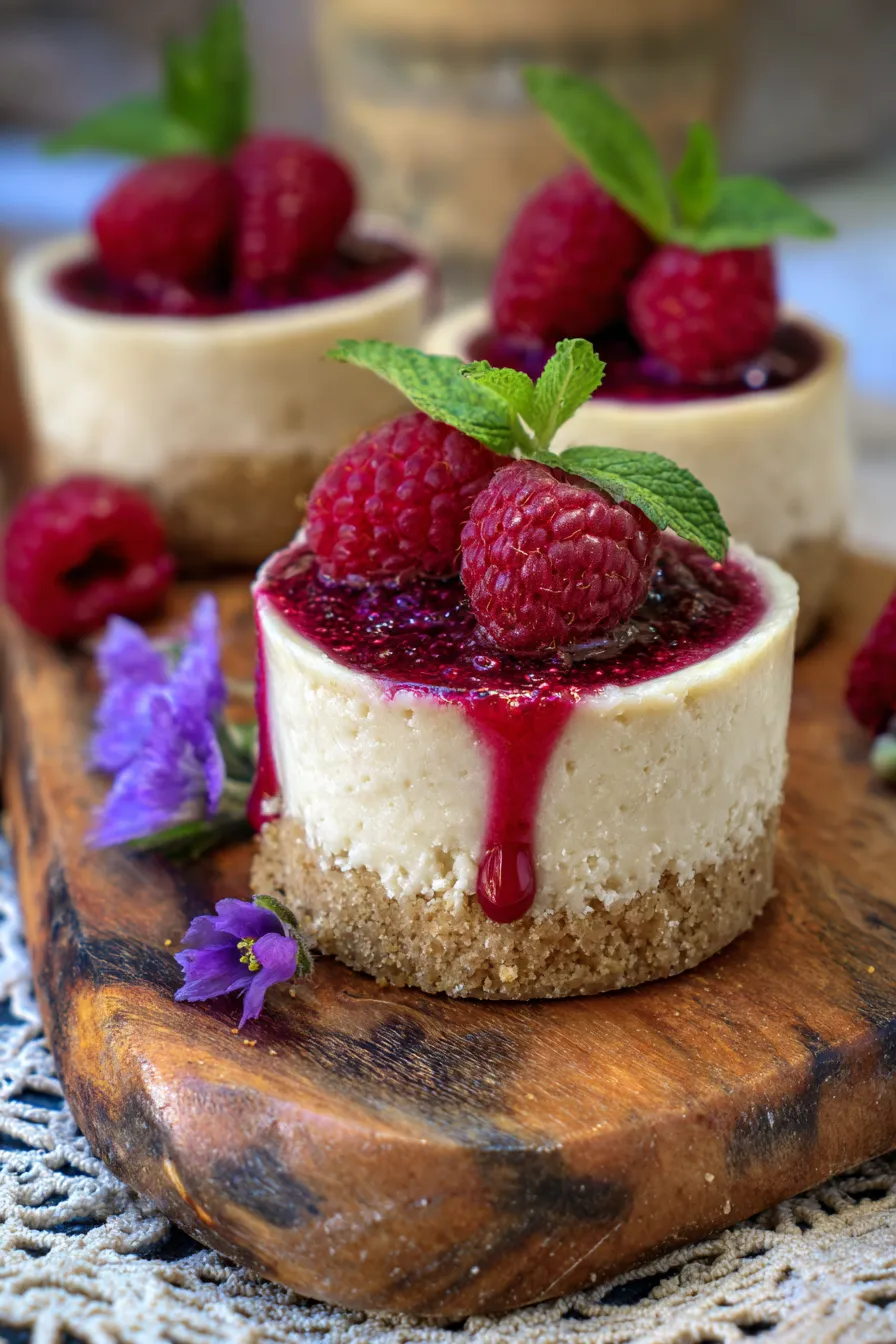
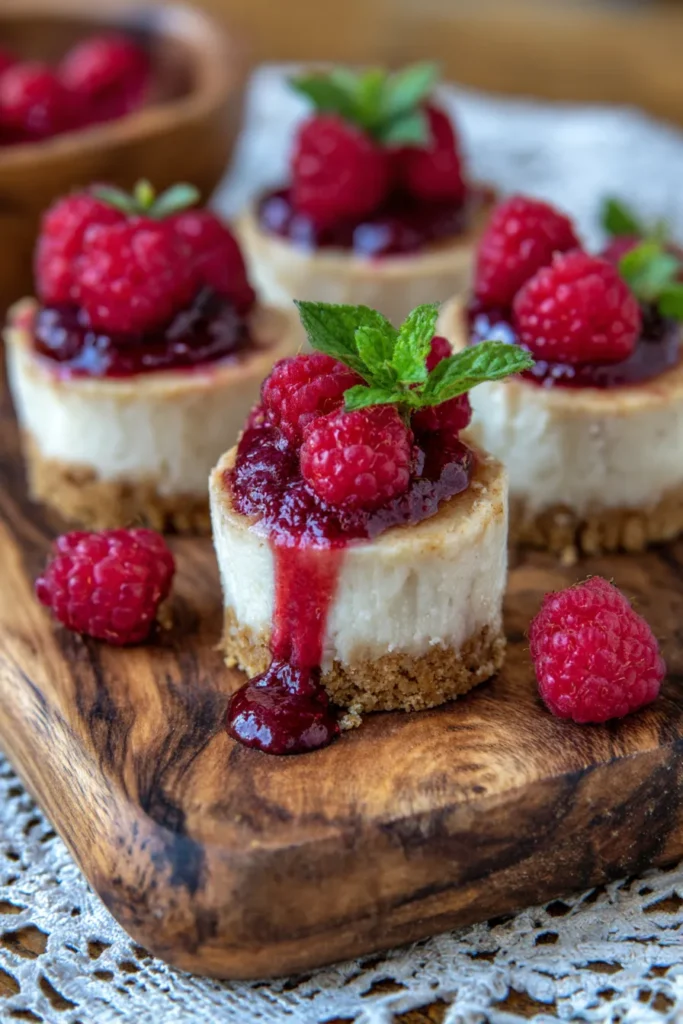
- Rich, Creamy, & Tangy: We’re talking classic cheesecake perfection! A smooth, velvety cream cheese filling with just the right balance of sweet and tangy, nestled atop a buttery, golden graham cracker crust. It’s pure bliss in every bite.
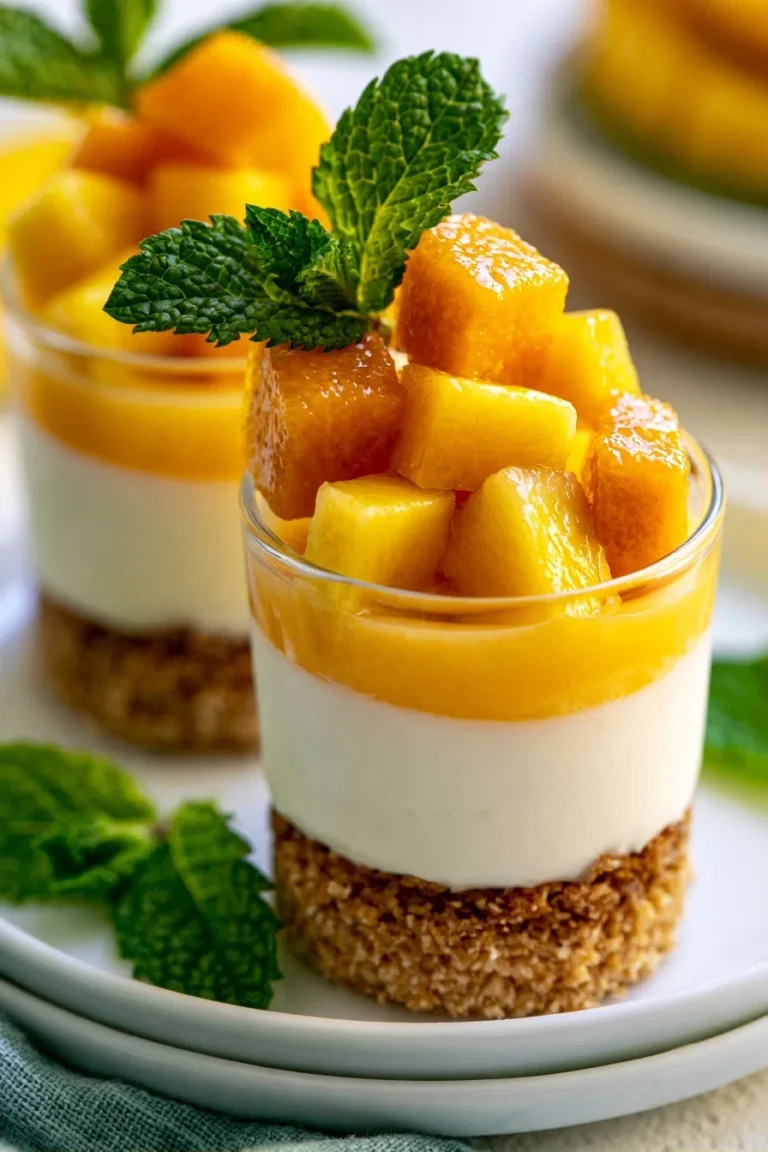
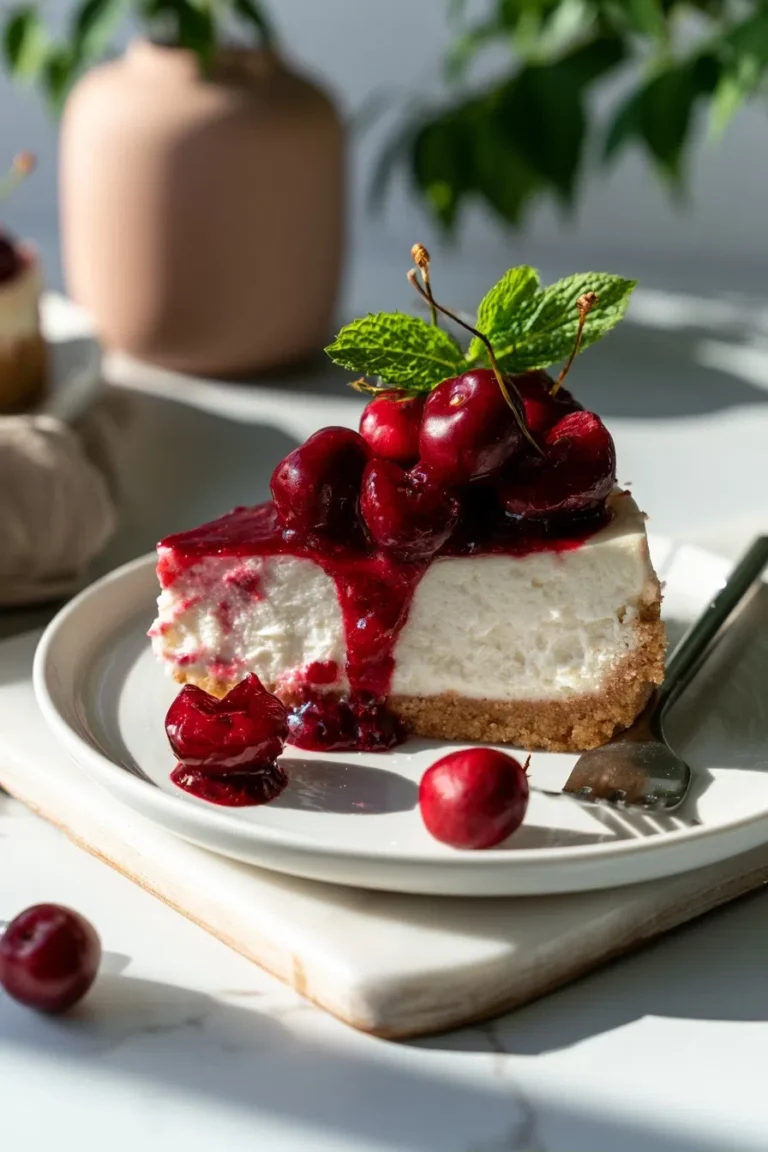
- Customizable & Versatile: While truly classic on their own, these mini cheesecakes are a fantastic canvas for your creativity. Top them with fresh berries, chocolate ganache, caramel sauce, fruit compotes, or even a dollop of whipped cream. The possibilities are endless!
- Crowd-Pleaser Guaranteed: Who doesn’t love cheesecake? These mini versions are universally adored, appealing to all ages and palates. They’re a surefire hit at any gathering and often disappear faster than you can say “more, please!”
- Make-Ahead Magic: You can prepare these beauties a day or two in advance, making them an excellent option for stress-free entertaining. Just cover and chill, then add your toppings right before serving for ultimate freshness.
- No Water Bath Woes: Unlike traditional large cheesecakes, these mini versions rarely crack, and you don’t need to fuss with a tricky water bath. This simplifies the baking process significantly, especially for cheesecake novices.
- Perfect Texture Every Time: With the right baking temperature and cooling method, you’ll achieve that sought-after creamy-smooth texture without any dryness or graininess. Each mini cheesecake melts in your mouth!
What You Need
You only need a few simple pantry staples for this recipe! Cream cheese, sugar, eggs, and graham crackers are the stars of the show, along with a touch of vanilla. Check the full printable recipe card below for detailed measurements and any optional toppings you might want to consider.
💡 Expert Tips for Cheesecake Success
- Room Temperature Ingredients are KEY: This is arguably the most crucial tip! Ensure your cream cheese, eggs, and sour cream (if using) are at true room temperature. This allows them to blend smoothly without lumps, creating that irresistibly creamy texture. Cold ingredients can lead to overmixing, which introduces too much air and can cause cracks.
- Don’t Overmix the Batter: Once you add the eggs, mix just until combined. Overmixing incorporates too much air, which expands during baking and then collapses, leading to cracks and a less dense texture. Mix on low speed, and scrape down the sides of the bowl frequently.
- Pre-Bake the Crust (Optional but Recommended): For an extra crisp and stable crust, par-bake your graham cracker crusts for about 5-7 minutes before adding the filling. This prevents a soggy bottom and enhances the toasty flavor. Make sure to let them cool slightly before adding the filling.
- Tap to Release Air Bubbles: After spooning the filling into the liners, gently tap the muffin tin on the counter a few times. This helps to release any trapped air bubbles, ensuring a smooth, uniform top.
- Don’t Overbake! Cheesecakes are notorious for cracking if overbaked. The edges should be set, but the center should still have a slight jiggle. It will continue to set as it cools. When in doubt, underbake slightly rather than overbake.
- Cooling is Crucial: Once baked, turn off the oven and prop the door open slightly, leaving the cheesecakes inside for about 15-20 minutes. This slow, gradual cooling helps prevent cracks caused by sudden temperature changes. Then, transfer to a wire rack to cool completely at room temperature before chilling.
- Chill Thoroughly: For the best texture and flavor, these mini cheesecakes need at least 4 hours of chilling in the refrigerator, but overnight is even better. Chilling allows the flavors to meld and the texture to firm up beautifully.
- Use Good Quality Ingredients: Since there are so few ingredients, the quality truly shines through. Opt for full-fat cream cheese for the richest, creamiest results. High-quality vanilla extract also makes a noticeable difference.
- Line Your Muffin Tin Properly: Use paper liners or foil liners in your muffin tin. A light spray with non-stick cooking spray before inserting the liners can also help prevent sticking, though usually not necessary with good liners. This makes removal super easy!
- Be Patient with Removal: Once thoroughly chilled, the mini cheesecakes should lift out of the muffin tin easily. Gently peel away the paper liners when you’re ready to serve.
Variations & Substitutions
These Mini Classic Cheesecakes are wonderful as is, but they also offer a fantastic canvas for creative twists!
- Citrus Burst: Add 1-2 teaspoons of lemon, lime, or orange zest to the filling for a bright, refreshing flavor.
- Chocolate Lover’s Dream: Swirl 2 tablespoons of melted chocolate into a portion of the batter, or sprinkle mini chocolate chips into the crust or over the top. A drizzle of chocolate ganache after chilling is also divine!
- Nutty Crust: Substitute a portion of the graham crackers with finely crushed pecans, walnuts, or almonds for a different texture and flavor in the crust.
- Spice It Up: Add a pinch of cinnamon or nutmeg to the graham cracker crust for a warmer, cozier feel.
- Gluten-Free Option: Simply use gluten-free graham crackers for the crust. The filling is naturally gluten-free.
- Keto-Friendly Option: Replace graham cracker crust with an almond flour or crushed nut crust (sugar-free sweetener would be needed for the crust). For the filling, use a sugar substitute like erythritol or allulose to taste. Ensure all other ingredients are keto-friendly.
- Topping Galore: The sky’s the limit! Fresh berries (strawberries, blueberries, raspberries), cherry pie filling, salted caramel sauce, lemon curd, whipped cream, or a dusting of cocoa powder all make fantastic toppings.
Storage & Freezing
Once completely chilled, store your Mini Classic Cheesecakes in an airtight container in the refrigerator for up to 4-5 days. If you’ve added fresh fruit toppings, it’s best to add those just before serving for optimal freshness and appearance.
For longer storage, these cheesecakes freeze beautifully! Once chilled and firm, place them (without toppings) on a baking sheet and freeze until solid. Then, transfer them to a freezer-safe bag or airtight container, separated by parchment paper, for up to 1 month. Thaw in the refrigerator overnight or at room temperature for a couple of hours before serving.
FAQ
Q: Why did my cheesecakes crack?
A: Cracks are usually caused by overbaking or sudden temperature changes during cooling. Make sure not to overmix the batter, don’t overbake (the center should still jiggle slightly), and allow them to cool slowly in the oven with the door ajar before fully cooling on a wire rack.
Q: Can I use low-fat cream cheese?
A: While you can, it’s highly recommended to use full-fat cream cheese for the best results. Low-fat versions can yield a less creamy texture and may not set as firmly. For true classic cheesecake richness, stick with the full-fat option!
Q: Do I need cupcake liners?
A: Yes, definitely! Cupcake liners (paper or foil) are essential for easily removing the mini cheesecakes from the muffin tin and for serving. They also help prevent sticking and keep the cheesecakes neat.
Q: How can I tell when they’re done?
A: The edges of the cheesecakes should appear set and slightly puffed, but the very center (about an inch across) should still have a slight jiggle when you gently shake the muffin tin. They will continue to firm up as they cool.
There you have it – your new favorite way to enjoy cheesecake! These Mini Classic Cheesecakes are truly a joy to make and an even greater joy to eat. Whether you’re making them for a special occasion or just a cozy night in, they’re guaranteed to bring a smile to everyone’s face. Don’t forget to customize them with your favorite toppings and make them your own. Happy baking, and don’t forget to Pin this delectable recipe for later!
Best Mini Classic Cheesecakes: Easy & Decadent Bites!
Ingredients
- 1 ½ cups graham cracker crumbs
- u2153 cup granulated sugar (for crust)
- 6 tablespoons unsalted butter, melted
- 2 (8-ounce) packages full-fat cream cheese, softened
- ¾ cup granulated sugar (for filling)
- 2 large eggs, room temperature
- 1 teaspoon pure vanilla extract
- ¼ cup sour cream, room temperature
- Pinch of salt
Instructions
- Step 1 Preheat oven to 325°F (160°C). Line a 12-cup muffin tin with paper liners.
- Step 2 Combine graham cracker crumbs, u2153 cup sugar, and melted butter. Press about 1 ½ tablespoons into the bottom of each liner. Bake for 5 minutes. Let cool.
- Step 3 In a large bowl, beat softened cream cheese and ¾ cup sugar on low speed until smooth. Scrape down sides of bowl.
- Step 4 Beat in eggs, one at a time, mixing just until combined. Stir in vanilla extract, sour cream, and salt until smooth.
- Step 5 Divide filling evenly among crusts. Tap tin gently to release air bubbles.
- Step 6 Bake for 20-25 minutes, or until edges are set but centers still slightly jiggle. Turn off oven, prop door open, and let cool in oven for 15 minutes.
- Step 7 Transfer to a wire rack to cool completely at room temperature. Chill in refrigerator for at least 4 hours, or overnight, before serving. Top with desired garnishes.